Oops, I’ve been absolutely terrible about keeping this blog updated. I have a lot of reasons, like life happening, and things with the farm being at an all-stop for literally a year, but the truth is, that it doesn’t matter!
Things have finally started moving and that’s great. We’ve finally started development on our pastures, and have started planning for our rabbit housing as well! Things are moving ahead slowly, with just Sylas and I doing the work on the farm and with Sylas working full-time, but moving is better than not!
Our current goal is to have alpacas on the land in Spring, with the farm structures completed either this fall or first thing in the spring. I’d love to share more, but truth be told that’s all there is!
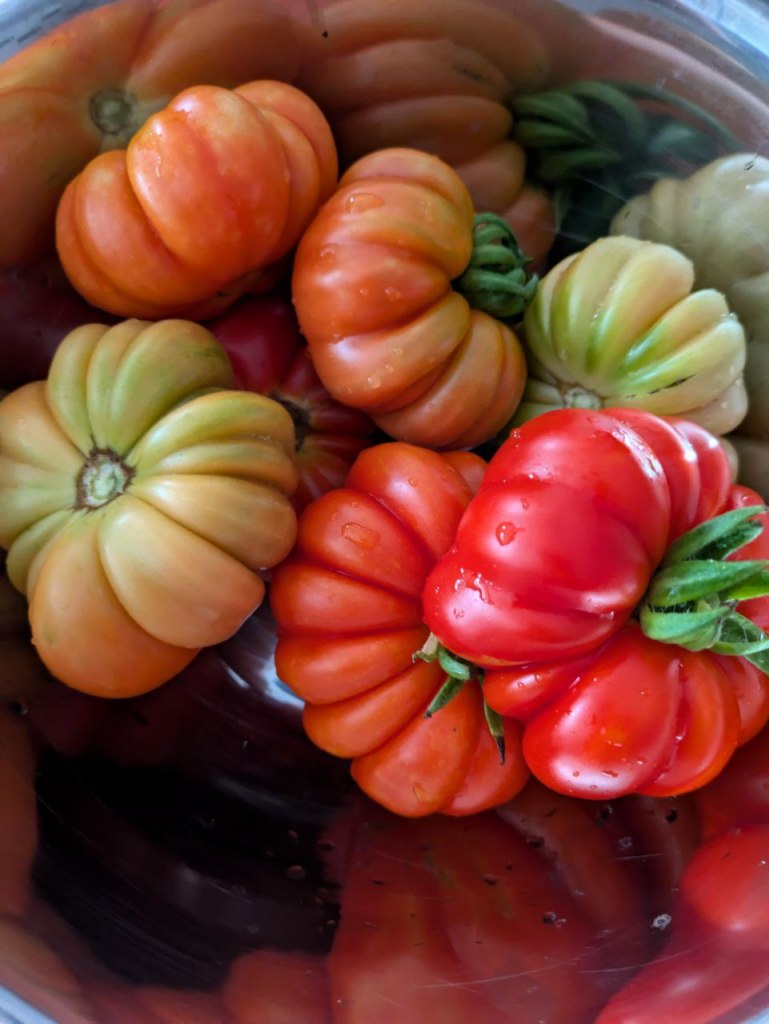
Head on over to instagram for our latest updates, we’re posting there as things move along. And enjoy this photo of our heirloom tomatoes as well.
When I last posted here I said I would be back in January 2023 with an update. Oops, it’s April 2023! As I’m sure you can imagine, a lot has been going on around here but winter is generally quite slow. We haven’t done any further renovations, and farm projects have been at a halt for a while. So here’s some updates and some plans. We won’t resume posting weekly until we have some solid updates to share.
Alpaca Update
It’s 2023 and we still don’t have animals. I know, I’m as disappointed as you are. It’s been a lot of red tape trying to get everything approved with our additional lands purchase and now we’re in a waiting game with the county. We haven’t gone ahead and started clearing land, knowing we’ve purchased farm land and won’t have to fund that expense, so we’re in a bit of a holding pattern here. We’re antsy and I (Holly) have even gone back to work full-time because let’s be honest I’m bored when I’m not busy. Hopefully we will have an update to share on the alpaca front soon, but in the meantime we ARE moving ahead with our fibre production plans. That’s where we bring you… rabbits.
Rabbits?! Rabbits!
Angora rabbits more specifically. These little guys can produce up to 3lbs of fibre in a year and are fairly low maintenance to take care of. They’re also super resilient and can sustain themselves in Canadian winters with shelter and food. We’re in discussions right now on acquiring them and our plans are under way. We hope to have them by September. More to come on that!
Internet Update
When we last posted, we still had residential wireless internet with speeds of 20Mbps/5Mpbs. Since that post a lot has changed! Starlink low-altitude satellite internet went live for a roaming package intended for travellers and RV users. For a little bit more per month, we subscribed, purchased hardware and set everything up.
We’re averaging 150Mbps down and 20Mbps up with latency averaging 20ms-40ms. In non-tech speak, that’ s 6X the speed. We did keep the other internet as a backup, because we work from home, but we’re very happy with this quality of life improvement! Even in the dead of winter this little guy packs a punch with its heating elements and ice melt capabilities. If you want to hear more about Starlink, let me know and I’ll post an entire blog post about it.
Sorry for the lack of posts over the last few months! Things have been crazy on our side. It’s hard to believe that it’s been a year since we closed on the property! We wanted to take a moment to reflect on all of the hard work we’ve put into completing projects this year and share some progress photos and future plans.
That said, this will likely be the last blog post on here until January when we share our plans for 2023. Thank you all for being on this journey with us, for reading our blogs and most importantly for your unwavering support as we pursue our dream!
Without further ado…
Accomplishments
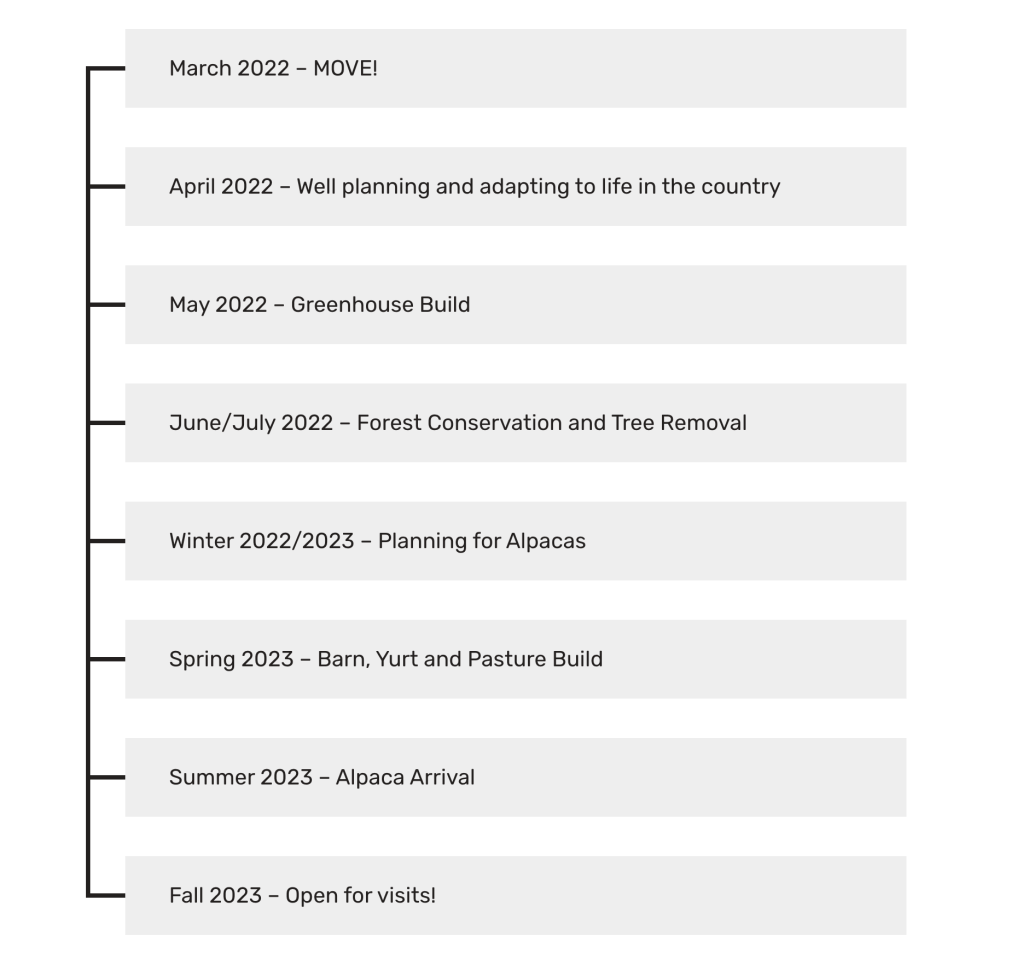
Earlier this year, we laid out this for our 2022/2023 plan
It’s crazy to look back at this! In March 2022 we didn’t even think we would have a real internet service provider on the farm. Like all things in life, things change! Here’s a list of things we were able to accomplish this year.
Added UV Filter and Reverse Osmosis Filter to our well for sustainable drinking water
Got internet!
Got an air conditioner and smart thermostat
Completely gutted and renovated the garage, turning it into my (Holly) office
Completely gutted and renovated the bathroom and repaired water damage
Trimmed and removed trees to conserve our forest floor
Installed a fence for the dogs
Built a shed
Grew vegetables and ate them!
Created a composting system to feed our garden
Purchased 4 additional acres for the barn and animals
Decided on having Alpacas, Goats and potentially rabbits!
Visited an alpaca farm and got hands on with the animals
Learned to reduce waste and are only visiting the dump once a month
Wow! That’s a lot. 2022 has been incredible.
Renovation Update
I know you’re here for the renovation updates. I would be too! It’s been a very exciting time here on the farm for our home and the property itself. Enjoy the photos!
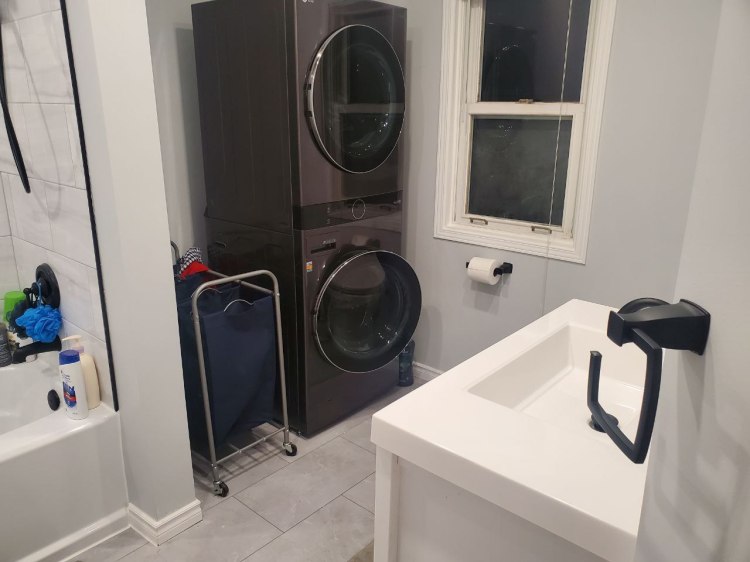
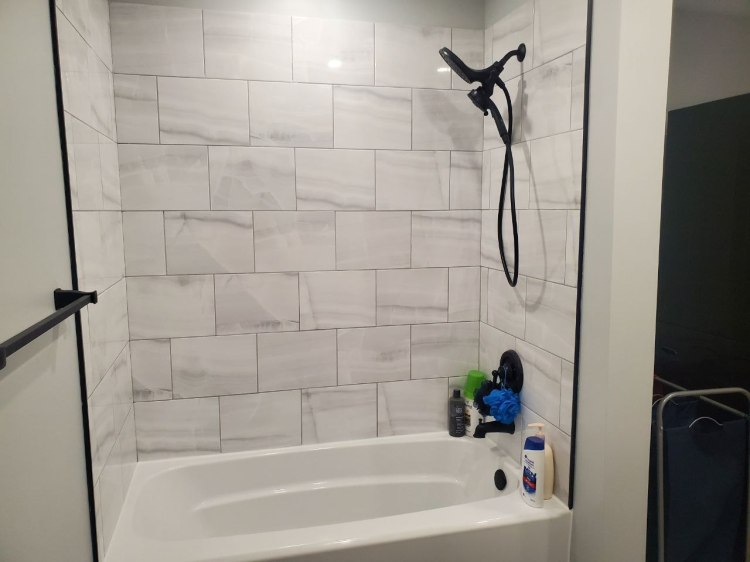
Bathroom
We completely gutted the bathroom, purchased a new washer and dryer and moved the vanity from the wall with the tub to the wall with the toilet.
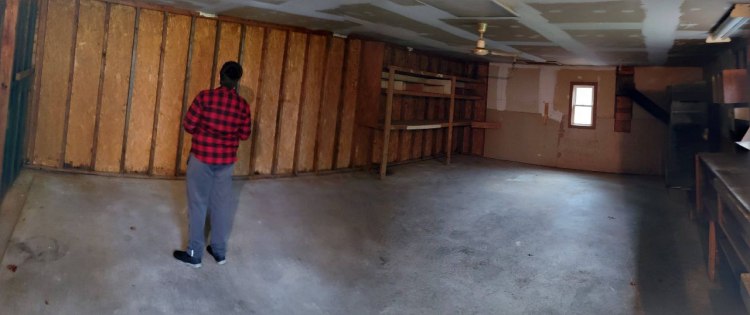
Garage
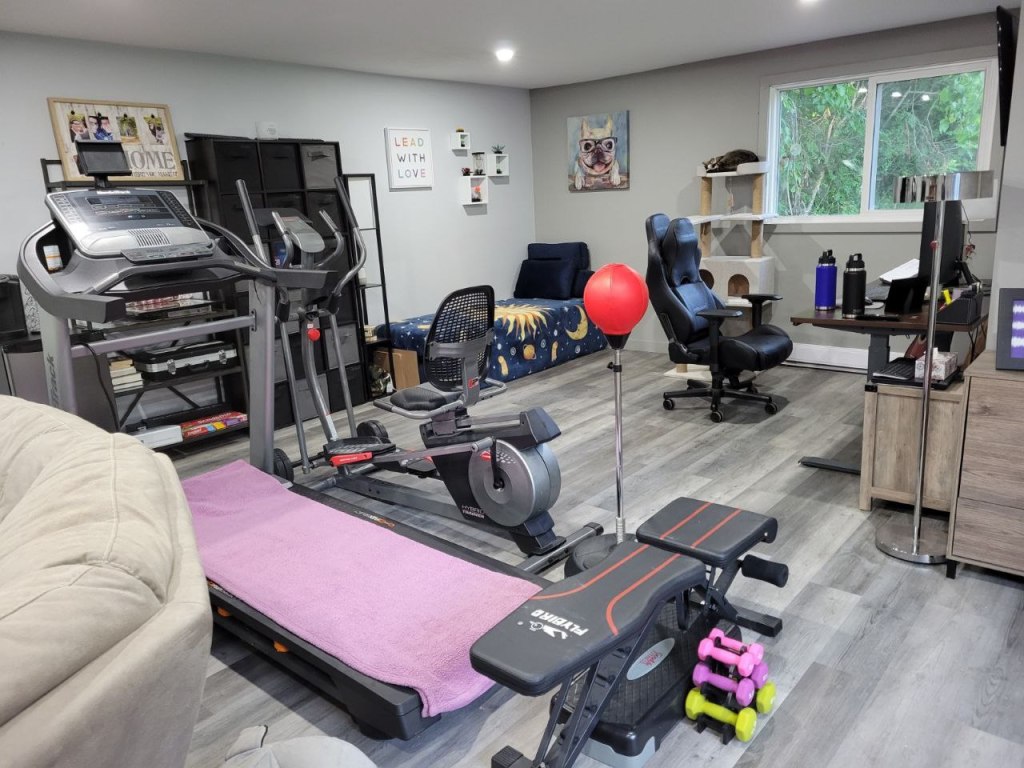
We completely gutted the garage, leveled the floor and added new framing and flooring. Then we insulated and added new windows and doors as well as heaters to keep it warm in the winter. This is now Holly’s office, the cats home, a gym and our recroom. It can also serve as a spare bedroom for when people come to stay. At 800 sq ft it’s almost like an entire second house now!
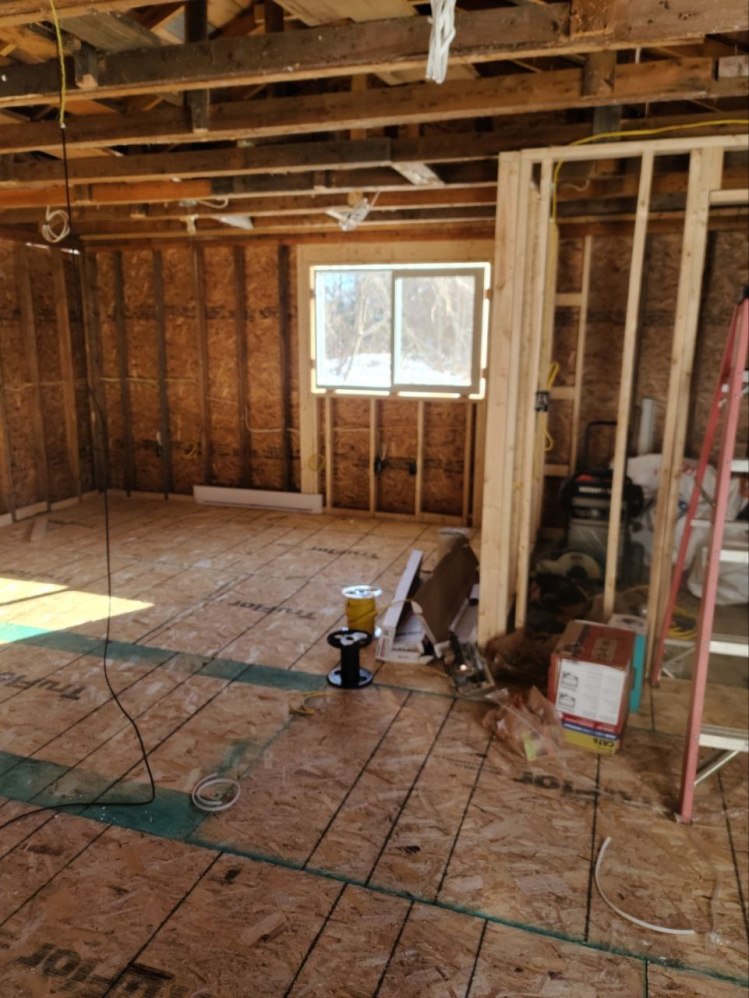
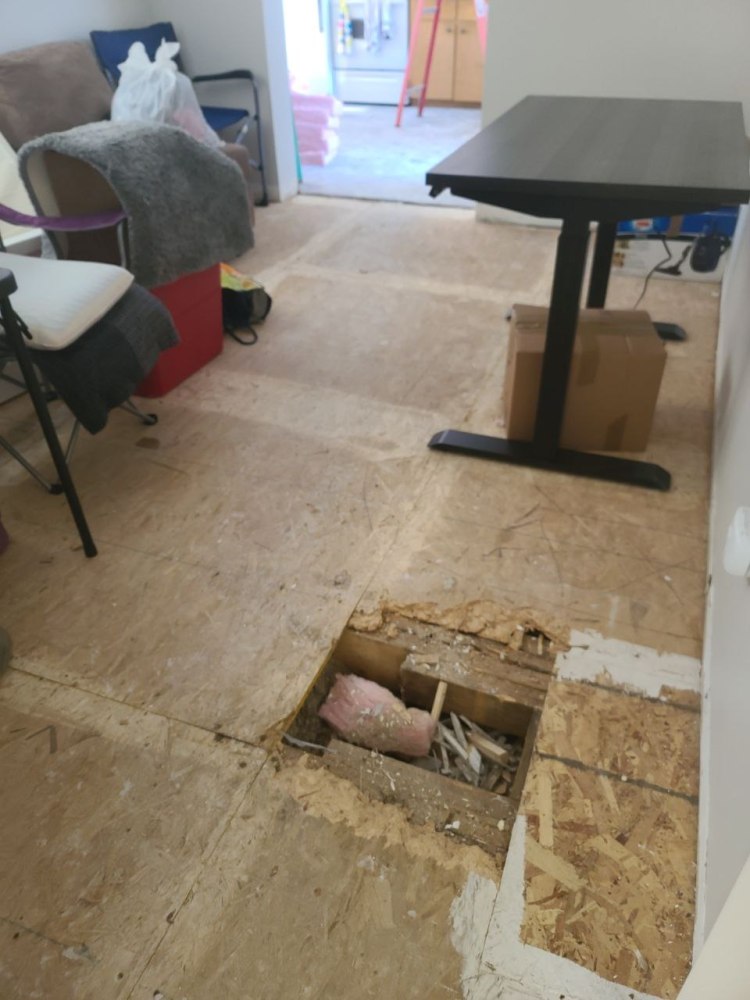
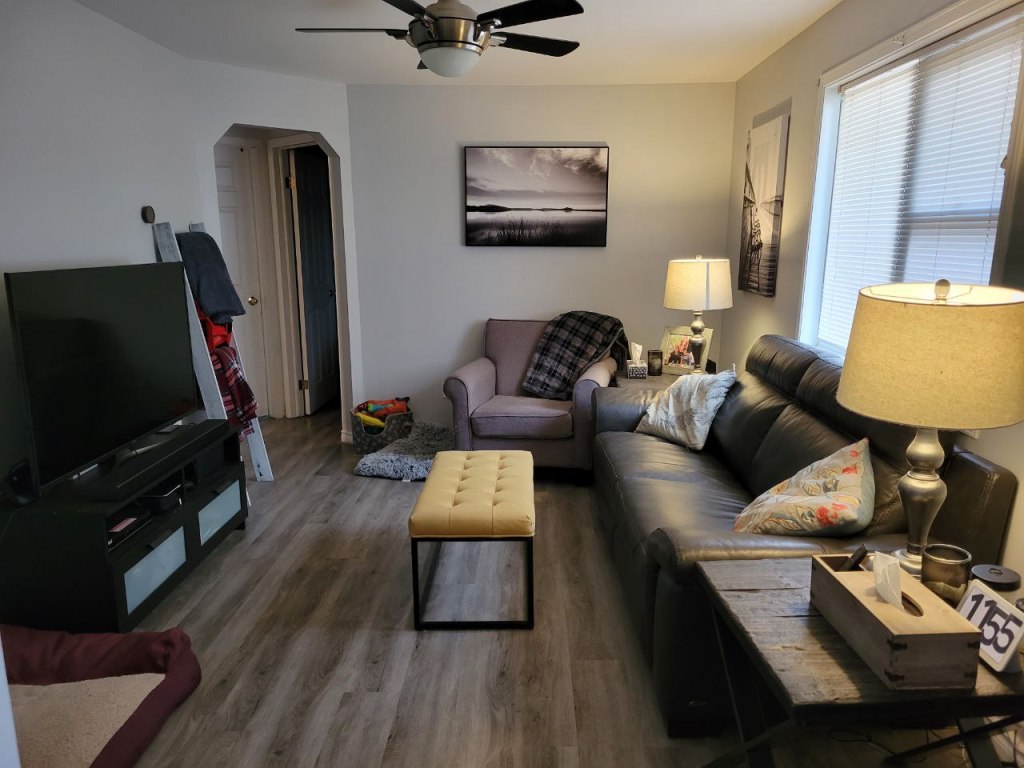
Floors
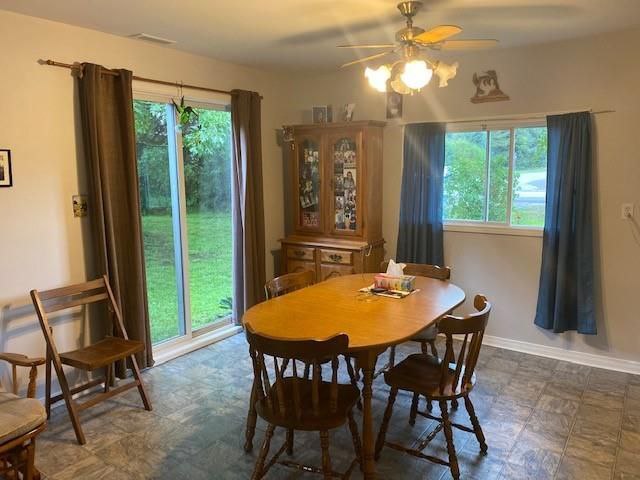
We replaced all of the plywood for the foundation of the floor and then put down new flooring. The floors were a mess. I didn’t know how to take a picture of the floors so I just included one of the living room. The same floor is throughout except in the bathroom where we put tile.
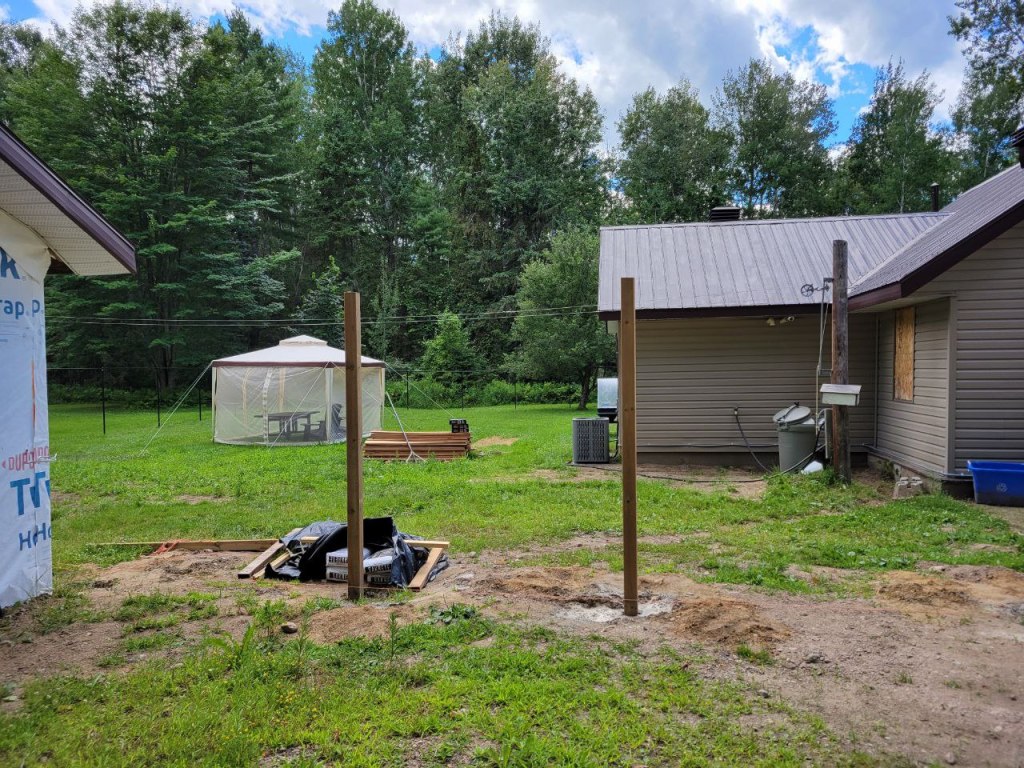
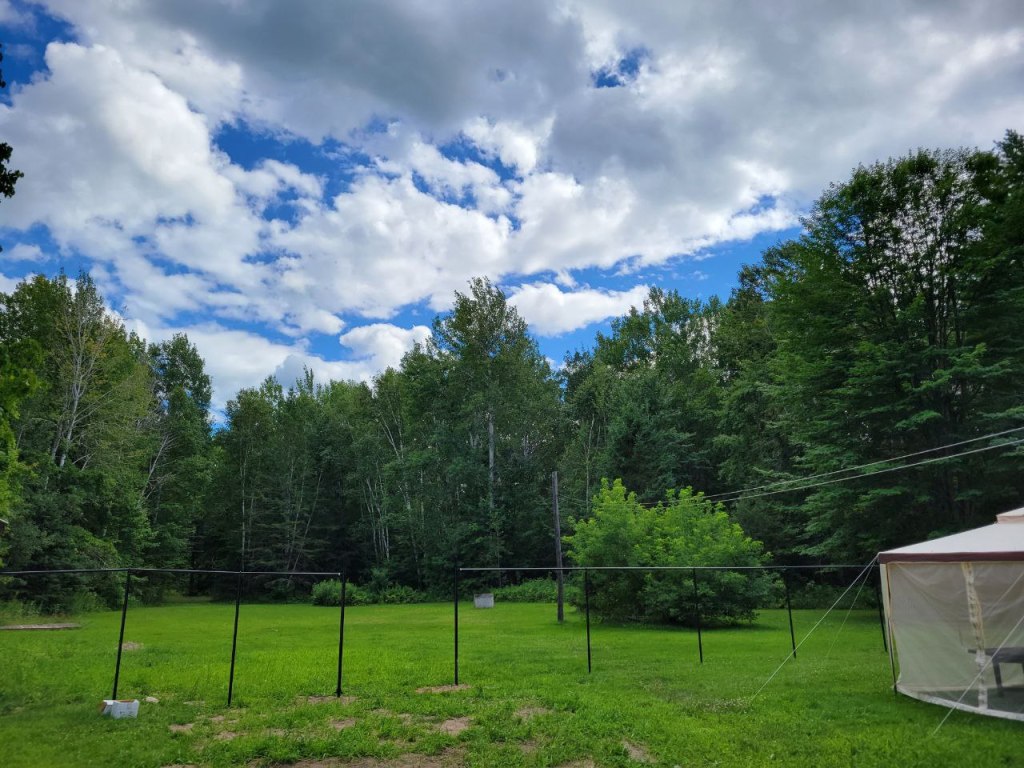
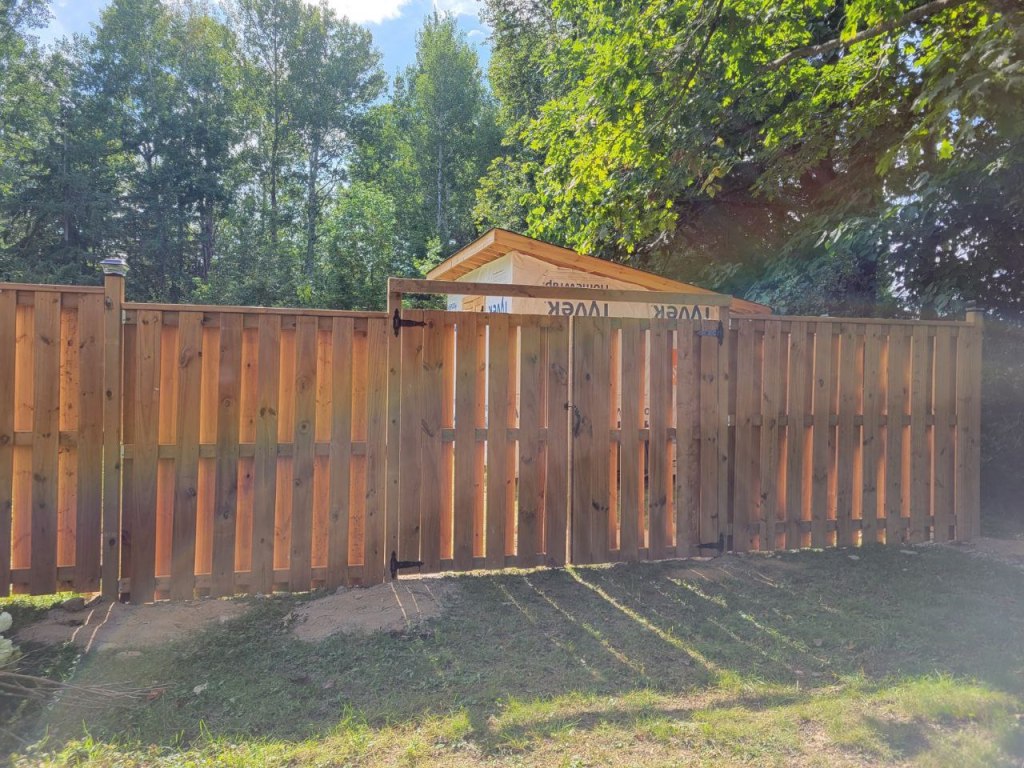
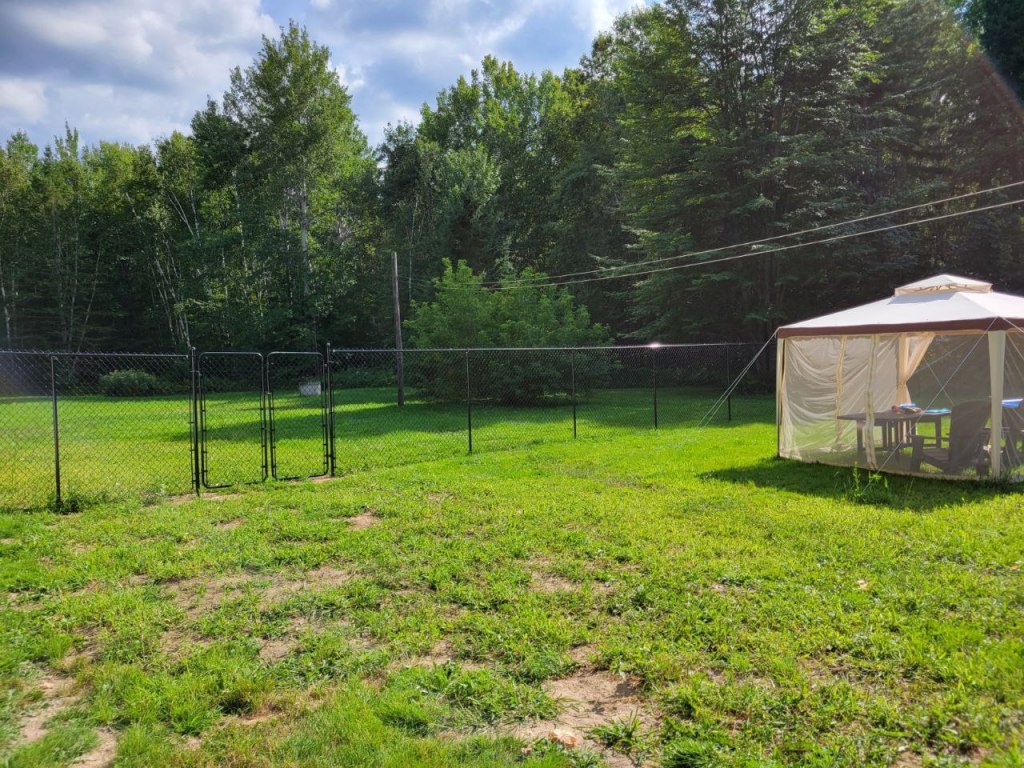
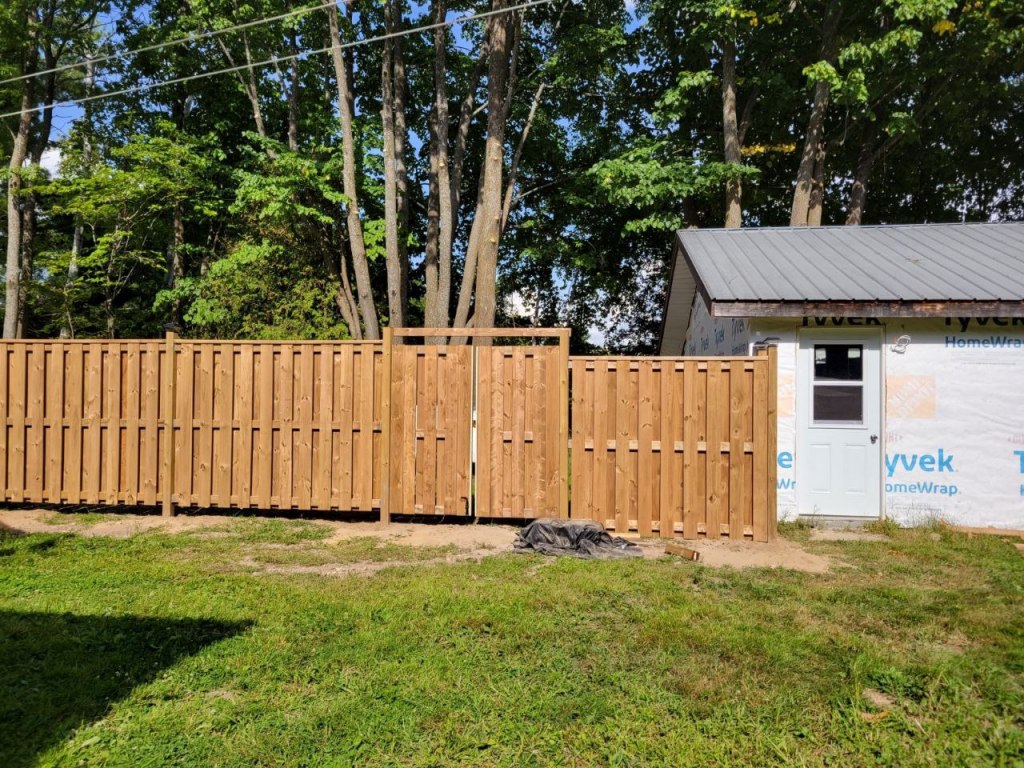
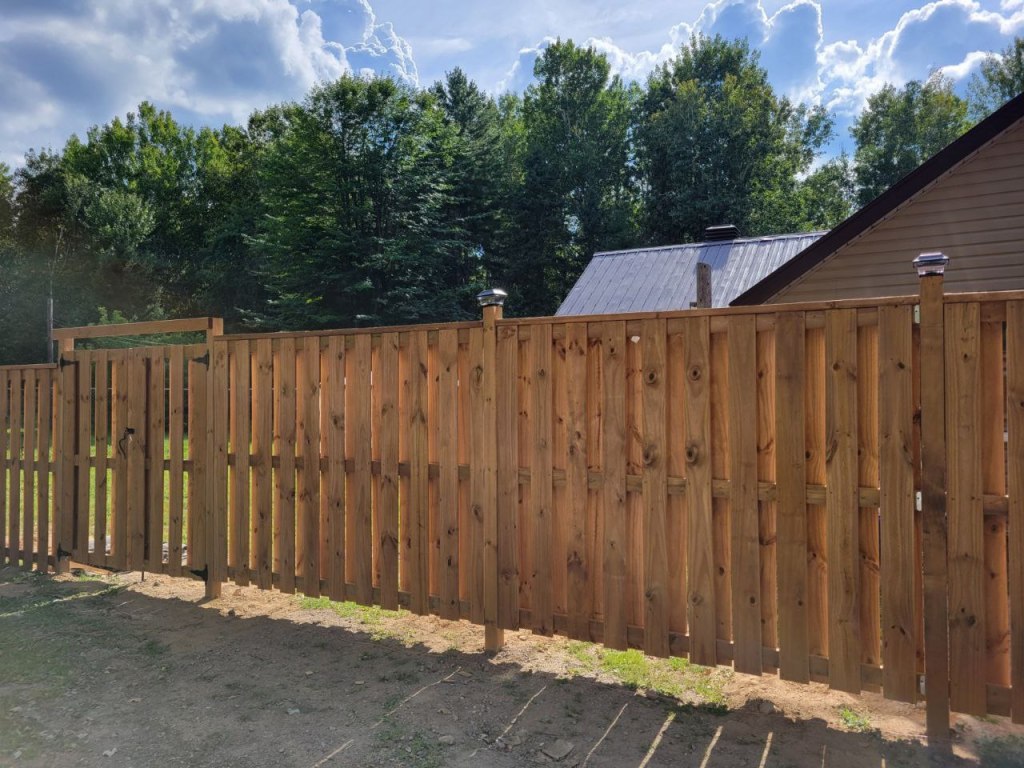
Fence
We fenced off an acre of the property for the dogs! Half of the fence is chainlink and half is made out of wood to provide some privacy from the road (not that it’s a busy road).
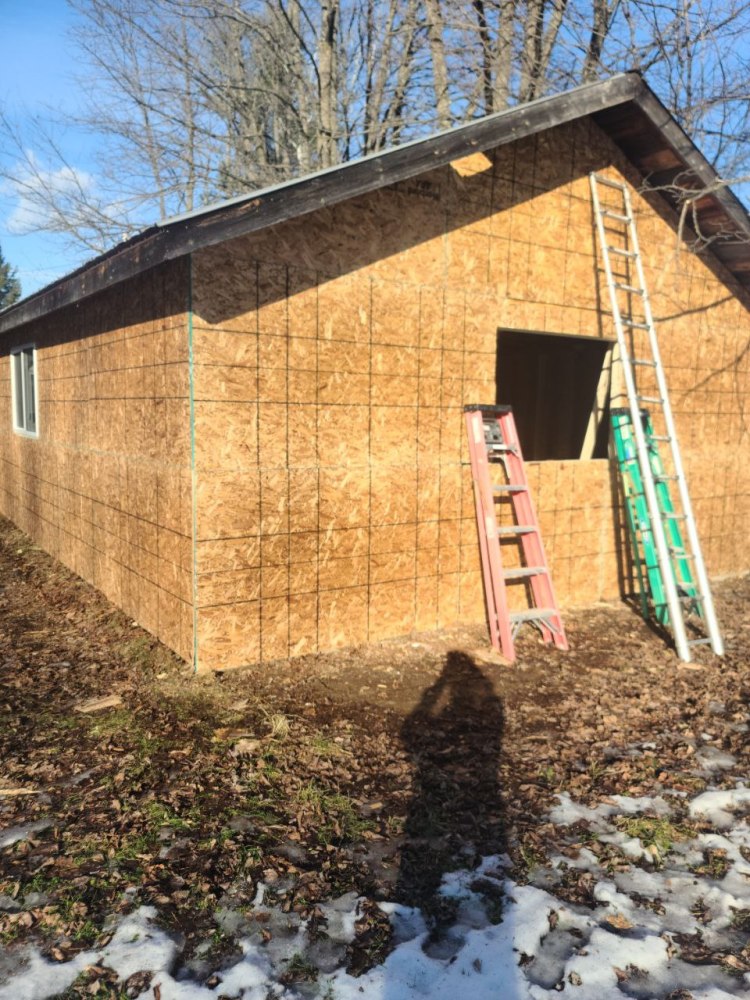
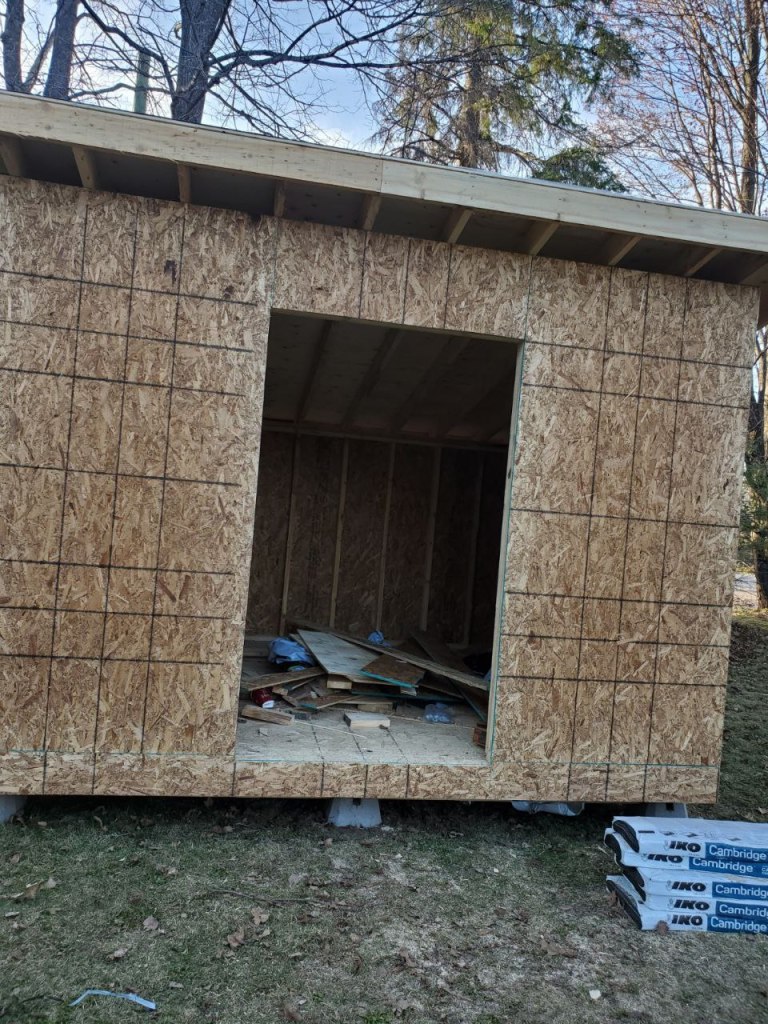
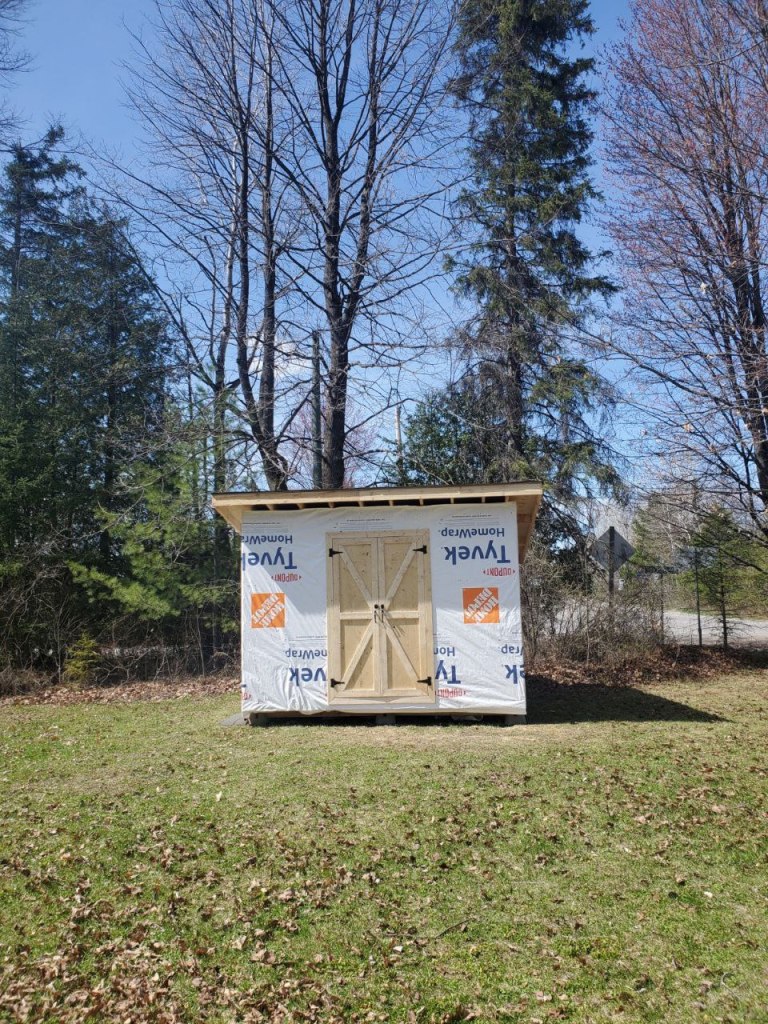
Shed
Completely built a new shed to replace what we lost in converting the garage. The siding has also been added now to match the house.
Living Room
We didn’t do much to the living room other than a new layout, floors and paint but it definitely went a long way!
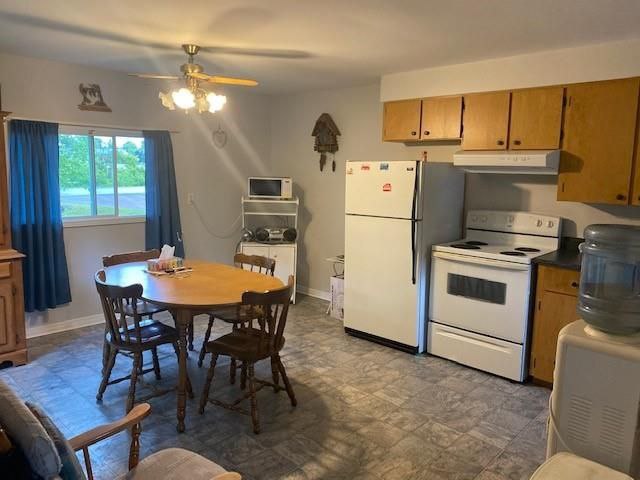
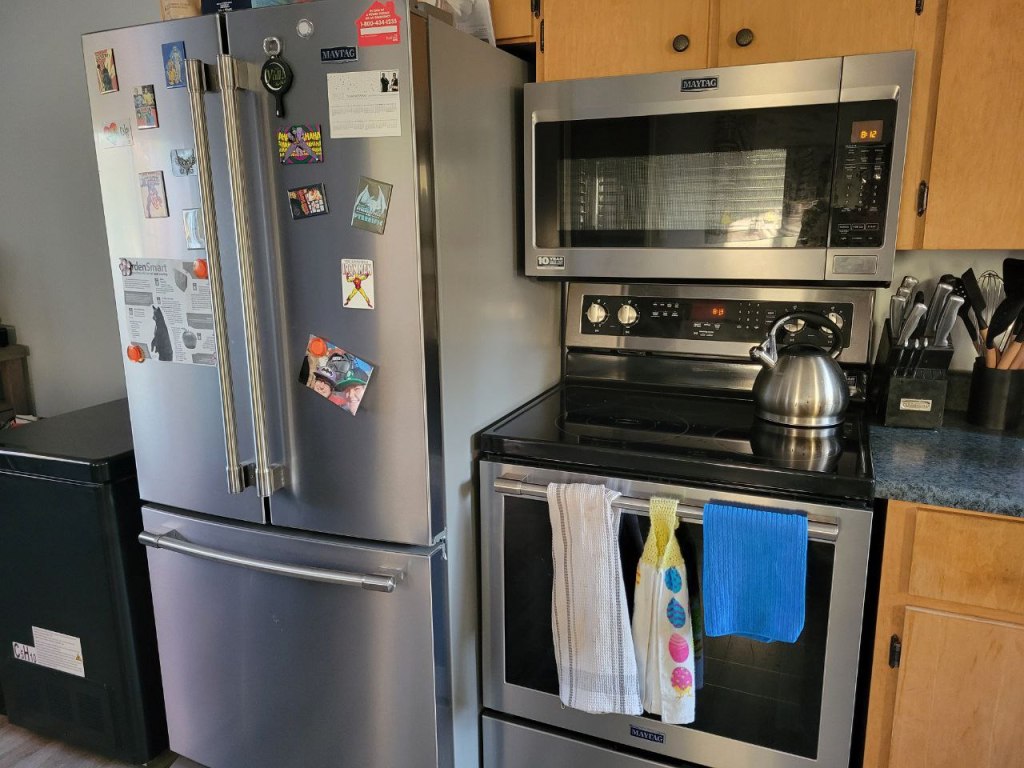
Kitchen
The kitchen is still a work in progress. We got new appliances, took out the horrible closet and redid the lights but there’s still the cabinets and plumbing to be finished in 2023.
2023 Plans
We will have more to come on this but so far our plans for 2023 involve getting a prefab shelter up and having the alpacas arrive sometime in spring or early summer. This means we have to get suppliers and supplies all in order before spring! Wish us luck. It’s crunch time. We’re still aiming to have the farm open for visitors in 2023 and can’t wait to share more of this adventure with you.
Happy Holidays from all of us here at Rainbow River Alpacas and see you in 2023!!!! We will continue sharing on our instagram so be sure to follow us there if you don’t for more frequent updates.
Summer has finally ended, but we wanted to take this week to share our last farm fresh recipes of 2022.
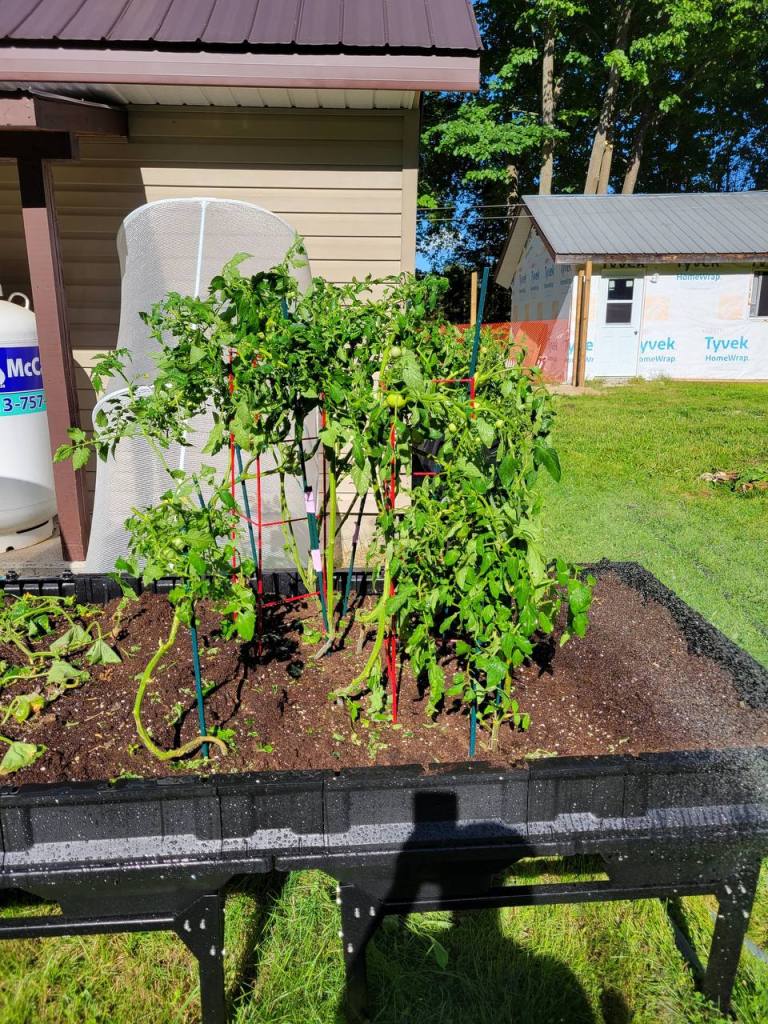
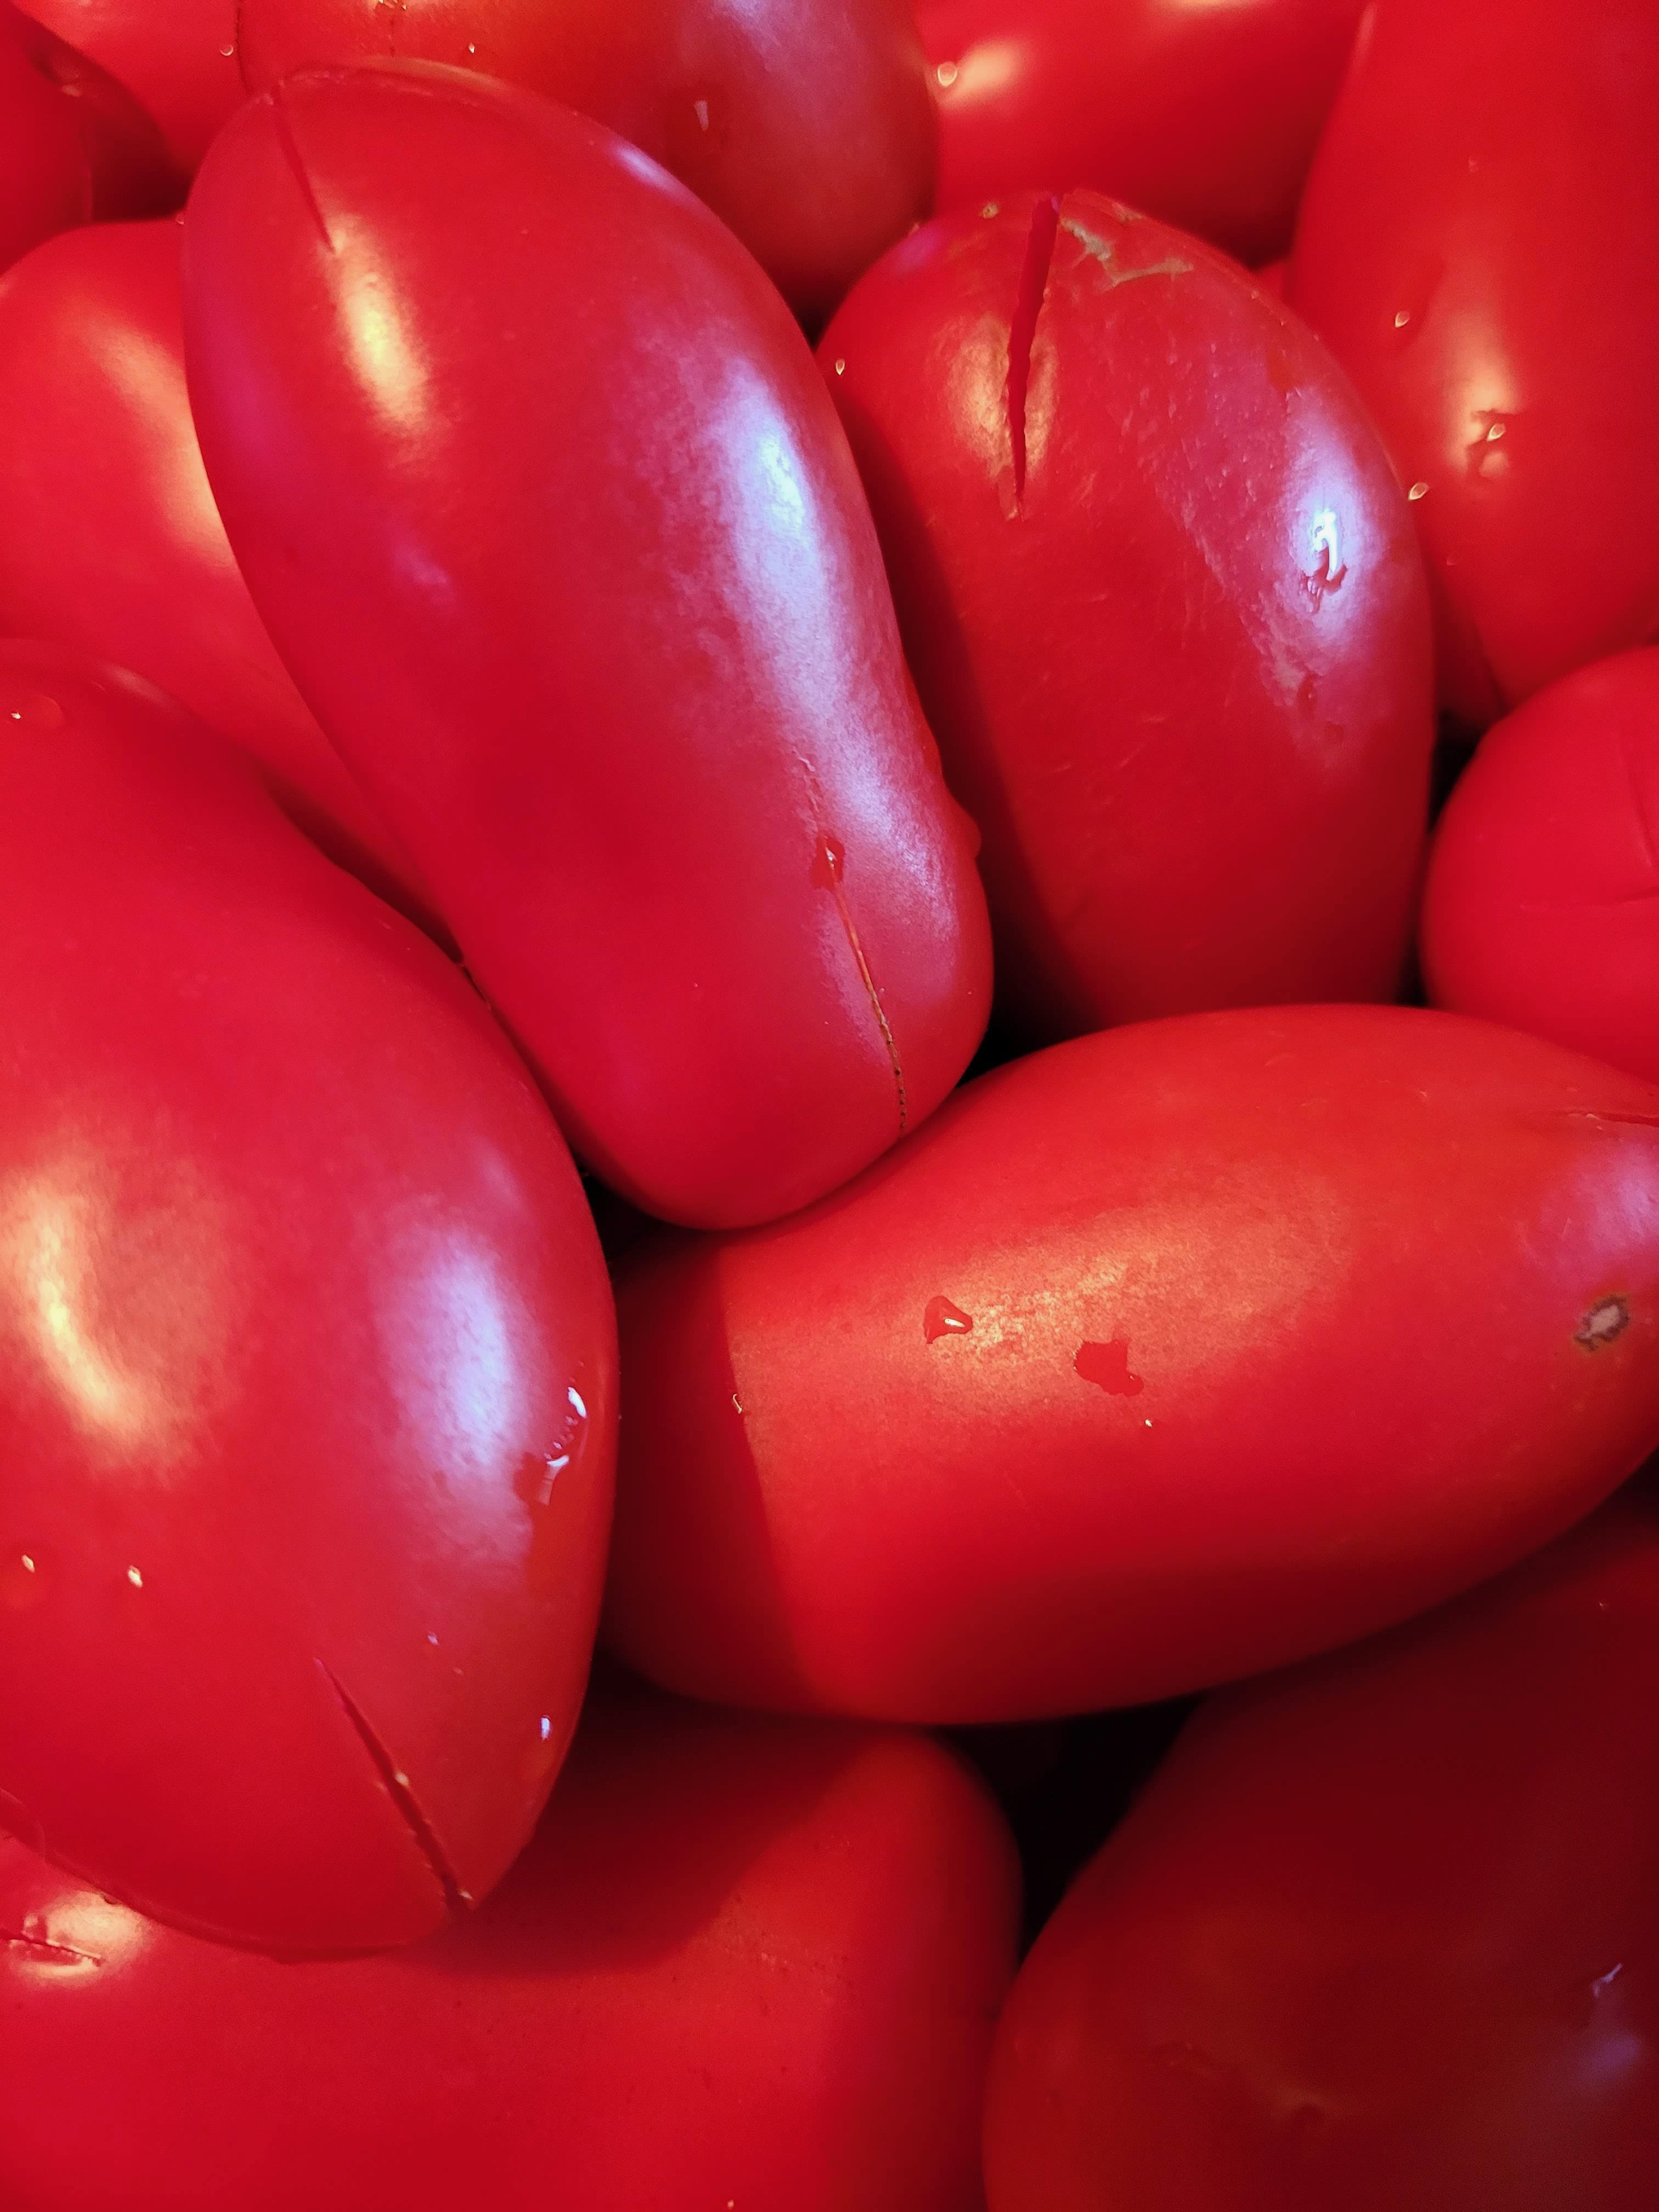
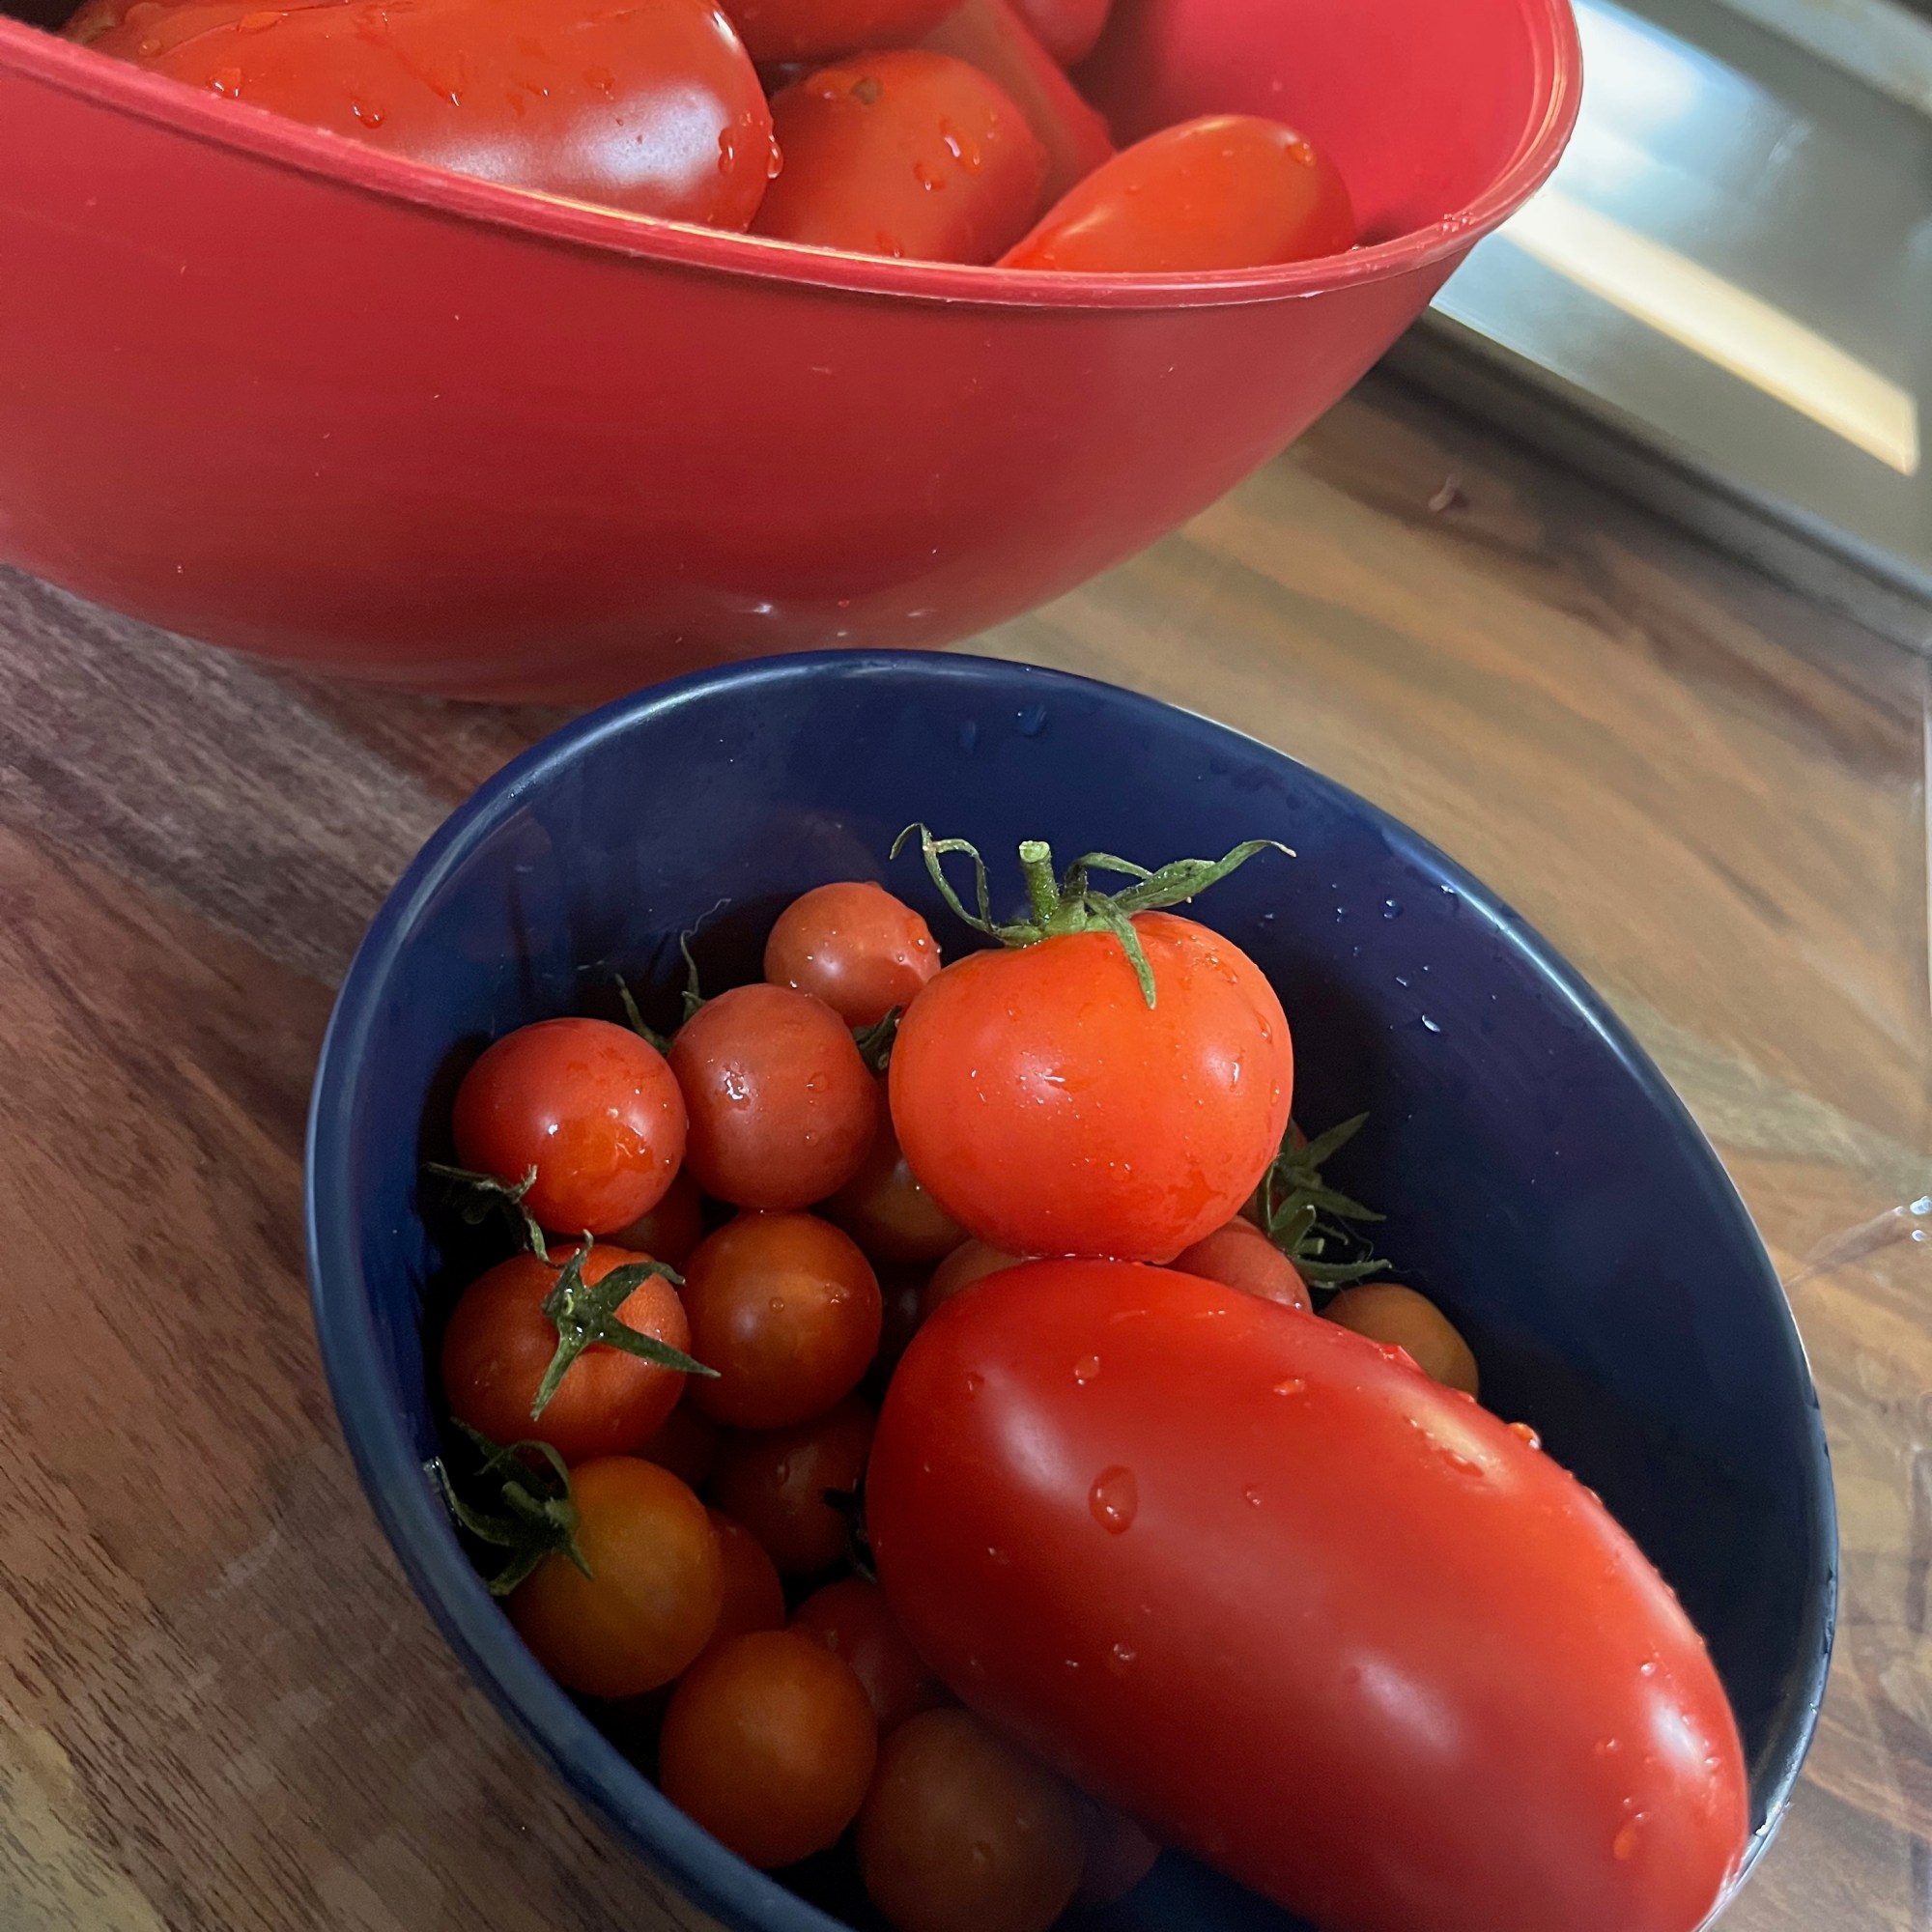
If you’re anything like me, tomatoes can be super hit and miss. What I mean is, some tomatoes are delicious and others … Not so much, especially fresh. We grew A LOT of tomatoes. Cherry tomatoes, full roma tomatoes… Our tomatoes took over the garden. We were really hoping to make tomato sauce and soup to freeze so this actually worked out really well for us, or so we thought. Until we realized that we overwatered them because of the rain and many split. Unfortunate, but luckily that’s what stores are for. We went and picked up some supplemental roma tomatoes and then we made our sauce and soup! I’ve included the recipes below.
This was definitely one of the highlights of our summer! I’m even feeling a bit nostalgic about pruning the tomato plants now that it’s fall. I’ve included a picture below of the tomatoes including a sad one that wasn’t supported properly as it grew. We recovered it though! (PS LOOK AT THE SNEAK PEAK OF OUR FENCE BEHIND)
Tomato Sauce
Tomato sauce is a staple for us. We use it weekly at least, so having some prepared and in the freezer for pasta and other recipes is a game changer.
Ingredients
2 kg Roma Tomatoes
2 White Onions
2 tbsp Minced Garlic
1 tsp Sugar
2 tsp Salt
3 tbsp fresh basil
1/4 cup Olive Oil
1/4 cup unsalted butter
Preparation
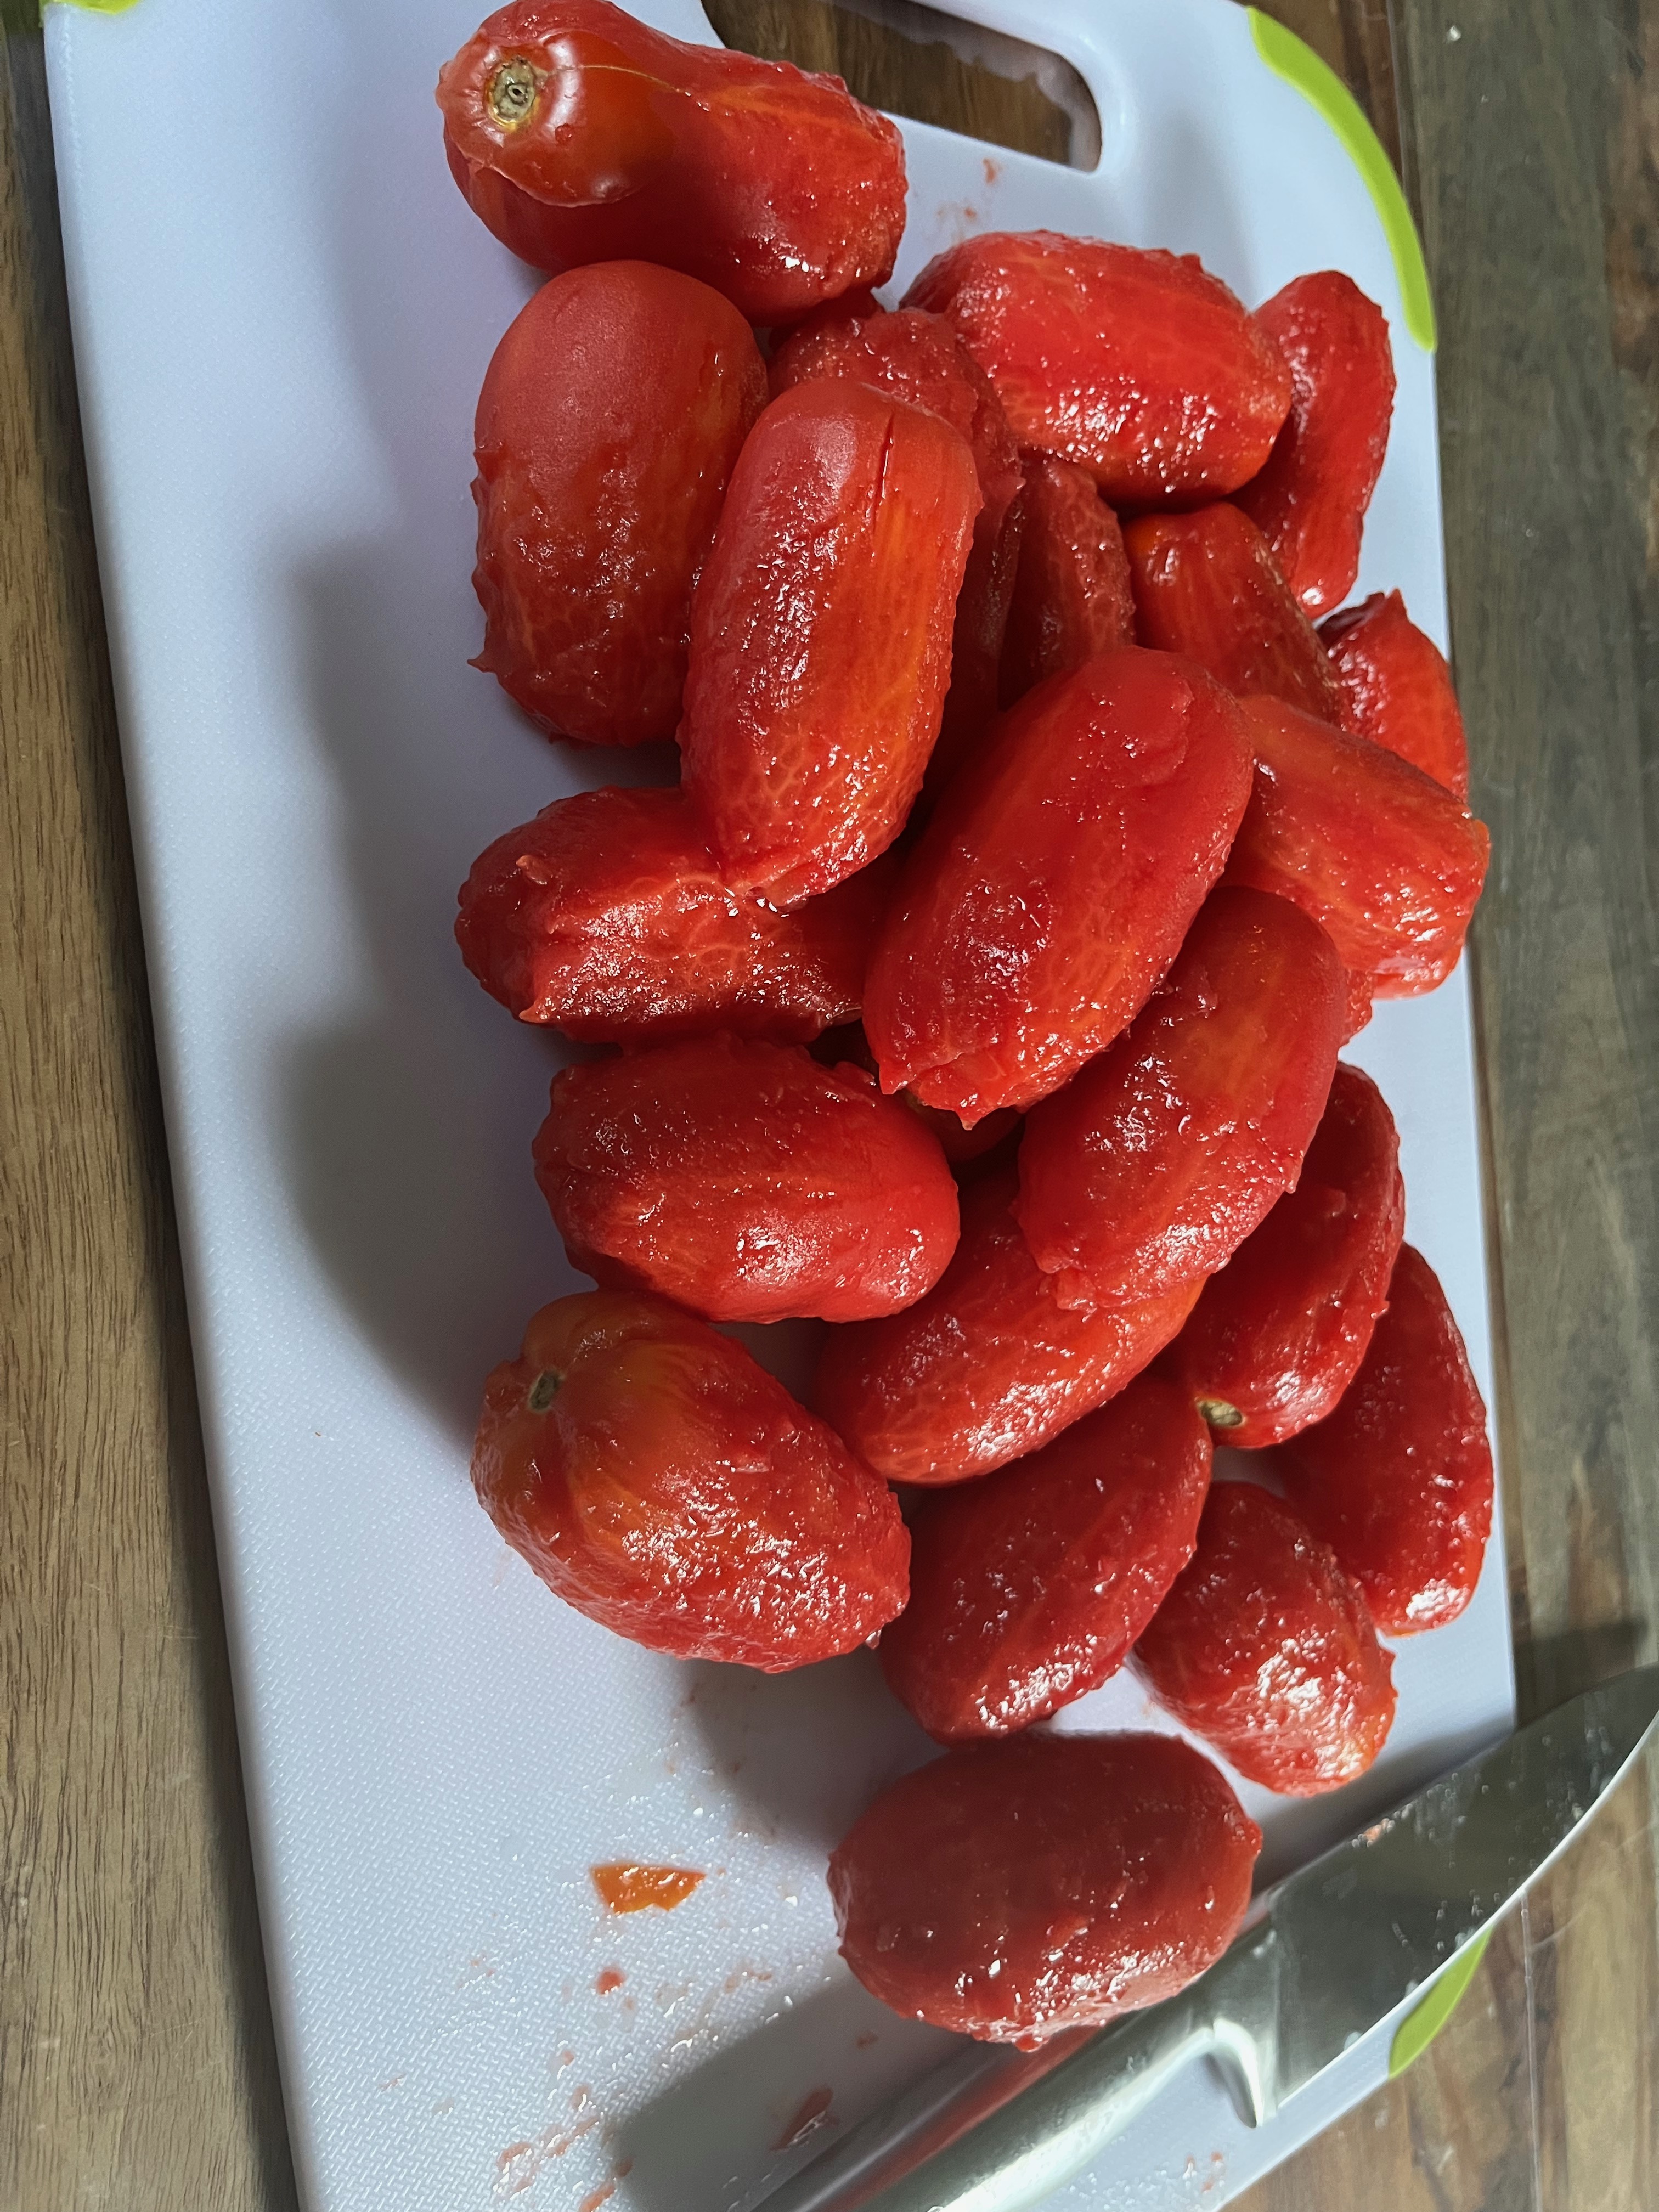
Prepare the tomatoes for boiling by scoring the bottoms of them in an X pattern
Boil the tomatoes for about 2 minutes
Remove and place in ice bath
Peel tomato skins off and chop into chunks
Add all tomatoes and juices into a pot
Add in onion, garlic, sugar, salt, olive oil and butter.
Bring to a boil on high and then reduce heat to a simmer for 2-3 hours
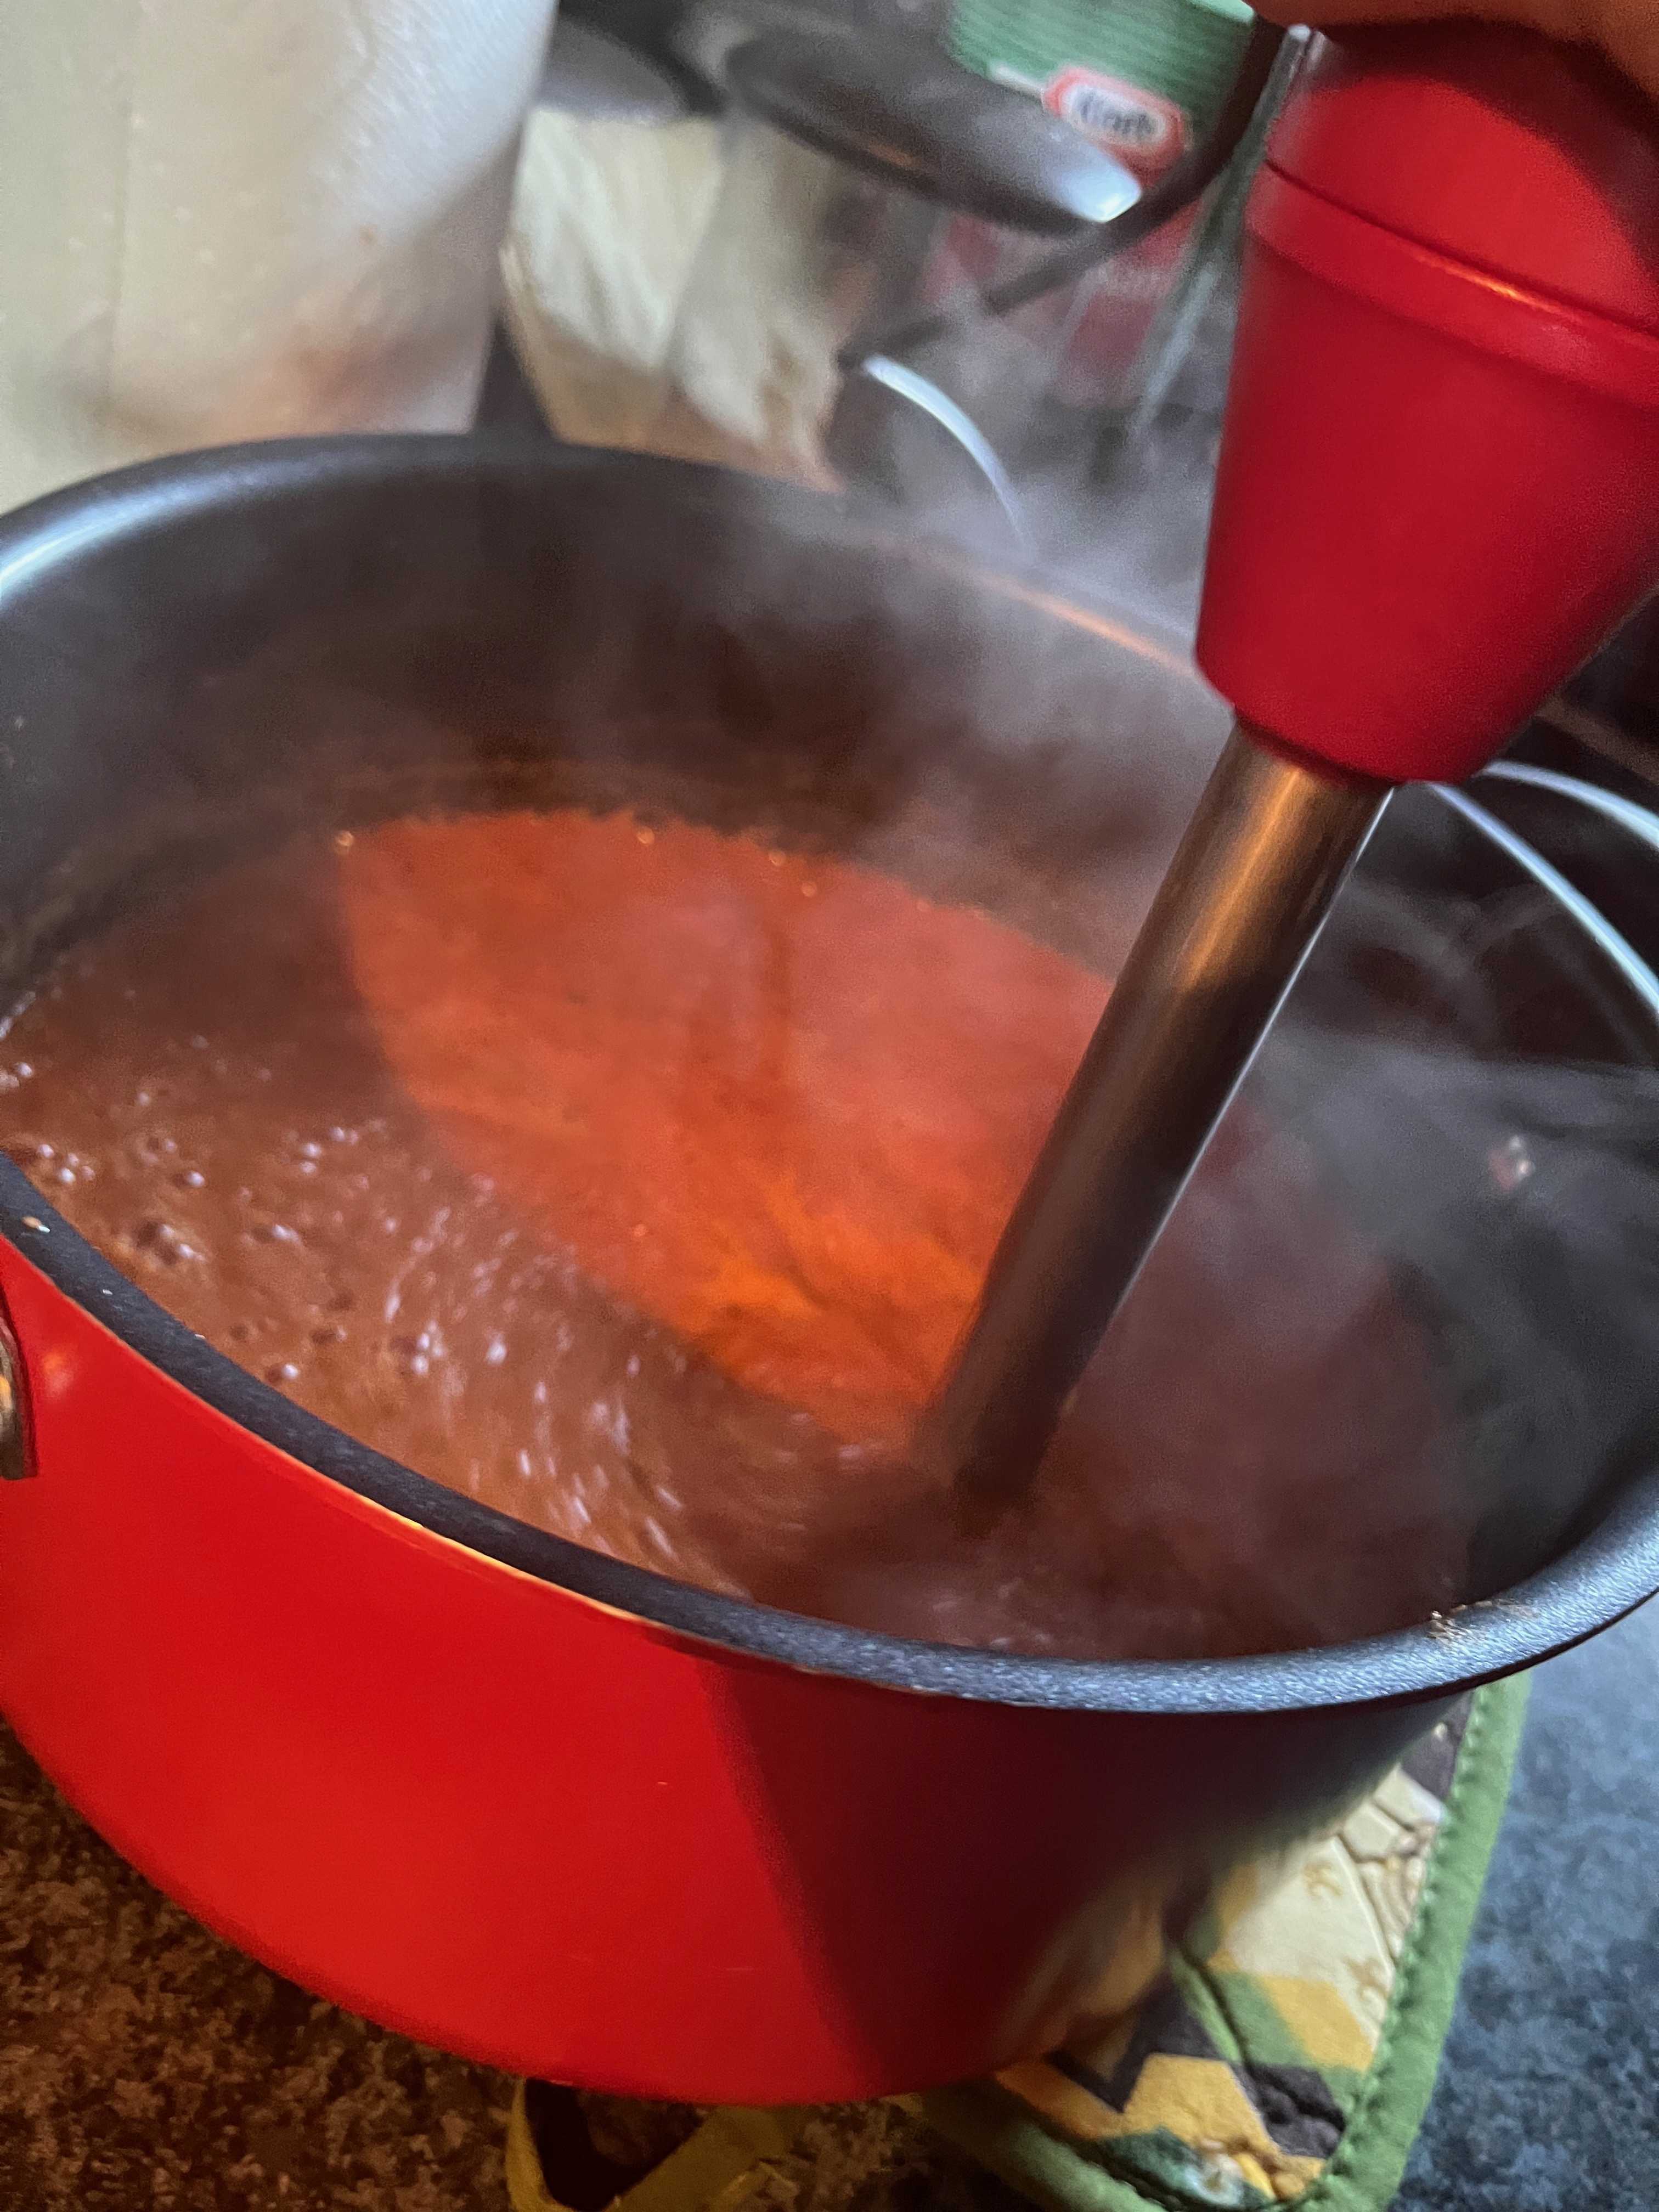
Mash tomatoes and onions that are still in large chunks with a masher or slotted spoon
OPTIONAL: Blend using an immersion blender for a smoother sauce
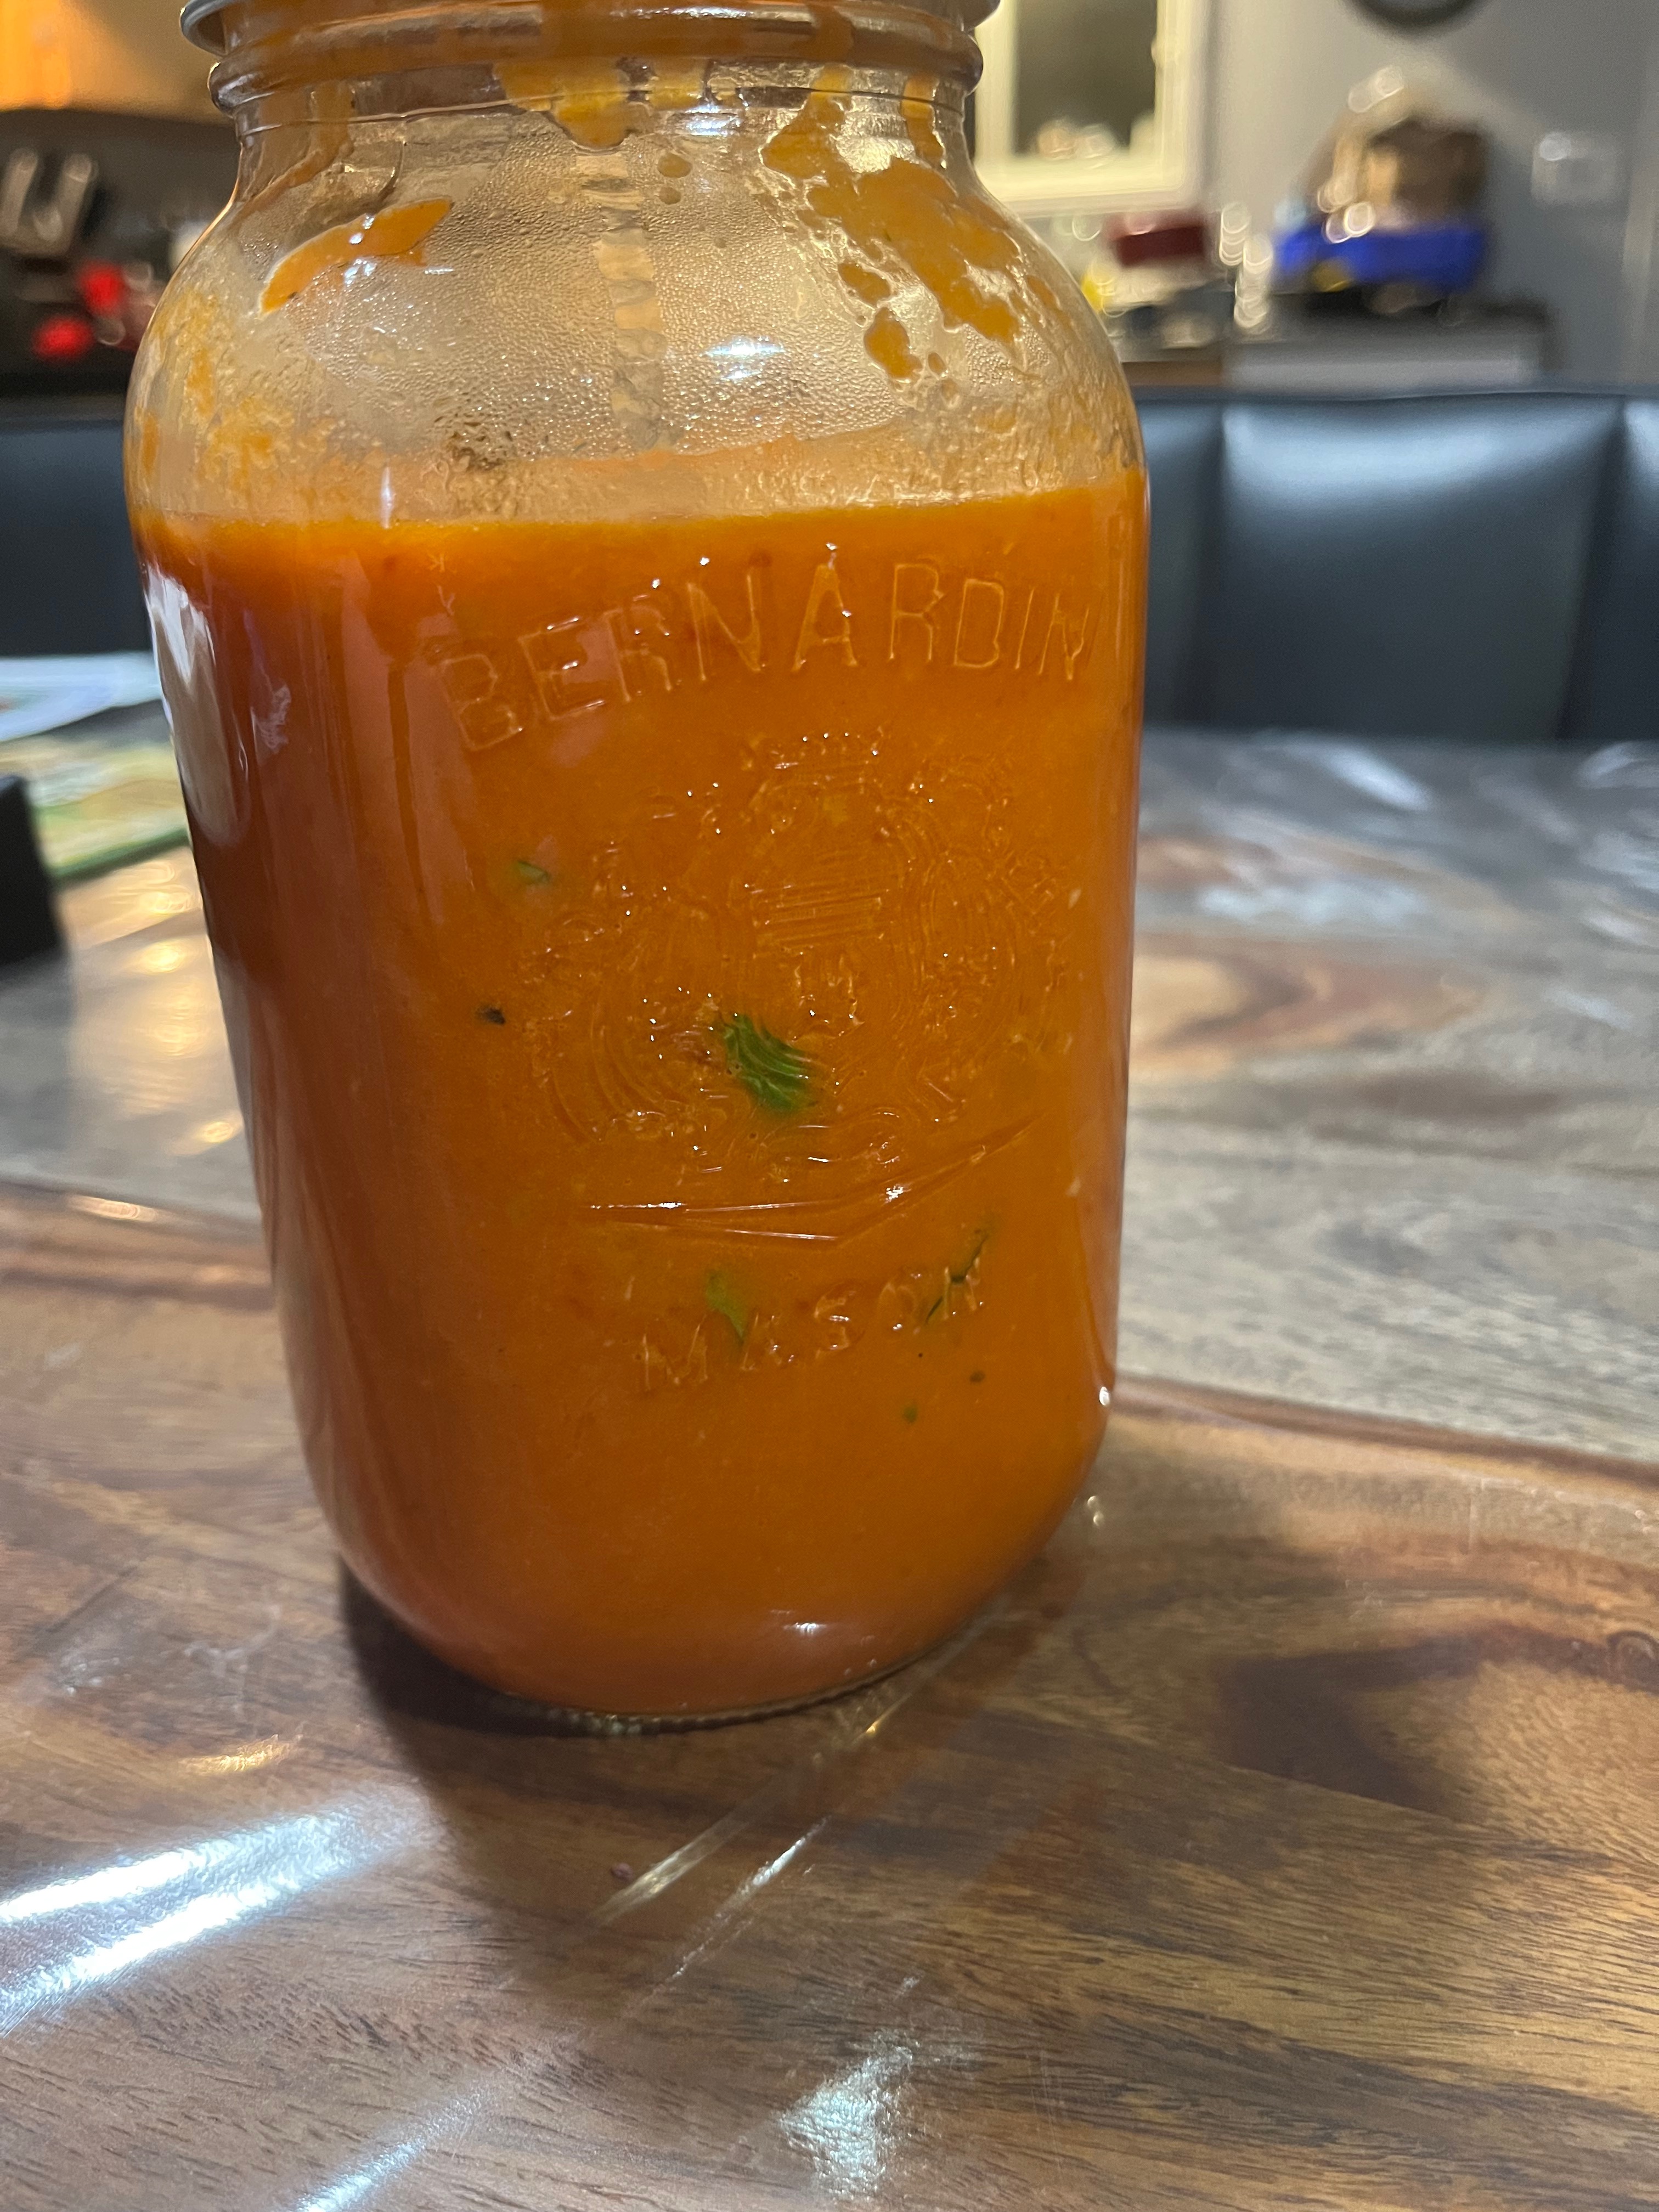
Stir in Basil
Cool and Transfer to freezer safe jars or bags and freeze for up to 3 months
Fresh Tomato Soup
After making the sauce, we still had an additional 4-5kg of tomatoes left over, so we also decided to make fresh tomato soup for those cold fall days that were quickly approaching. I cannot say enough good things about fresh soup. Similar to the tomato sauce, this can be stored in the freezer for up to 3 months. We chose to store two portions in gallon size ziplock bags for easy freezer stackability.
Ingredients
3 kg of fresh tomatoes, chopped (we used roma and cherry tomatoes)
4 tbsp minced garlic
1 whole white onion, diced
1 whole bell pepper, diced
2 tsp dried basil
2 tsp dried oregano
2 cups chicken broth or reconstituted bullion
1/4 cup olive oil
Salt and Pepper to taste
Fresh basil/parsley and parmesan for serving
Preparation
Preheat oven to 425F
Place chopped tomatoes, garlic, onion, bell pepper, olive oil, salt, pepper, oregano and basil in a bowl and mix
Spread vegetable mixture on 2 baking sheets
Roast for 30 minutes, stirring halfway.
Switch oven to broil for 3 minutes until vegetables are just beginning to char
Bring broth to a boil in a large pot
Transfer vegetable mixture and blend using an immersion blender
Let cool and transfer to bags or freezer safe containers for freezing (OR JUST EAT IT)
If you’ve spent most of your life in a city, there is probably one thing you haven’t used: a ride-on lawn mower.
Prior to moving to the country, Holly and I used to think that the less than half acre city lots we had with our detached homes felt big, huge even, compared to the apartment balconies we had in many places we’d lived before. Yet even these lawns were easily tamed with a small electric push mower; it took one charge of the battery and usually less than an hour.
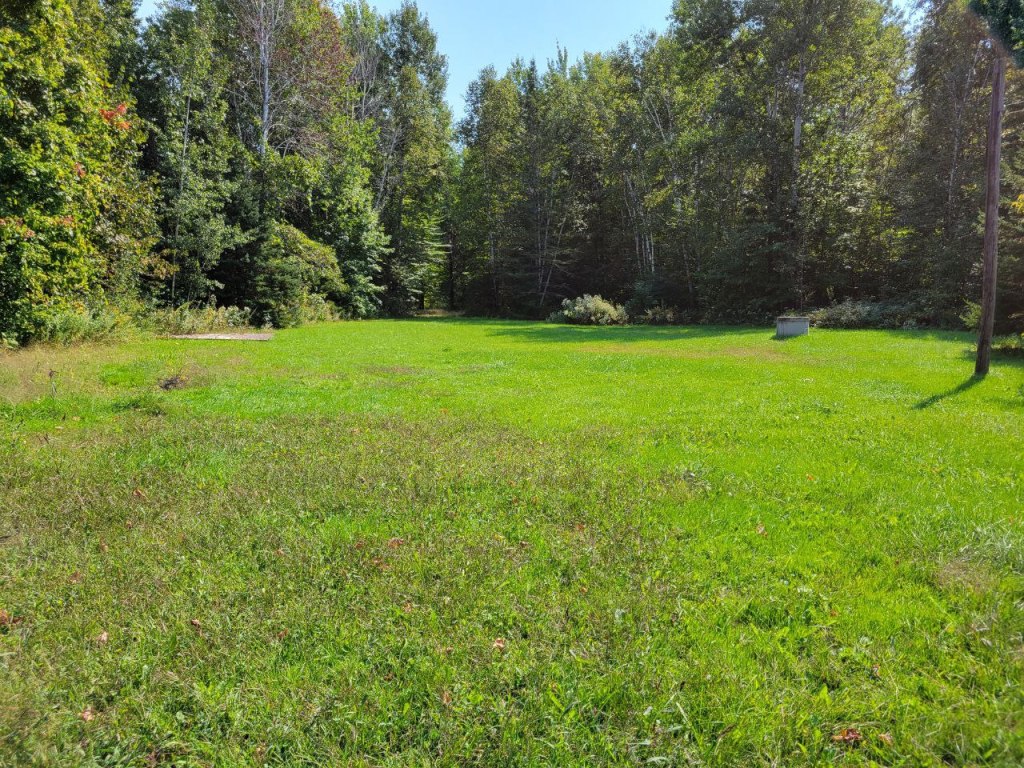
Of course, nearly 4 acres is much more lawn to mow, even when some of it is treed. For the first couple months of summer, we really let the grass go a bit wild as mowing even the smaller part of the lawn close to our house took 3 or 4 battery charges and just as many hours. This, truly, would just not do!
This is just part of the yard that must be mowed.
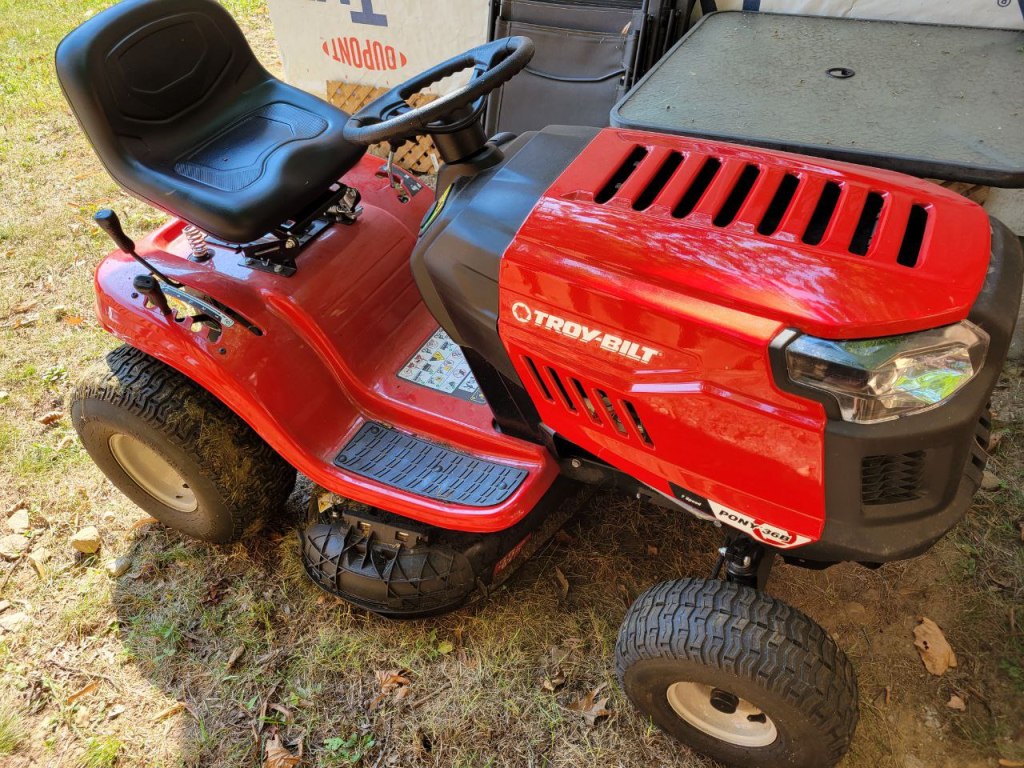
So after a bit of research, we settled on getting a lawn tractor, which is mainly a ride-on lawn mower, but also, you can get attachments for things like plowing snow or towing small trailers.
We were excited, and admittedly, a little nervous to give this thing a try, but we knew it would be light years better than trying to use a push mower on our whole yard. That being said, at this point, the grass beyond the house was really tall, and it was going to be quite a bit of cautious work to get the job done.
First though, we had to get the lawn mower! It was delivered all wrapped up and on a wooden palette just at the end of June. It also wasn’t fully assembled, and before we could get it off the palette, we had to hook up the battery and put the seat on, as well some other bits and knobs. This took…a lot longer than we anticipated. Should it have been that complicated? Probably not, but by the time we had finished, it was too late to mow that day, and we also realized it was kind of stuck on the palette as it was quite high off the ground. We ended up having to run out to the store and pick up some loading ramps to be able to get it off. We left it parked in the yard, and now, finally, we were ready!
Mid-afternoon the following day, Holly decided to take the first go at it. We had also picked up all the necessary safety gear in our earlier run to the store: shatter-proof sunglasses and sound-cancelling ear protection – fancy Bluetooth ones that you can sync to your phone to listen to music while you mow. So really, it sounded like a pretty decent job – take a little ride around the yard, jam to some music, and make the lawn look real nice again (not to mention, we were hoping it’d cut down on the mosquitoes and flies).
It took a few tries (and a YouTube video) to get the thing running, but once we knew the right order of things, it’s pretty easy to get the hang of. There were some other things to do around the yard, plus some spots I’d have to get with the push mower that the ride-on wouldn’t fit, so I got busy with those other tasks as Holly got going.
I can’t recall how much time had passed, but it must have been 30 minutes to an hour, when I heard a horrendous clanging noise and the hum of the lawn mower abruptly stopped. My first thought being that some rock or piece of metal got clogged up in the blades, or the mower broke down, or some piece fell apart.
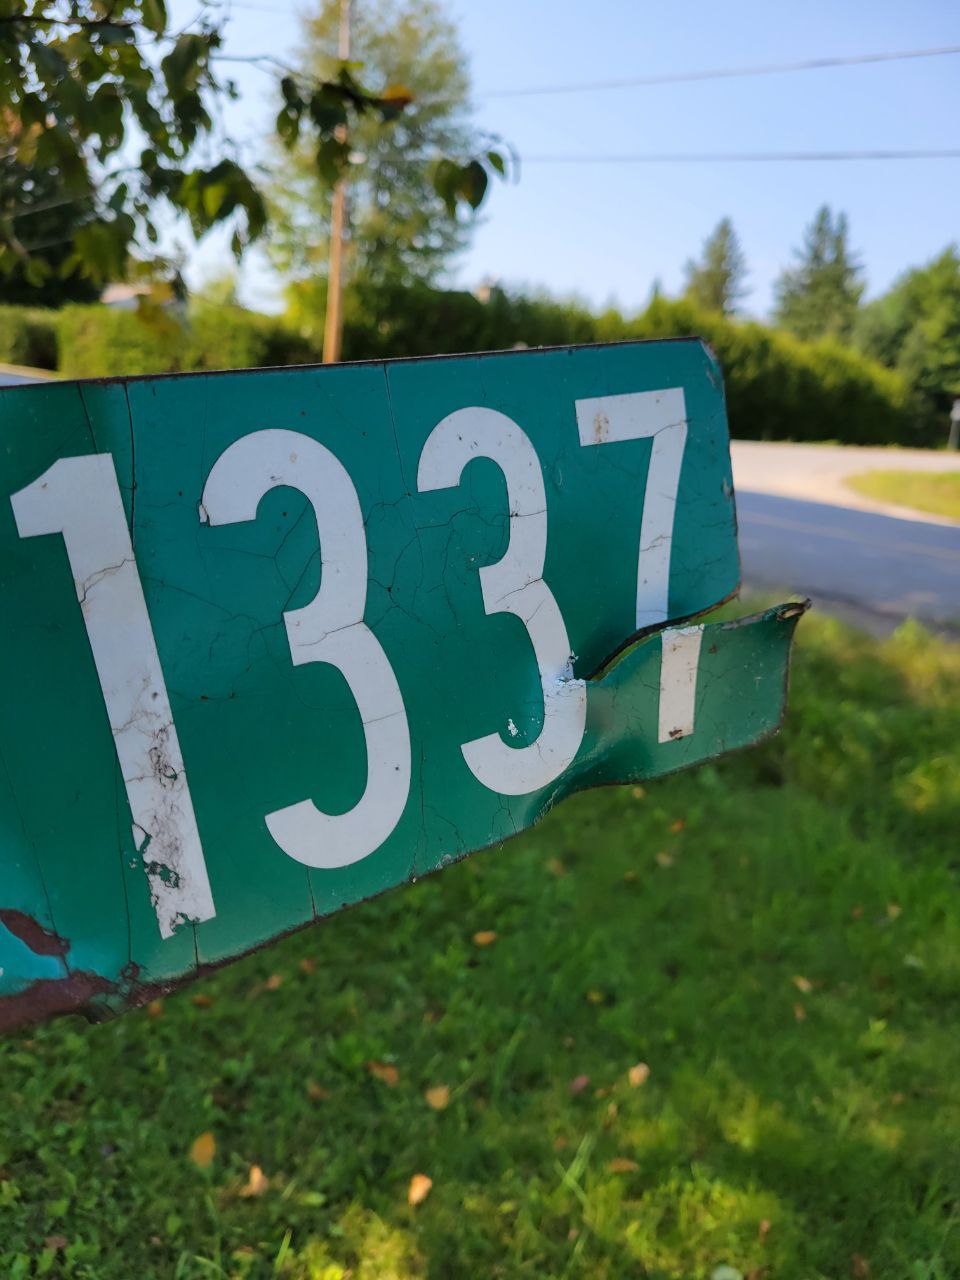
I went running to the front yard where I saw Holly sitting on the mower at the top of the embankment, nearly on the road that runs in front of our house, and it was also then that I noticed the sign post with our fire number was…no longer standing at the end of our driveway. I think Holly must have been in shock from the ordeal, but I could also tell she was in a lot of pain. The first thing she asked me: “WHERE’S MY LEG?” To which I can only go, “It’s still attached. I promise.”
With how tall the grass had gotten, it had been impossible to see that there was a slope in the ground near the post, and the lawn mower had tipped a little, which then got the post caught between Holly’s leg and the mower, and with her leg being held in place, she wasn’t able to brake right away, which meant the sign pulled her leg back, and the lawn mower sped forward, until finally the post was yanked down and under the mower (hence the horrible noise). She had just managed to stop the mower right at the top of the small hill after that.
Her leg was in pretty bad shape, and she could barely get off the lawn mower, let alone walk back to the house, but I did my best to help her inside and get her sitting and resting. The bruise this disaster left was big, and it’s stuck around until this day (3 months later!). Needless to say, I did end up finishing the rest of the lawn that day.
However, Holly is a champion, and this incident hasn’t stopped her once from getting right back on that mower and tackling the lawn mowing every single time! But let this be a lesson to anyone new to ride-on mowers or just managing large areas of lawn in general, make sure you get a sense of the terrain before you get on the mower, especially if you’re used to a push mower that can be pretty forgiving.
I don’t know about you but I’ve always found myself uninterested in eating beets. I don’t know why, truthfully! Maybe something about the smell or about how people always talk about them tasting like “dirt” (wash them better!), but they didn’t appeal to me one bit! Until I grew them myself and made them myself that is.
This summer, as we’ve talked about several times in other posts, we really tried to grow food that would nourish us while also challenging some of those preconceived ideas about vegetables – Thus, BEETS!
I didn’t even know how to cook or prepare beets. I literally googled “DO YOU PEEL BEETS?” and “HOW DO YOU KNOW WHEN BEETS ARE COOKED?”. In truth, I think both Sylas and I were overwhelmed at the though of GROWING beets and even more overwhelmed at the thought of actually eating them. Let me tell you – If they’re prepared correctly and you put in the effort, they’re DELICIOUS and easy!
We started our beets with many of our other vegetables and I was honestly concerned they weren’t going to thrive at all. They were whispy like our lettuce and initially didn’t have much of a bulb (I checked by lightly checking the roots without damaging the plant). I learned later that you should trim the beet top to help the root be nourished and that you can actually eat the beet greens! So, we did that and we ended up with quite a few nice sized beets. We did supplement them with a couple of store bought as well because we wanted to have leftovers for this recipe and not all of our beets were ready, but it was fantastic!
How to cook beets
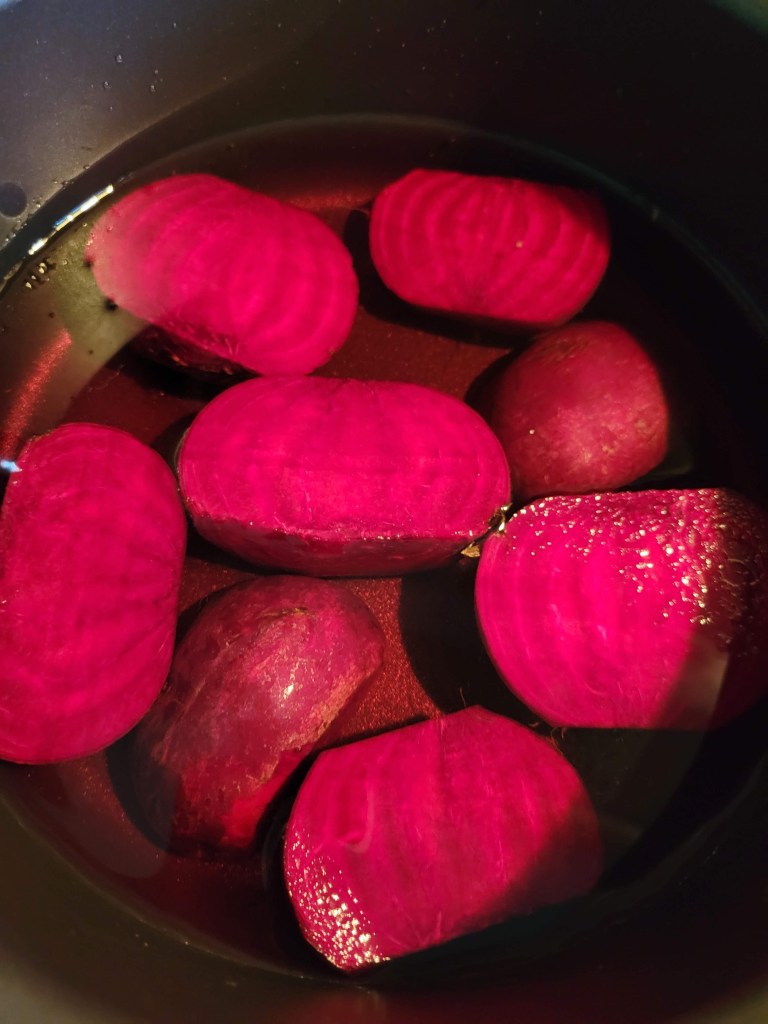
Beets are really easy, especially when you’re making them to add to a meal like a salad or to roast with other vegetables. You need to wash them well because remember that dirty flavour I mentioned earlier? That was my understanding of beets before I made them myself too. Use an abrasive brush that you use only for produce or similar and run under hot water. Scrub them for several minutes until the outside skin looks clean.
Then it’s as simple as slicing the beets into halves or quarters depending on the size and roasting or boiling them until fork tender, 20-40minutes depending on the size of your beets.
Also be careful, beet juice is bright pink and it does stain!
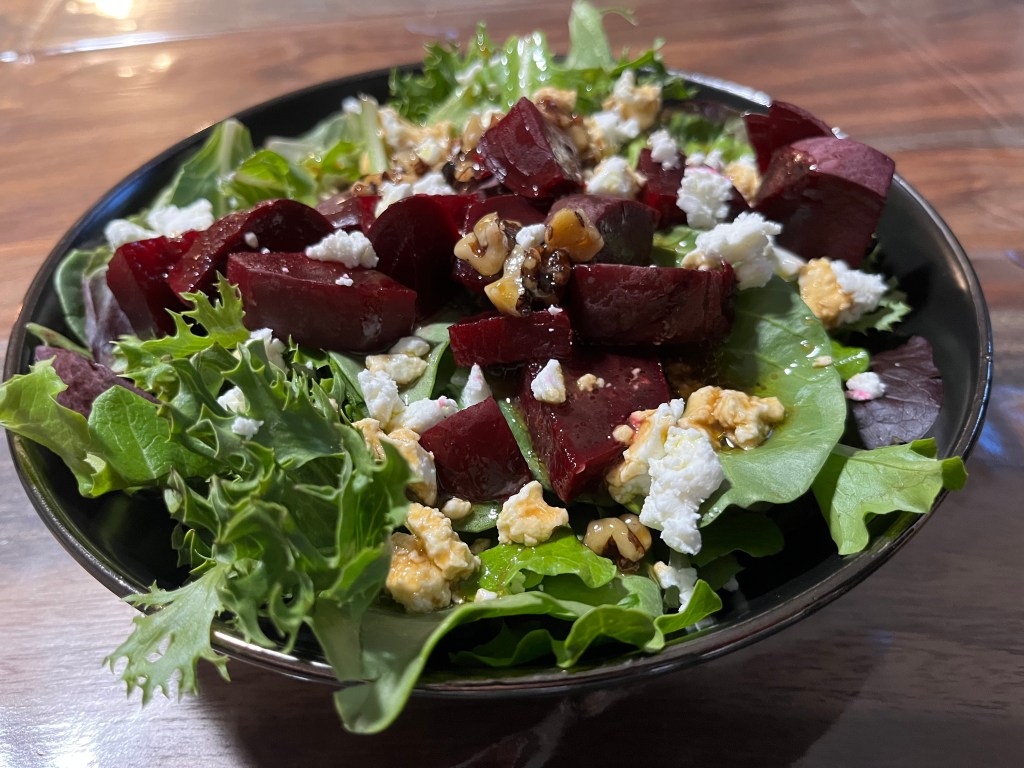
Fresh Beets
Beet and Walnut Salad: A recipe
Serves 4 as a side, 2 as a main (add protein). This is a variation on a recipe I found on all recipes here.
Ingredients
6 small beets
1/2 cup chopped walnuts
2 tablespoons maple syrup
300G spring mix greens
1/2 cup sugar free orange juice concentrate
1/4 cup balsamic vinegar
1/4 cup extra-virgin olive oil
Goat cheese to taste, large crumbles
Preparation
Scrub your beets. Really, SCRUB THEM. You don’t want to eat dirt.
Quarter the beets and cover in a sauce pan with water.
Bring the water to a rolling boil on high and reduce to medium
Boil for 25-35 minutes until fork tender
While the beets are boiling, add the walnuts, maple syrup and a pinch of salt to a frying pan. Caramelize on medium heat until thickened and then remove from heat and let cool
Remove beets from boiling water using slotted spoon or strainer and run under cold water
Chop beets into 1/2 inch pieces (smaller is better)
Add 75g of greens to each plate
Top with even portions of walnuts and beets and crumble even portion of goat cheese over top
Add orange juice concentrate, balsamic vinegar, olive oil, salt and pepper to a bowl and whisk
In one of our first posts, we put up a poll asking what type of content our readers would be most interested in seeing. Surprisingly, day in the life content ranked pretty high. I’m sure what was meant here was day in the life with the alpacas, but we’re not at that phase yet so I decided I’d share some content outside of our little puppy, kitty and garden farm.
At the beginning of August we decided we would take a train to Halifax from Ottawa, called The Ocean with VIA rail. My family has some strong ties to the east coast and I have never been out of province in Canada (Despite being to 10+ other countries and countless states). It promised to be a good time, but more on that later.
Leaving the Farm
One of the most challenging parts of having a farm with livestock as a responsibility is finding the time to go away on vacation. Since we haven’t gotten our Alpacas yet we have been really trying to get in a lot of vacation before that. That said, even now when we go away it’s a bit of a production with the dogs and cats and our garden.
Luckily for us we live less than a KM away from a really nice local dog kennel. The owners are really sweet and even Luna who is normally really timid gets on there just fine. Actually, this time when we rolled up to drop them off, Luna was crying and jumping at the back hatch in the car to get out so she could rush inside to see her puppy friends. It’s really amazing to see how much she’s grown.
Another lucky thing is that our house is in the middle of 4 other towns (Pembroke, Petawawa, Cobden and Eganville) so it wasn’t that difficult for us to find someone willing to drive out here to spend some time with our kitties each day either. Having a space for the cats that’s separate from our main house helps too so that we didn’t have to give our main keys to someone (not that anything would happen).
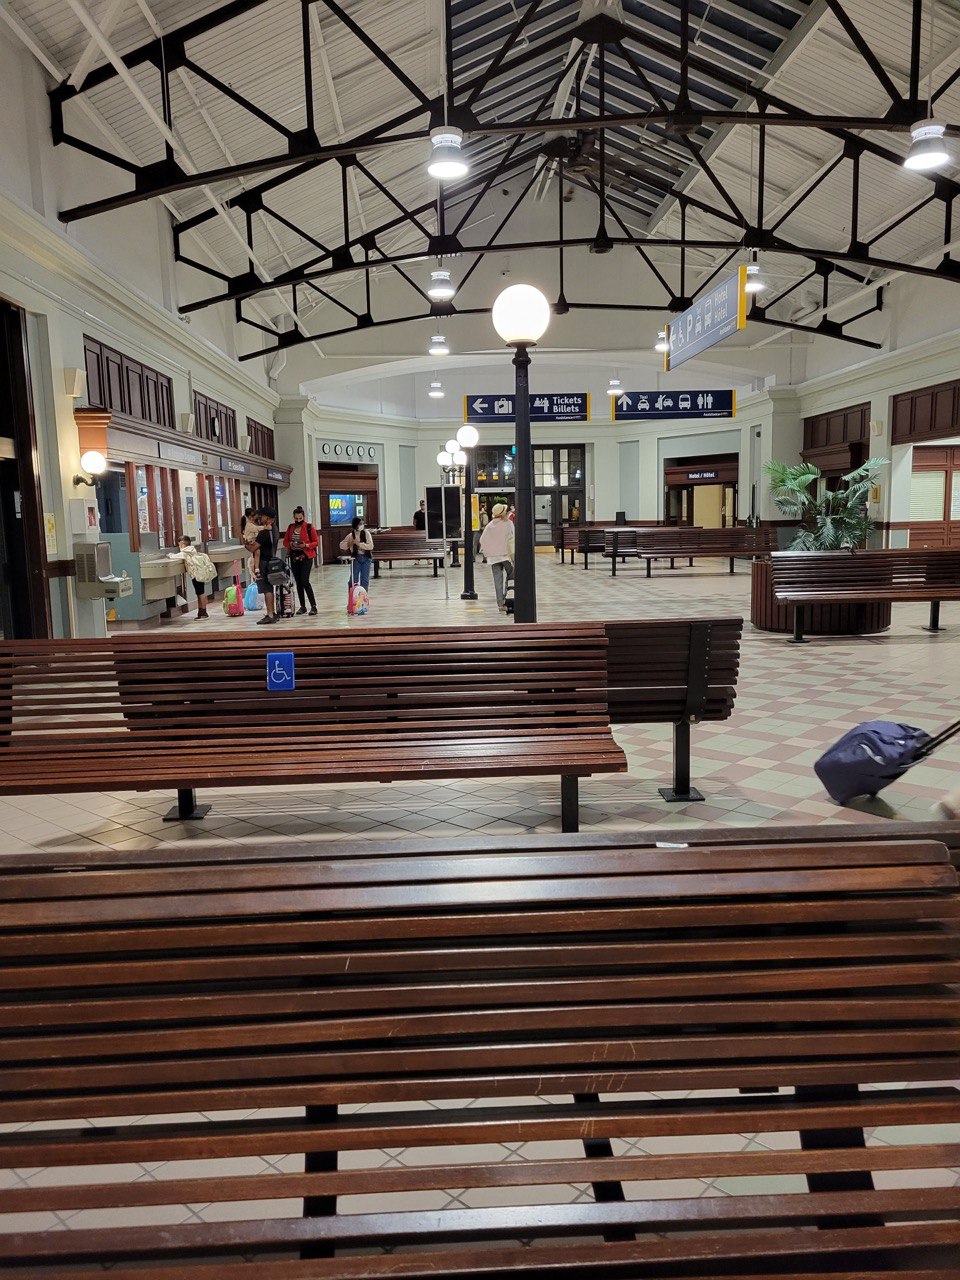
The Train
Stastically speaking, Canada’s passenger rail system is SERIOUSLY lacking, especially when comparing to Europe or Asia. Currently if you want to take a train from Ontario to BC it takes a week and if you want to go to the East like Halifax, it’s a full 24 hours on the train, compared to a drive that would normally take 13 hours. That said, I really love trains, so we decided to take the train and enjoy the views, some food and some relaxing on the way to Halifax.
The route that goes from Ottawa (Montreal really) to Halifax is called The Ocean. For more of the official information on this route, VIA rail has some information on THEIR SITE.
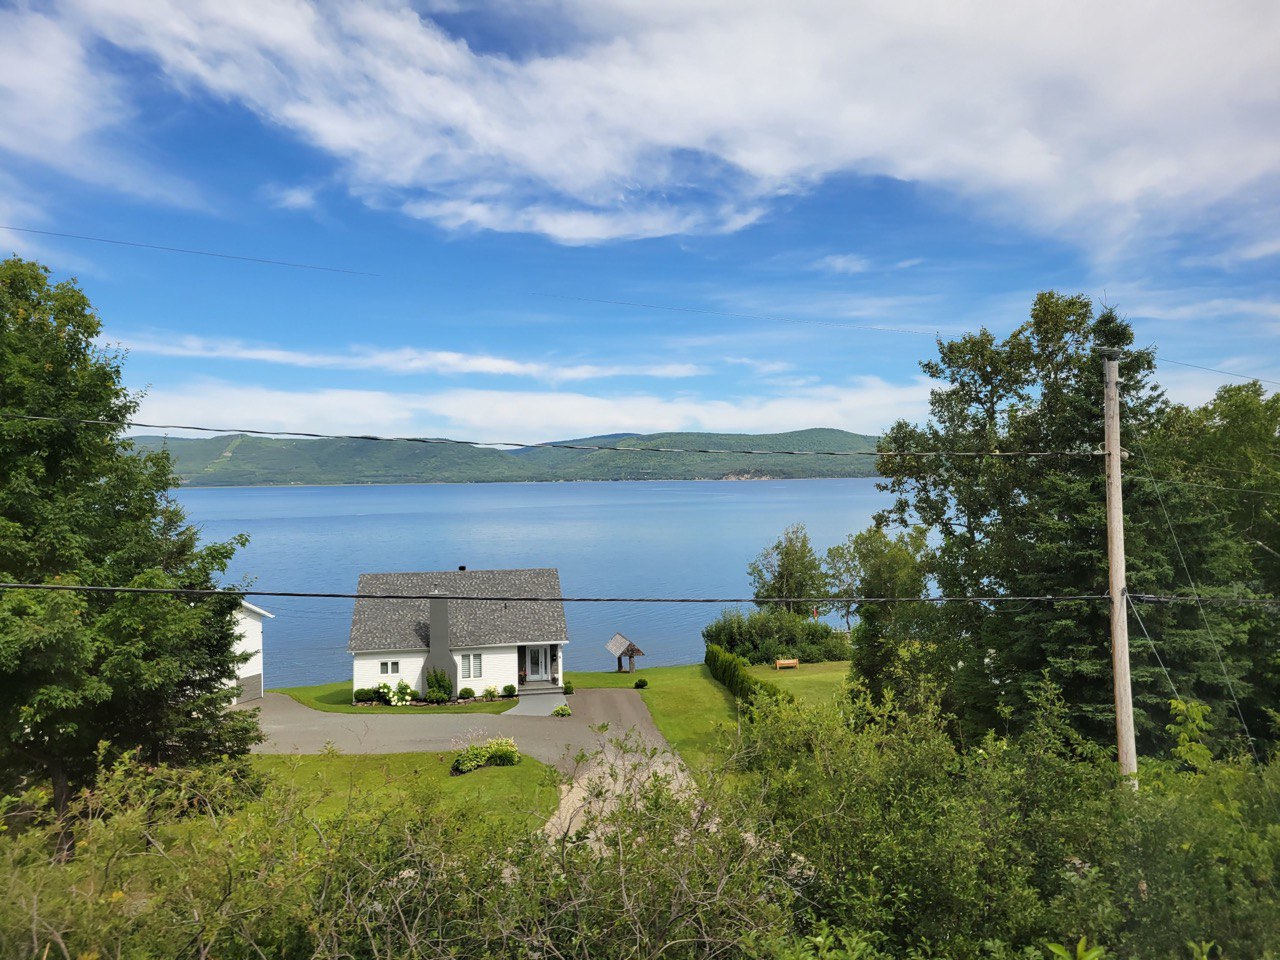
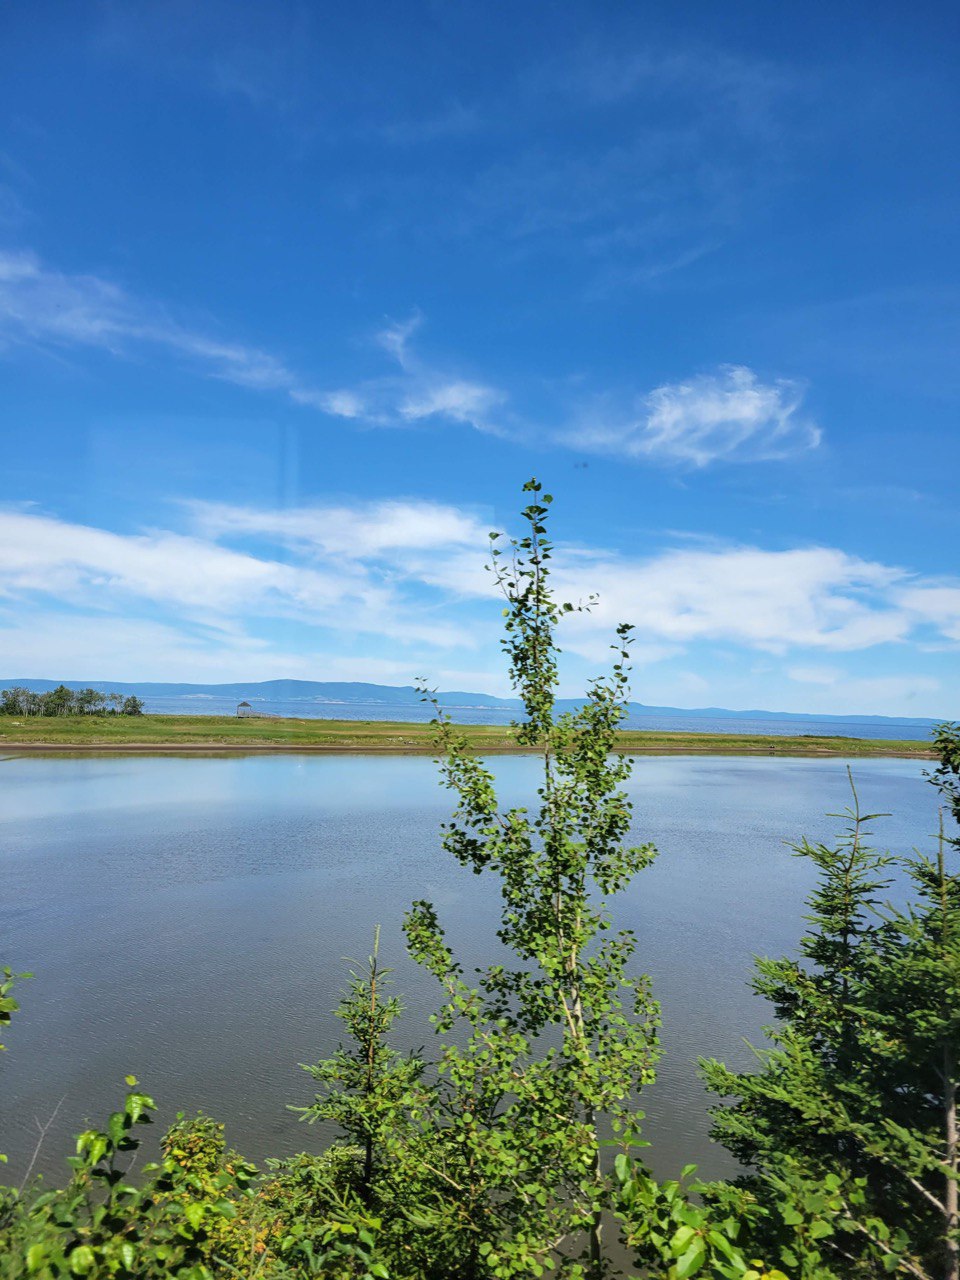
We splurged a little and got the sleeper class, expecting that it would be a little better than the economy seats. I can definitely say it was better than economy but you should absolutely not go into this experience expecting it to be comfortable or relaxing. The beds are very small, the washrooms are very small and the food was only okay. The views were spectacular though and mostly made up for it. We were disappointed that the observation car was removed and we had to spend most of our time in the room. Also, there are plenty of towns you go through, but don’t expect many stops to get out and stretch your legs. I’ve included some pictures below.
Halifax
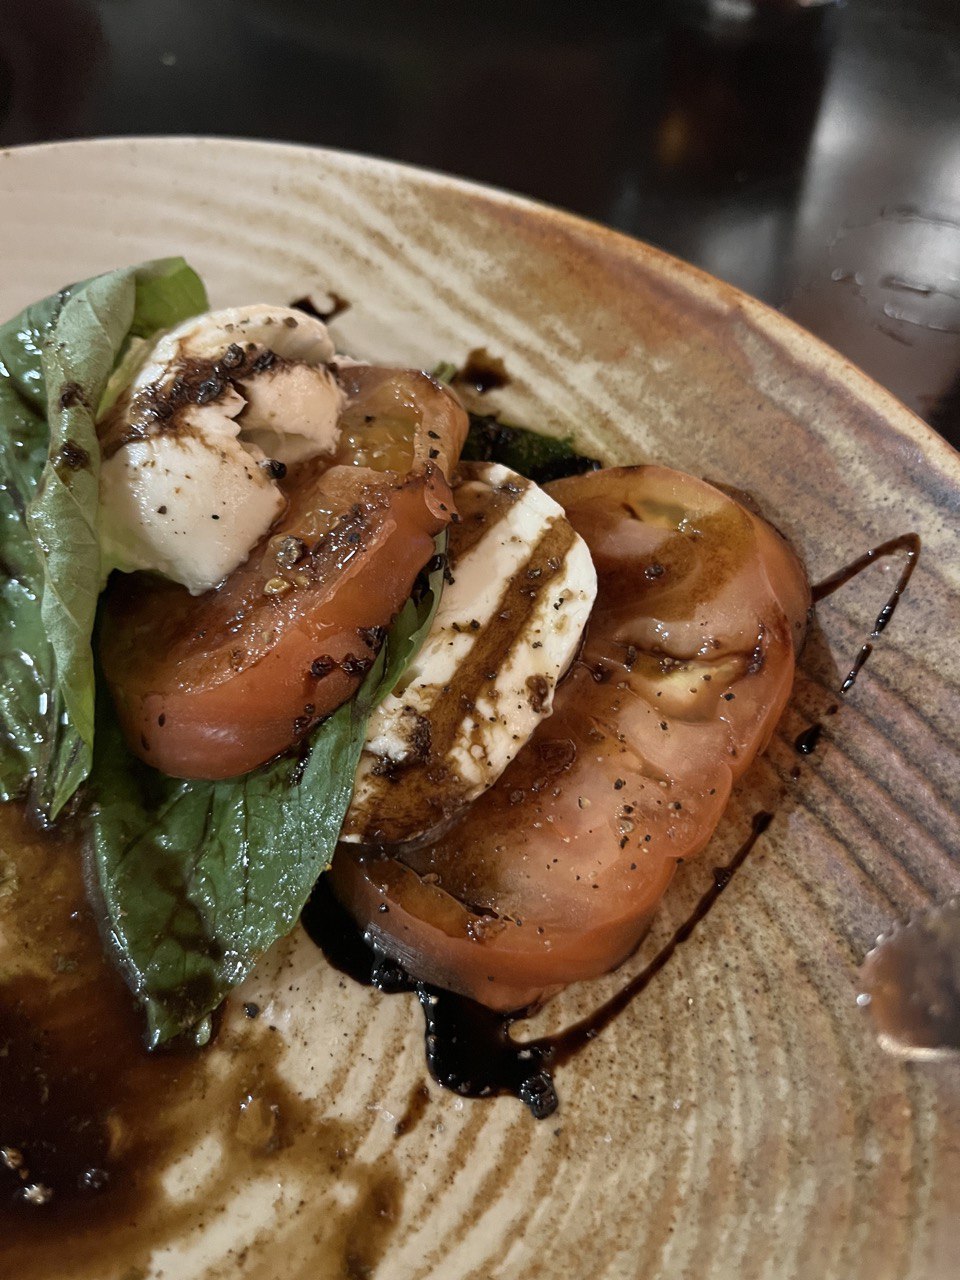
As I mentioned, I have never been to Halifax before and I was very pleasantly surprised with how much there was there. I did know a lot of the history, because things like the Halifax Explosion and its involvement in WWII were taught in history in school, but there is a deep culture that was surprising for me. It does feel like many seaside towns, but it’s also progressive and the people are very kind. The food was also excellent. Obligatory food gallery below.
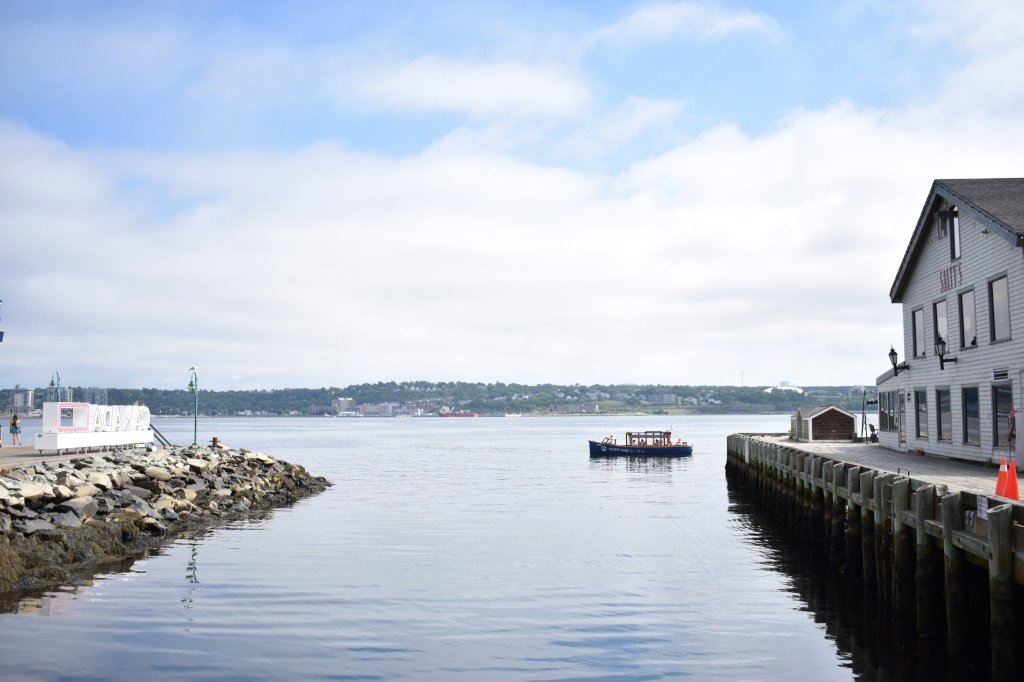
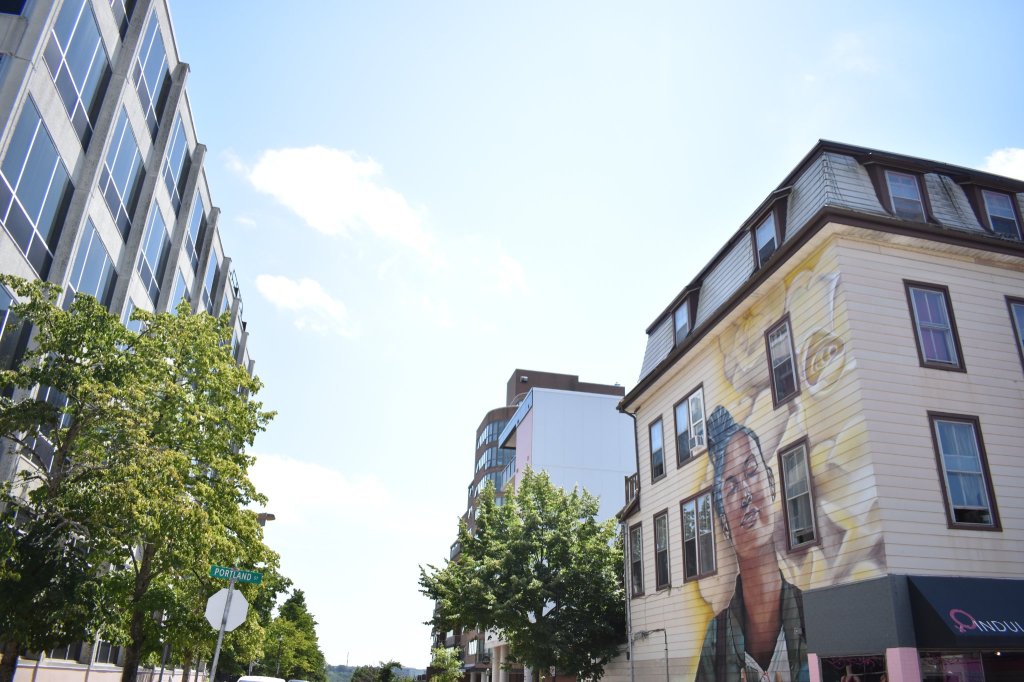
We did and saw so many things while we were in Halifax even though it was just a few days, including walking the boardwalk, two museums, a harbour tour, a trip to Dartmouth and of course eating a lot of crab and lobster. There is one place that was super special and I think should be mentioned, Peace by Chocolate.
Peace By Chocolate is a chocolate shop owned by a Syrian family who migrated in 2012 from Syria to Antigonish when their chocolate factory was destroyed in a bombing. They were refugees but with the community in Halifax they were able to rebuild their chocolate company since 2016. Read more about their story HERE. It was a lovely stop with some delicious sweets, and to me the best part is that their chocolate bars all represent a cause that a portion of the proceeds go to supporting. For example, they have a pride chocolate bar that donates $1 of the $5.50 for it to local LGBTQ causes.
I’ve included a slideshow of the rest of our trip here below. Enjoy!
My Connection to Halifax
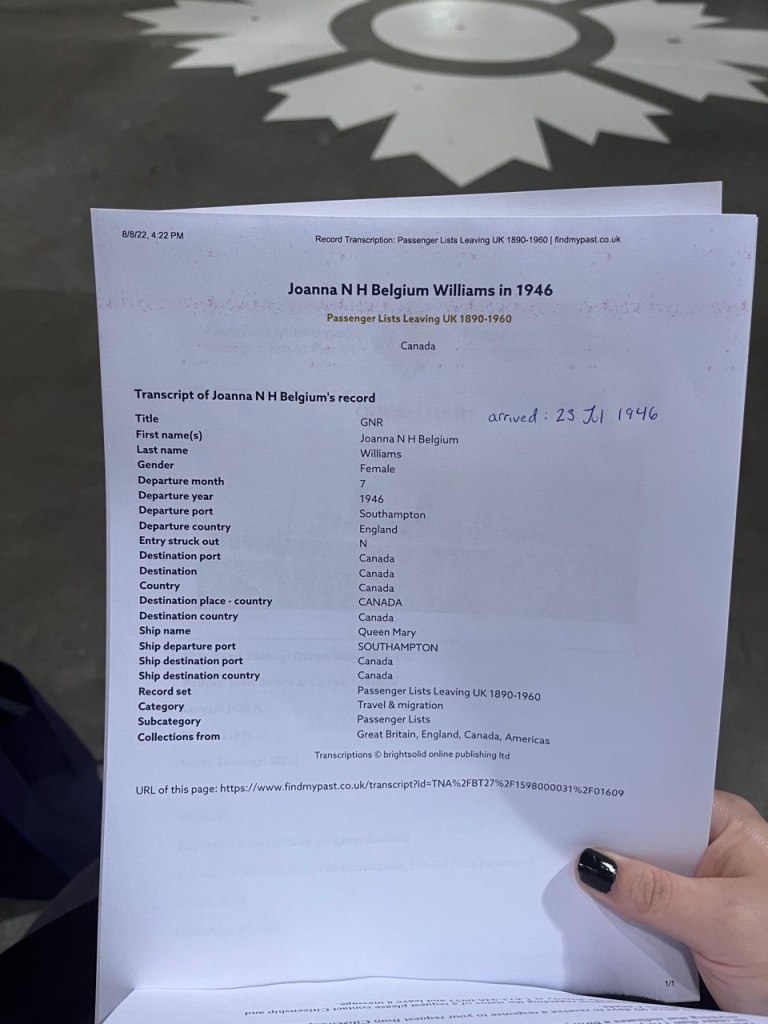
Like many Canadians, my grandfather served in WWII in Belgium. While serving there he met my grandmother and she became one of thousands of war-brides to come to Canada once the war ended. HERE is a great article about the war brides who came to Canada at the end of the war if you’re interested. During WWII 48,000 women who had married Canadian Servicemen ended up traveling to Canada.
After the war they boarded the Queen Mary, YES THE FAMOUS HAUNTED QUEEN MARY, and set sail for a new life in Canada, a life after the war. They landed in Halifax at Pier 21 on July 23rd, 1946 which was my grandmother’s birthday and made way for New Brunswick where my grandfather’s family was from.
Joanna Williams Migration Record
Before we went to the Pier 21 Museum, I didn’t know anything about my grandparents, so this was a really interesting experience for me. I also loved that they had this monument recognizing that Canada as we know it today was built on inherently oppressive systems.
The Wheel of Conscience in Halifax
What’s next?
We’re still in the middle of gardening for this year and are getting ready to harvest tomatoes. More to come on that soon. We’re also working on a deal that would double our land if it goes through so hopefully I have more to share on that and the plans for next year in a future post!
It’s been a while since our last scheduled blog! I meant to get this blog post out to you a few weeks ago, but life has honestly been a little bit wild. My health has been a bit on and off again, and we were on a trip to Halifax and Toronto for a week in there too, so my apologies for the three-week wait time on this blog! Rest assured though, we’ve got blogs scheduled through the end of October! Can’t wait to share all of our updates with you from renovations, to fences and land purchases and finally getting our alpaca plans going, we’re going to update you on everything!
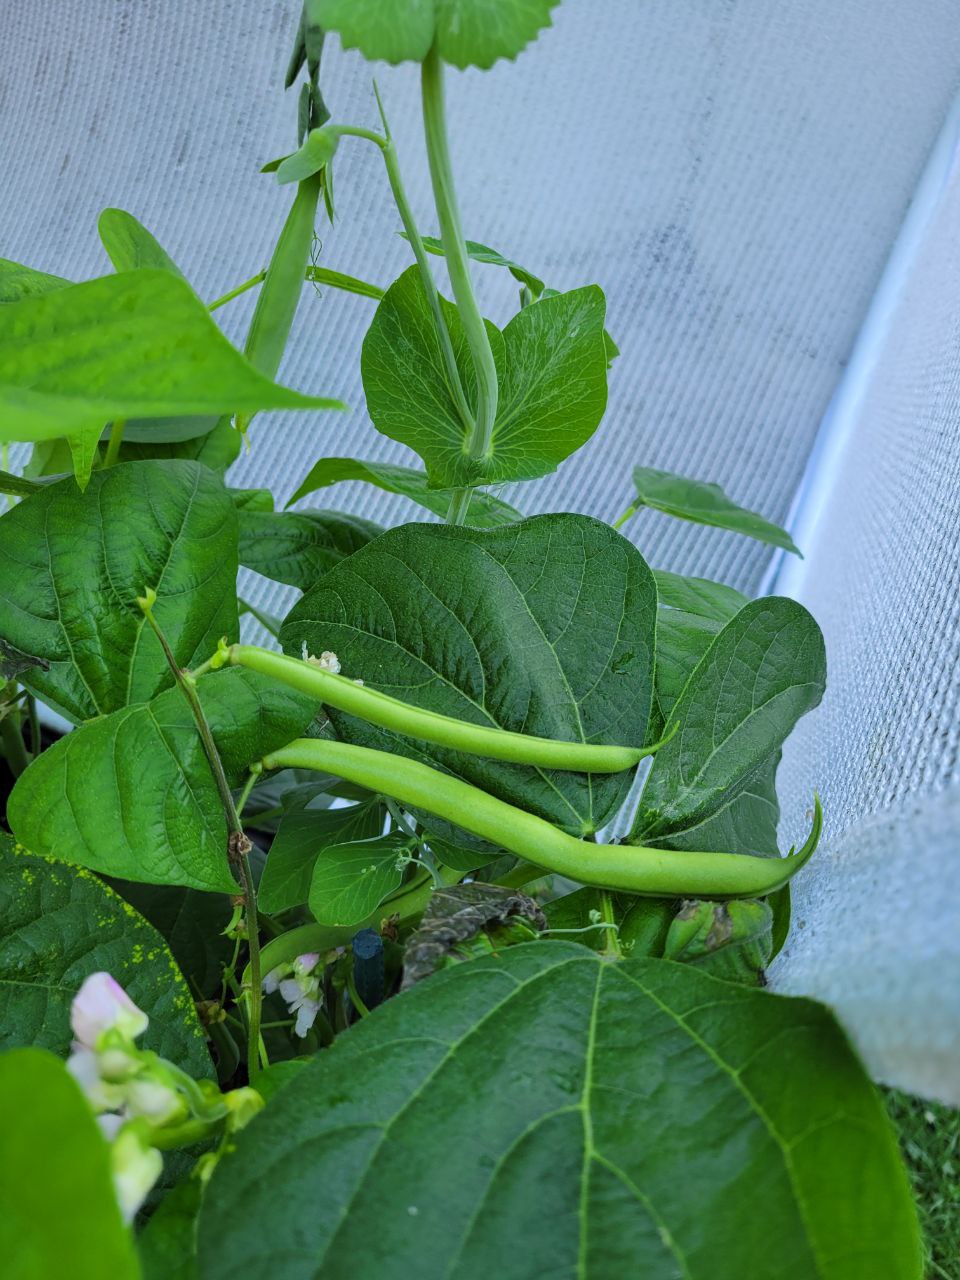
You know what benefited from us being away? Our garden. Our green beans THRIVED while we were gone and we’ve been able to eat them along with some cucumbers, beets and we’ve just started getting our tomatoes in! We’ll hopefully be sharing more recipes with you as we get to using our tomatoes and beets. Stay tuned for that!
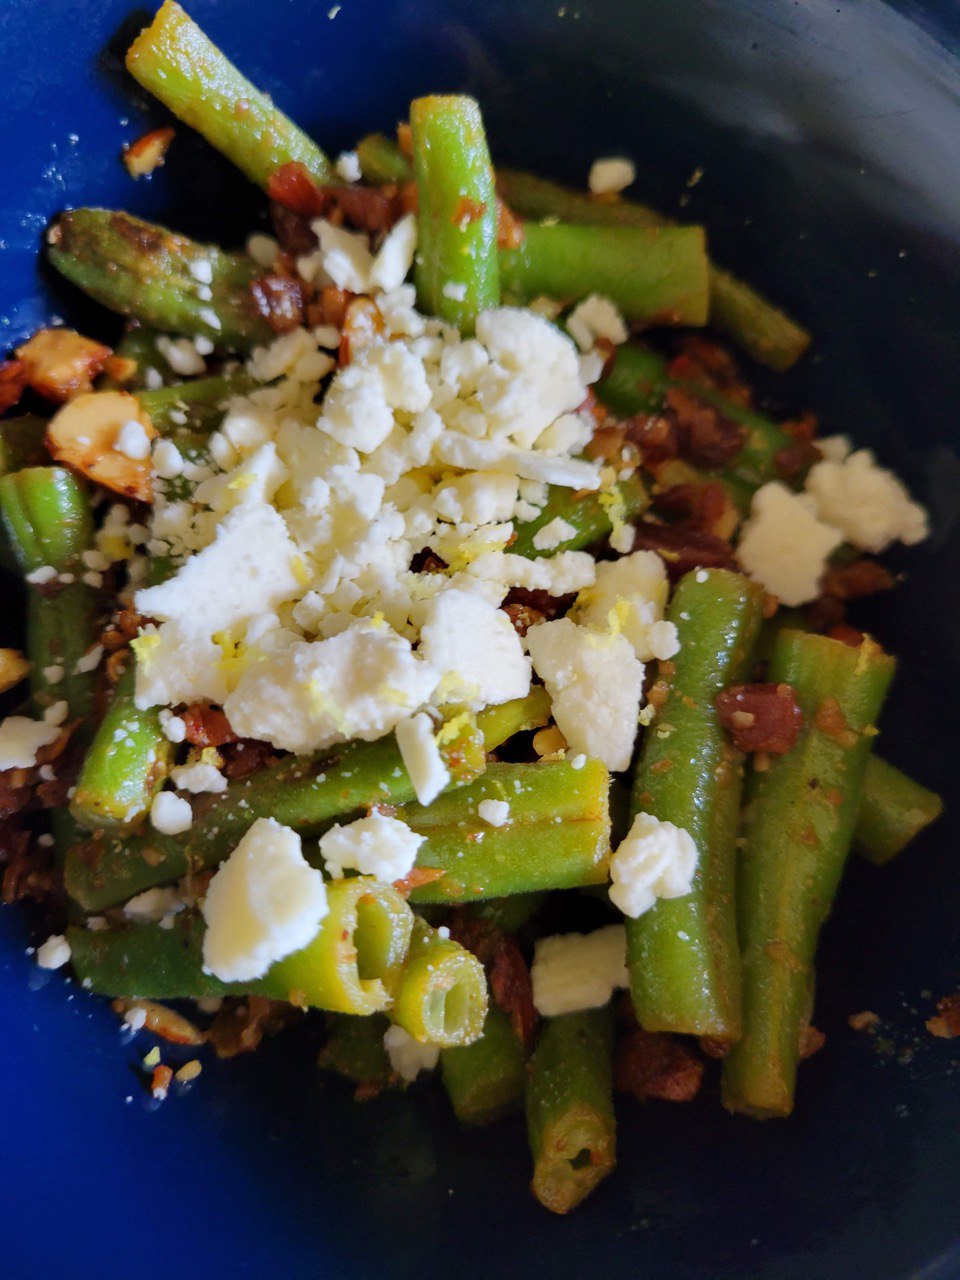
One of our mutual favourite vegetables are definitely green beans so when our plants thrived and we ended up with pounds and pounds of pods to figure out what to do with, we had to get creative. So we made warm green bean salad! Pictures and Recipe below. Don’t worry, that’s all I’m going to type for you to read before the GOOD part of the recipe post.
Warm Green Bean Salad
Serves 4 as a Side, 2 as Main
Ingredients
For Main Dish:
500g Fresh Green Beans, Trimmed and Chopped
1/2 Cup Roasted Salted Almonds, crushed into pieces
1/3 Cup Crumbled Feta
1/3 Cup Crumbled Bacon
1/4 Cup Water
Salt and Pepper to Taste
For Dressing:
2 Tbsp Extra-Virgin Olive Oil
1/2 Tsp Red Pepper Flakes
1 Tbsp Lemon Juice
1 Tbsp Dijon Mustard
1/2 Tbsp Minced Garlic
Salt and Pepper to taste
Preparation
Place 1/2 Cup Roasted and Salted Almonds in a ziplock bag and crush into pieces, set aside
Place skillet on medium-low and add chopped green beans and water
Season with Salt and Pepper to taste
Cover the Beans and cook, stirring until beans are just vibrant green, 5-7 minutes. (You can cook longer if you don’t like crunchy beans)
Remove lid, raise heat to Medium-High and continue cooking until water is evaporated, 2-4 minutes
Remove Beans from heat and transfer to mixing bowl
Whisk together ingredients for the dressing: Olive Oil, Red Pepper Flakes, Lemon Juice, Dijon Mustard and Garlic. Add salt and pepper to taste.
Place skillet back on medium heat and add dressing, almonds, bacon, half of the feta, stirring quickly before removing and pour over the green beans
Toss to combine
Serve and top with remaining feta and extra lemon juice to taste
It’s been a month and a half since our initial post about building out our vegetable garden so I wanted to give you a bit of an update. If you didn’t get a chance to read the initial post, and you’re interested in garden planning, take a moment to read it HERE (Building our Vegetable Garden).
Quick Review
For those of you who read the initial post and just want a reminder before we dive into updates – This quick review is for you!
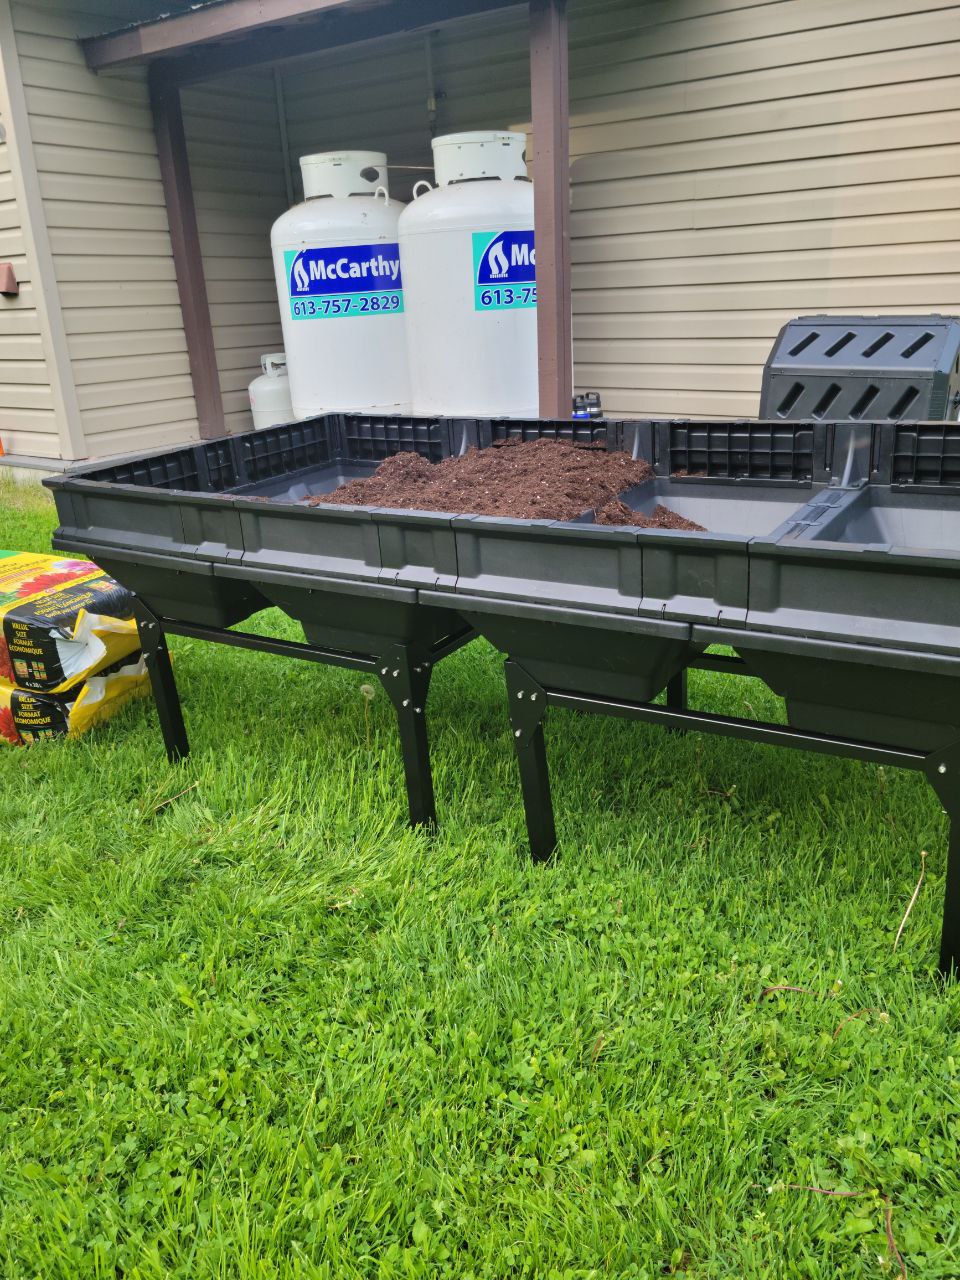
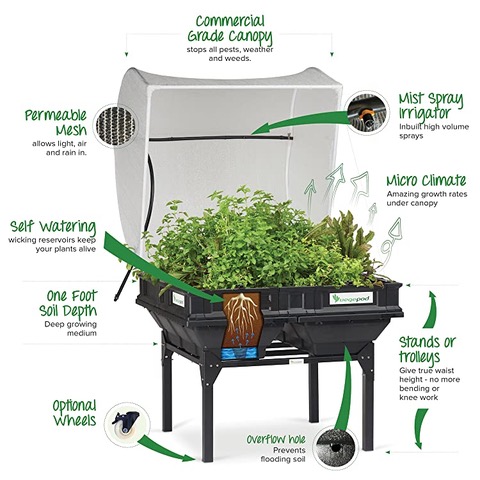
In May we purchased Vegepods to setup in our yard. These are raised auto-watering beds that have a pest shield and are perfect for people like us who weren’t ready to go messing around trying to build our own garden beds. We also started our seedlings indoors and once they were hearty enough we transplanted them outside in June.
In late June we transplanted our early June starts as well, completely filling both of our vegepods with seedlings.
We were super ambitious and thought we were going to be able to immediately grow and learn husbandry for the different plants on the fly. We weren’t exactly right about that, but ever the learn-by-doing kind of folks, we marched on!
One thing I didn’t expect was just how much I was going to love gardening. It’s become a bit of an escape for me, going out, checking the plants, harvesting and eating the literal “fruits” of my labour. I feel more connected to this earth and my body than I ever have, and as someone recovering from an eating disorder, that’s super powerful!
The Update
Gardening is hard. That’s something I really didn’t take seriously before, but it is. Advice someone gives you might have worked for them and not at all for you, or you might have a really strong couple of weeks only for something small to decimate your crop or seedlings.
We started with a lot of seed starts, some were successful and some became learnings for next year. The rest we kind of gave up on after we couldn’t get the starts to sprout at all. Through it all, we also learned some general gardening tips.
Successes
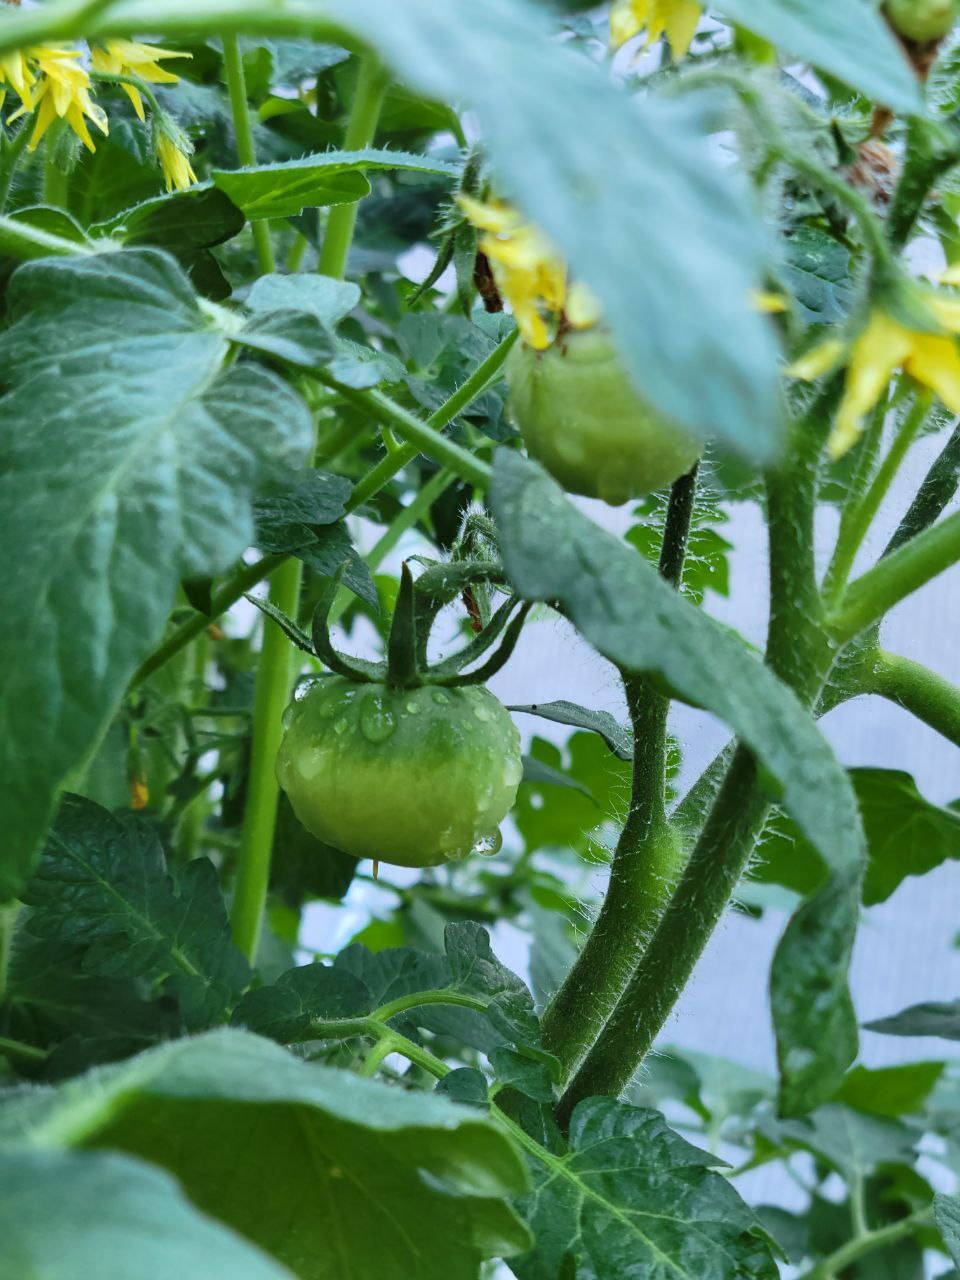
Tomatoes
Tomatoes grow tall and they really need a supportive trellis at the beginning while they fortify their stem strength. We purchased some gardening wire and used that to “tie” them to the trellis to help out and then removed them as the plants thrived.
Peas
Peas are a later start and fairly easy. They grow upwards and need trellises like tomatoes, but they vine out and grab on by themselves. Water and sunlight, ba-da-boom, ba-da-bing… peas!
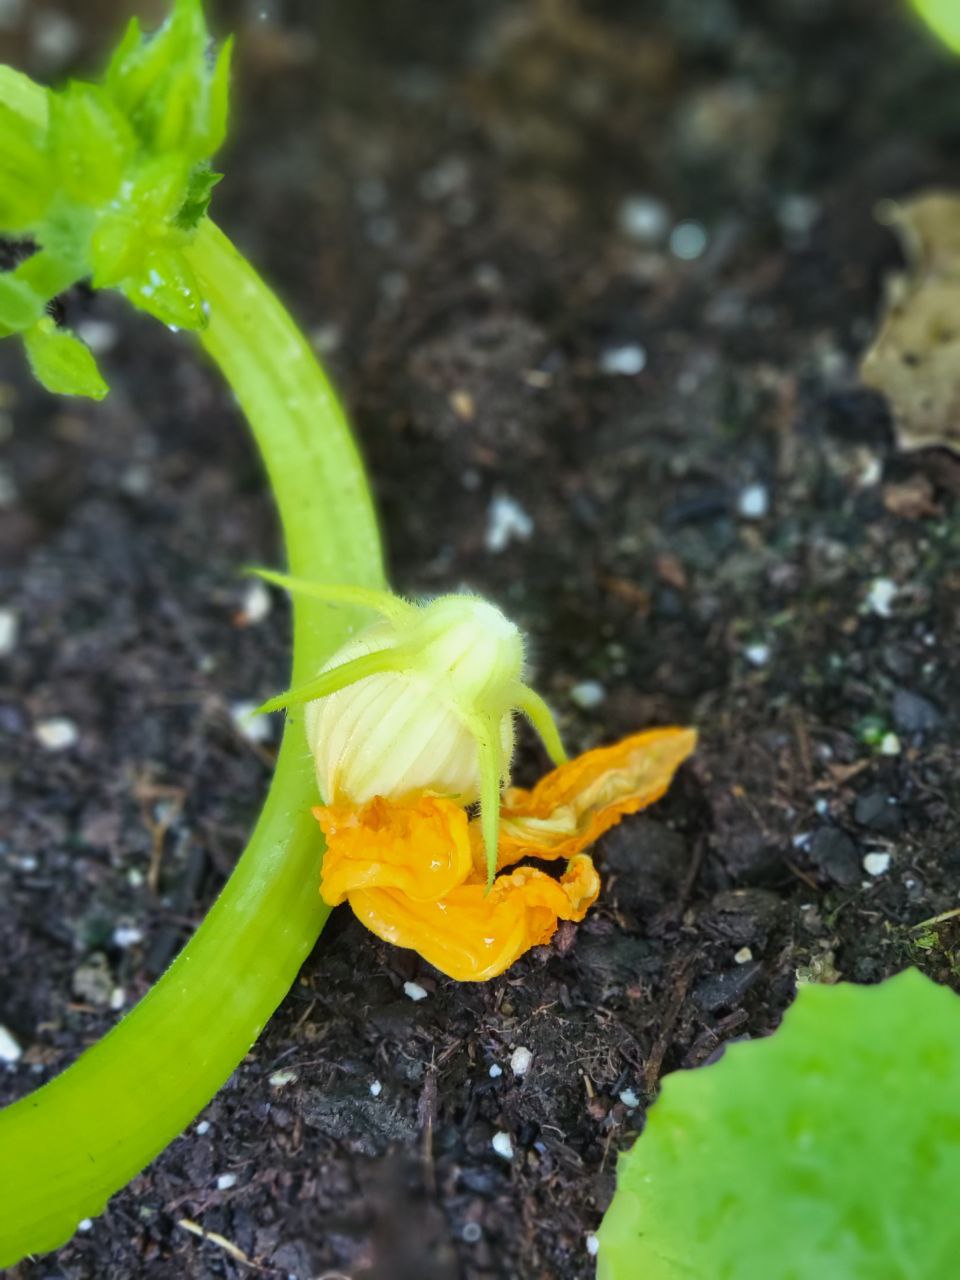
Pumpkin
Pumpkins make vines. That’s something I feel like everyone knows, but only when you’re actually growing the plant do you realize that pumpkins REALLY vine. They need a ton of space. We started with 8 pumpkin plants, they were really hearty, but they ran out of space and we had to get rid of half of them.
Cucumbers
Similar to pumpkin, this is a vine species. They need a lot more space to crawl along the bottom of your garden bed than we anticipated. We ended up ripping out the failed celery (see below) to give it more space.
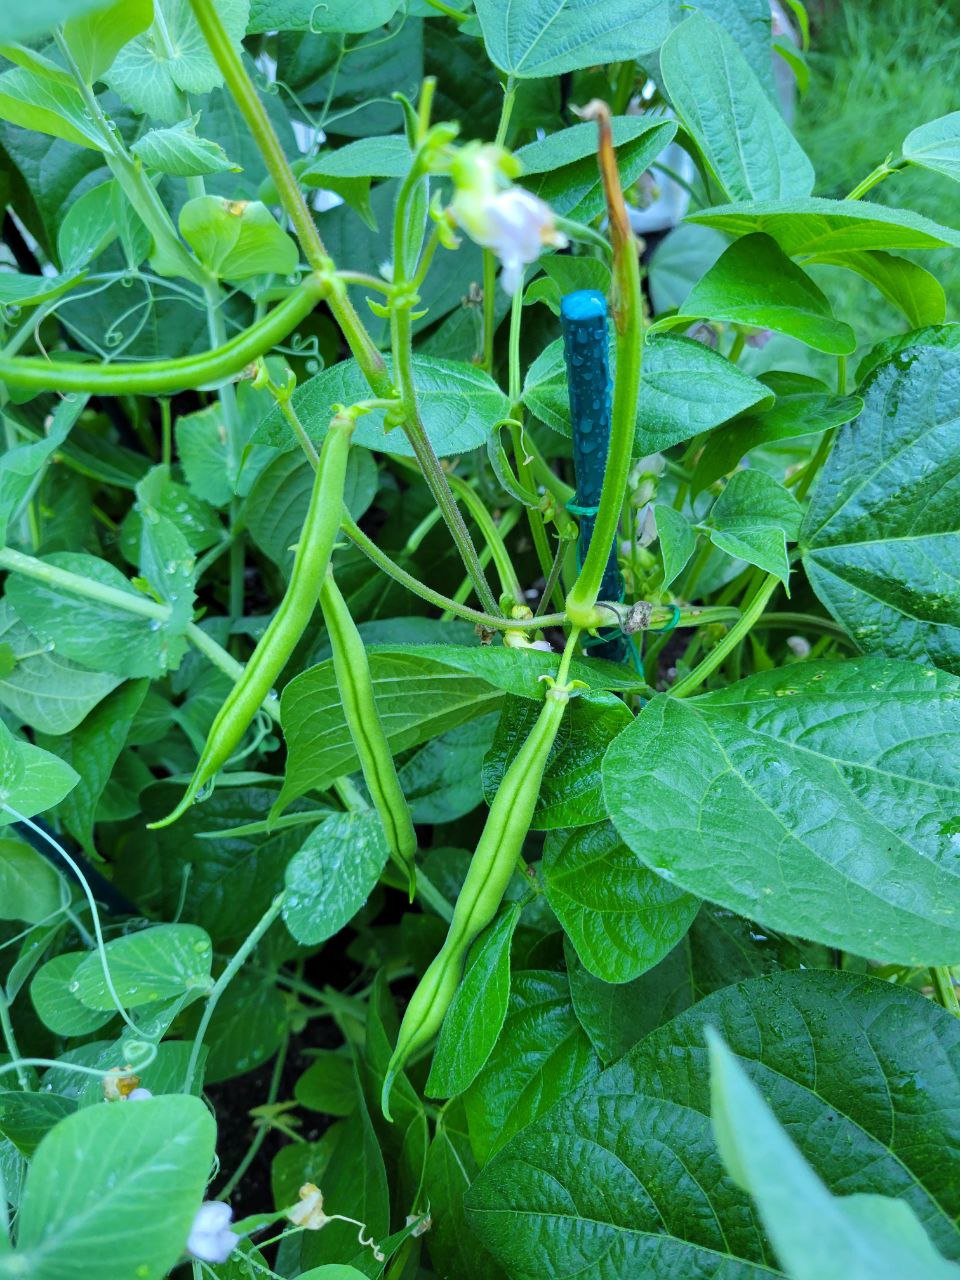
Beans
Much like peas, they were a later start but they grew quickly and once transplanted they grew a lot faster than I thought. It felt like one day we were checking on seedlings and the next we were harvesting a bowl of beans. And they have purple flowers; so cute!
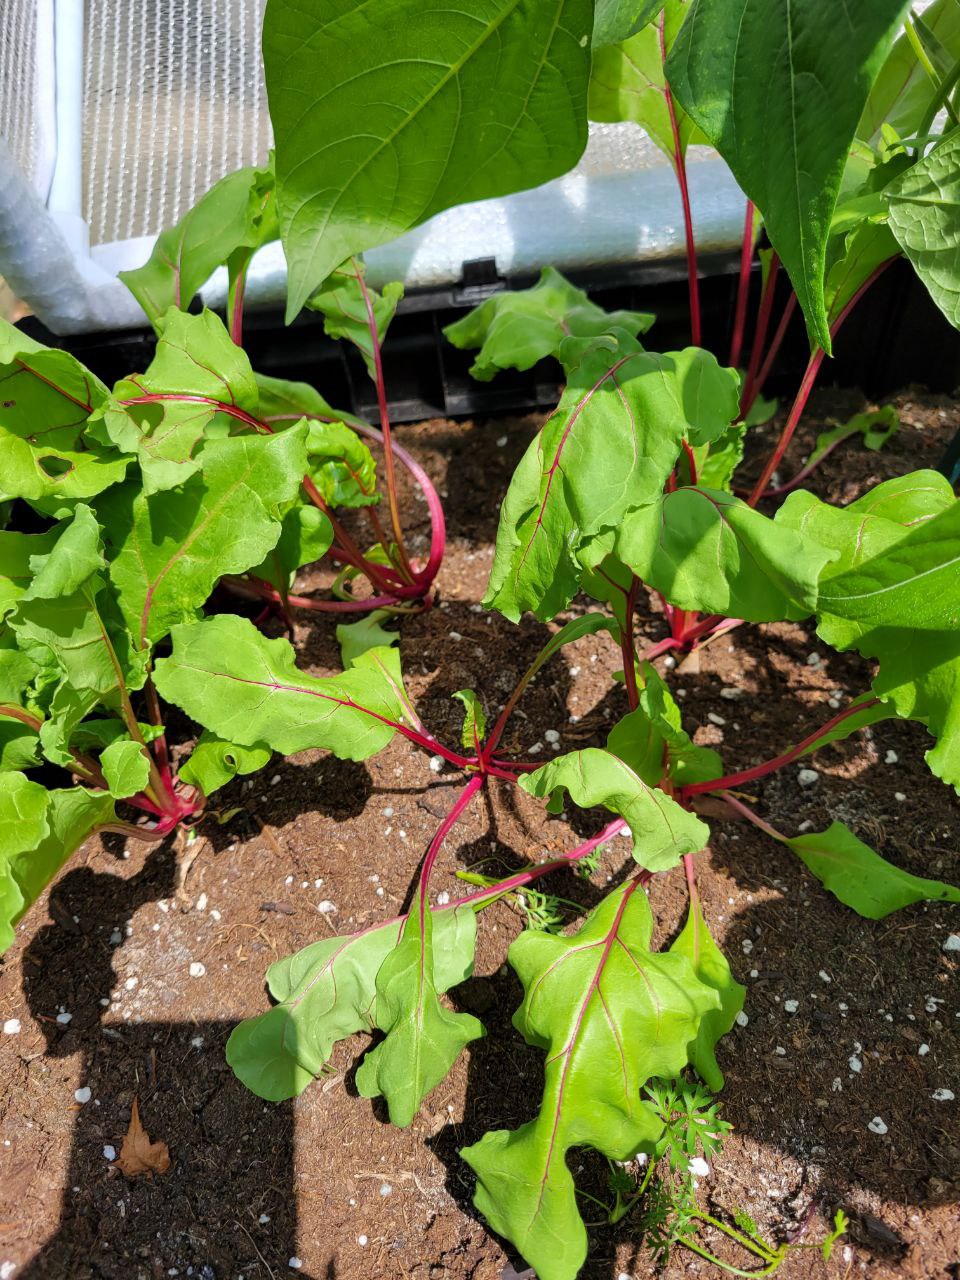
Beets
We weren’t sure about beets. I’ve only eaten them once. But they thrived! It’s super important to prune the tops a bit to make sure that the root is absorbing the bulk of the nutrition, but not all of the leaves because of photosynthesis (how the leaves use sunlight to feed the plant).
Green Onions
Honestly, super easy but they take a long time from seedlings. The best way here is actually to purchase a bundle of green onions, use the top and then replant them for reusability. They will continuously grow!
Learnings
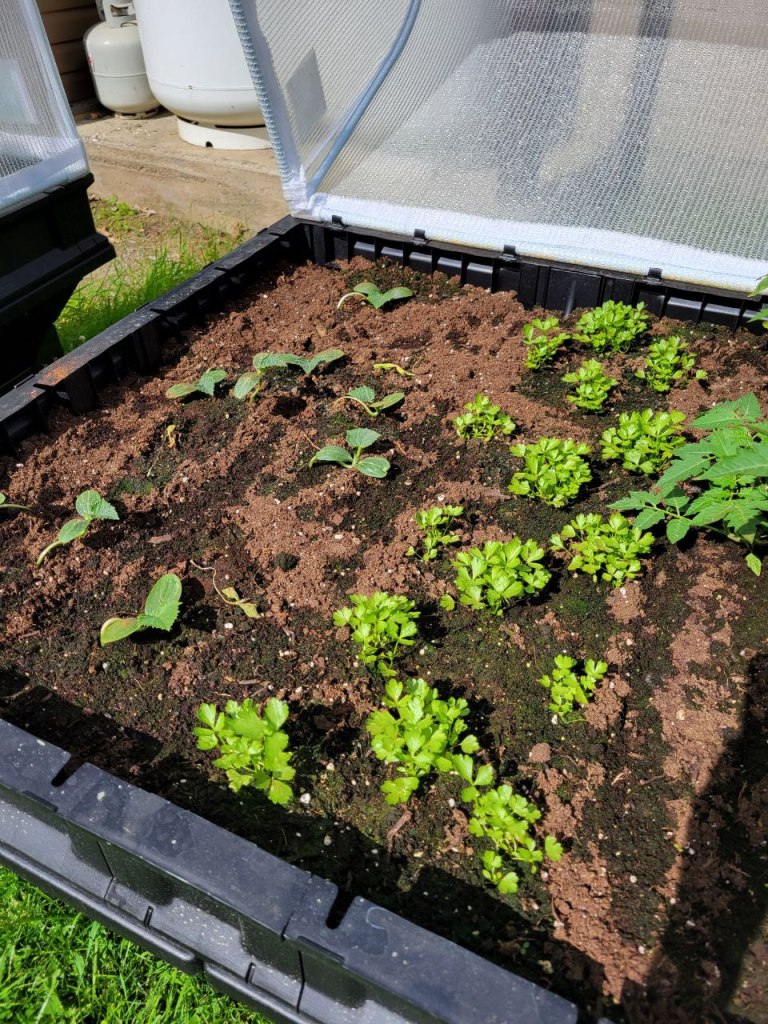
Celery
Celery is confusing. The seeds are really small. When you plant seedlings you often put a couple of seeds in the spot to germinate and then you keep the strongest plant. What’s confusing about celery is that when multiple seeds bloom it kind of just looks like … Celery, but little. We didn’t know we had inadvertently crowded their spots until it was too late and we had many heads of celery intertwining and growing wild. We ended up culling them for the sake of our cucumbers.
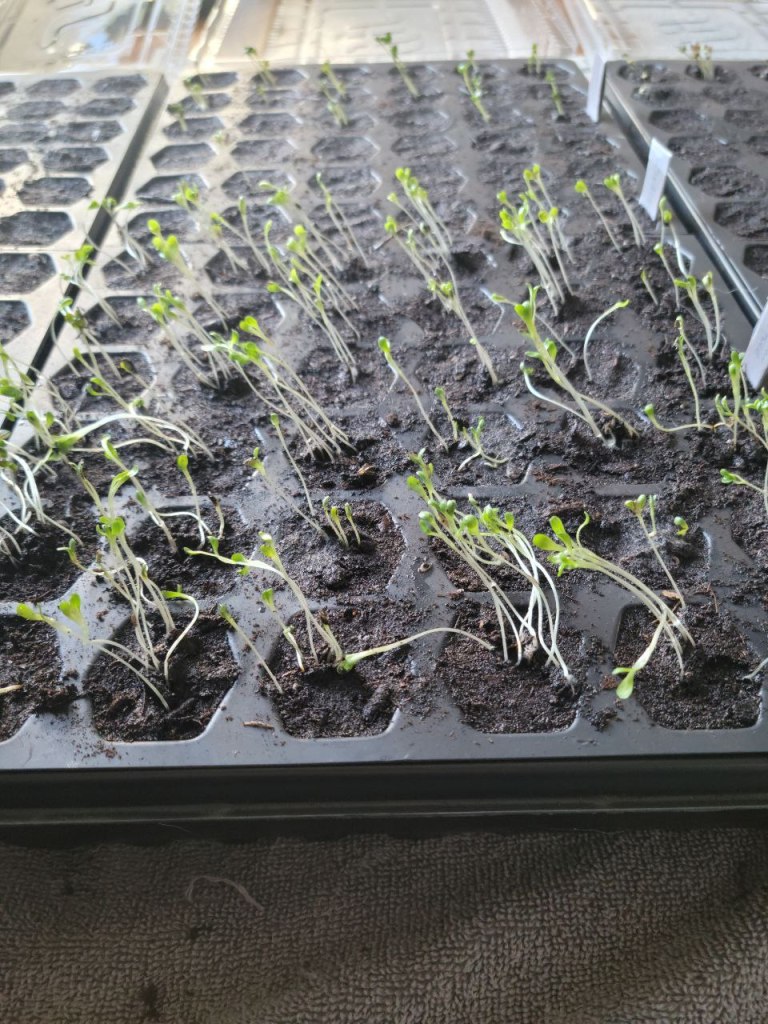
Lettuce/Spinach/Kale/Cabbage/Cauliflower
You would think that these leafy greens would need a lot of water. At least, we did! We were so excited when they sprouted immediately… But they didn’t stop growing. They became super whispy and tall and unfortunately there was no redeeming them into the stockier plants that they should have been. We were using a self-watering tray. Next year we will likely just start these a bit later directly in the garden bed and water daily as needed.
Carrots
Carrots are similar to beets but they are definitely easier to kill. We read somewhere that pruning their tops was a good way to get the root to grow. All it did was kill our plants. Carrots are delicate. We’ll try again next year.
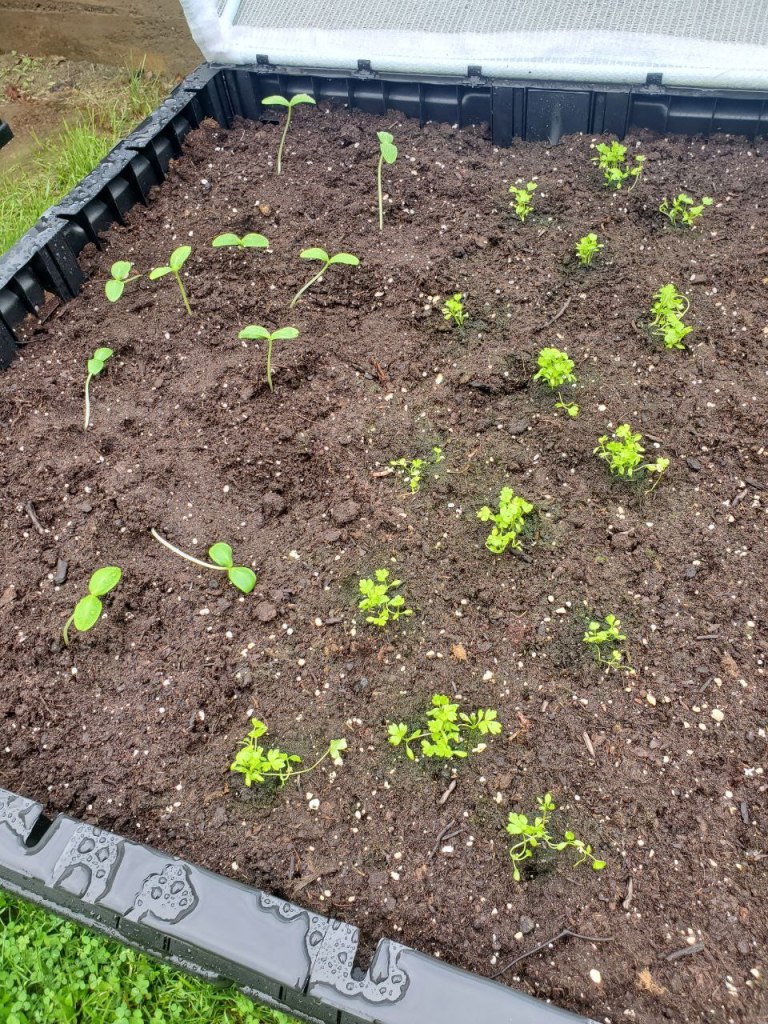
Garden Algae
We were wholly unprepared for this. I didn’t even know that algae could grow out of water and on soil, but it can! And it grows quickly. See the picture below to see what it looks like (around the middle celery plants). We noticed this algae and then the next day almost all of the soil on top had a green tinge. It was a pain to clean and involved a mix of sprinkling cinnamon on it (it kills algae, who knew!) and removing whatever chunks we could without harming our seedlings. The algae comes from overwatering, so be careful and make sure your soil is damp, not wet, especially if it’s going to rain.
Hands Off
As tempting as it is, unless you’re pruning dead leaves or suckers, keep your hands off your plants! I was feeling a beet the other day and I accidentally felt too low and de-rooted it. It died. Sad day.
That’s it for this update! We hope you’ve enjoyed. For more frequent updates, make sure you follow along on our instagram. We post stories and updates there regularly!
In December of 2019, a lot of people were talking about and thinking about a new disease caused by COVID-19, then not named. During that time, Sylas and I were unfortunately distracted by dealing with a rather significant death in our family, his mom. In the midst of dealing with her estate, COVID sent the world into a full-blown lockdown in March 2020, sending the entire process into a standstill for us. While it was a welcome reprieve from the grief and stress of dealing with an estate, it left us with a lot to do once things in the USA and Canada started opening back up.
Lucky for us, we do have amazing family members in the USA who were able to help us out with things that we could do remotely. Unfortunately, each time we tried to deal with the tangible estate items, the Canadian border closed, leaving us with travel vouchers and a final page to turn in that saga, bringing the items we were keeping to our home in Canada.
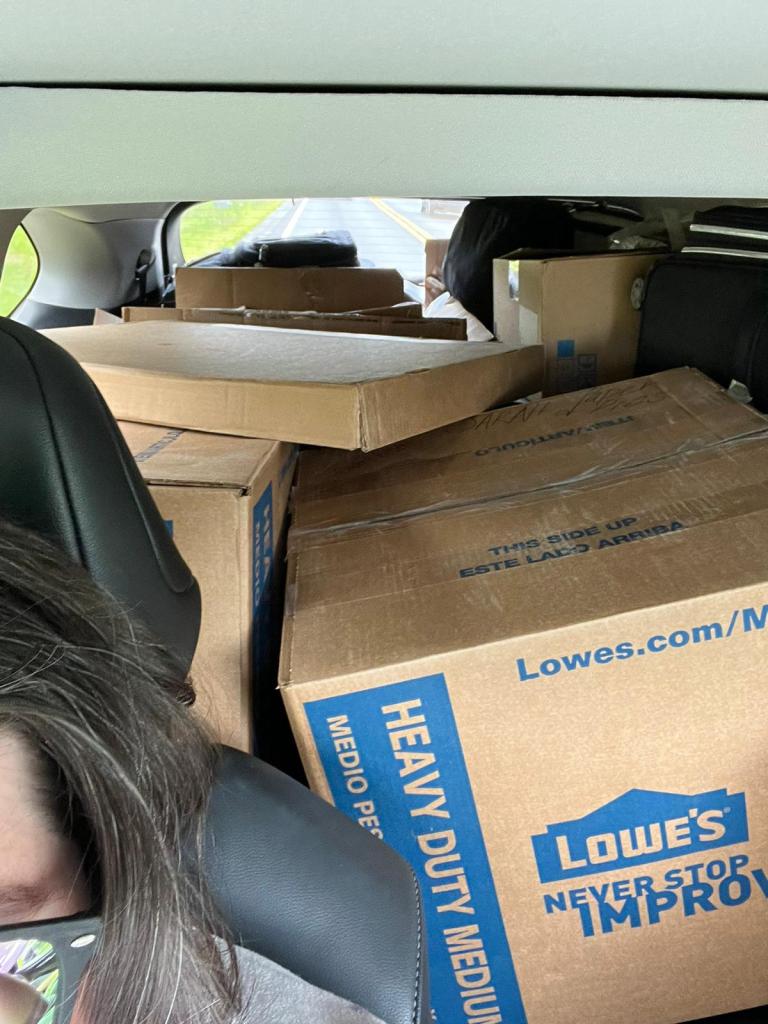
Over the last weekend, we finally had an opportunity to get down to North Carolina to see our family and finish things up. We loaded up a rental SUV (which was a nightmare to get, unsurprisingly) and embarked on our journey home on July 2nd, also our 10 year anniversary and 5 year wedding anniversary.
Sylas and I have made this drive once before, but that time we did it in two days and made the mistake of stopping in Hershey, PA at a Days Inn. This was when Sylas moved to Canada and all of his worldly belongings were in his Toyota Corolla. Honestly, I’m surprised we didn’t get robbed, but we made it.
This time, we were driving up to the Ottawa area, which means we were going through upstate New York instead of through PA and into Buffalo or Detroit. We decided that the 16 hours was completely do-able in one day and so we embarked.
We started out, of course, in NC. We’ve travelled NC several times, but we always get excited when we cross into Virginia, because it’s “new and exciting”. We stopped in Virginia for our last Bojangles lunch before we travelled north, where we found every bathroom packed or closed and ended up having to go to a Starbucks for a bathroom emergency.
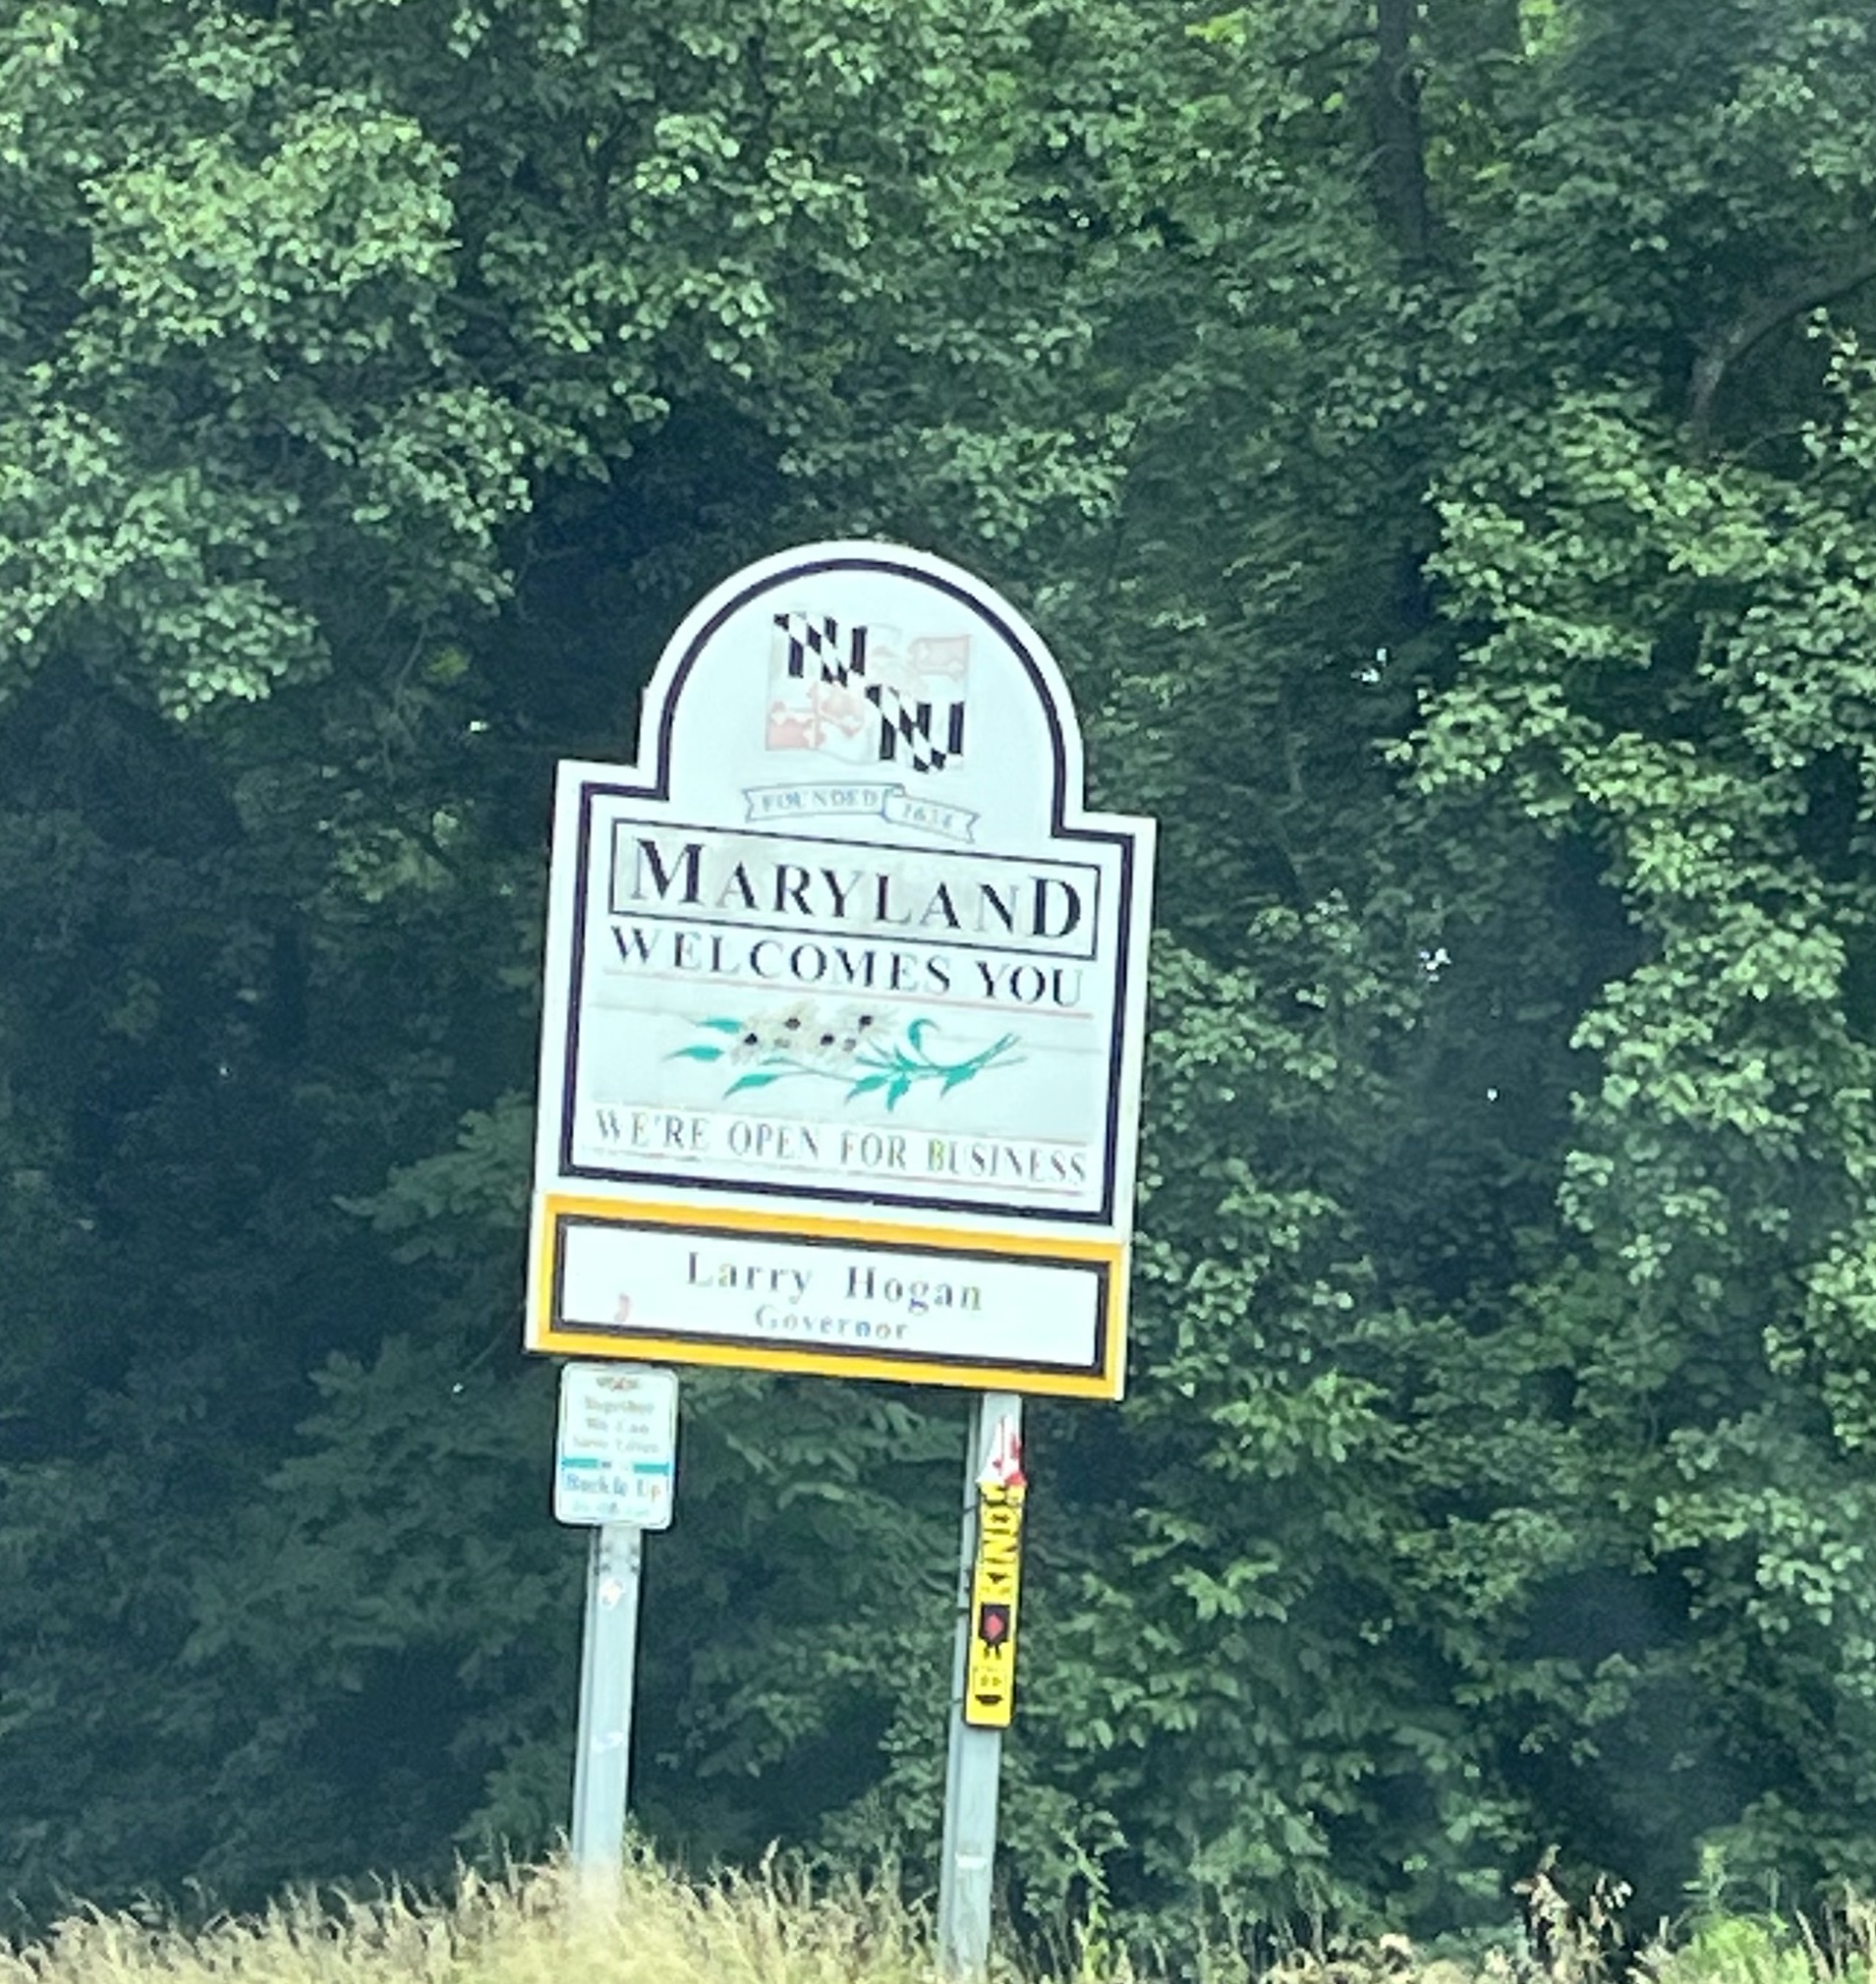
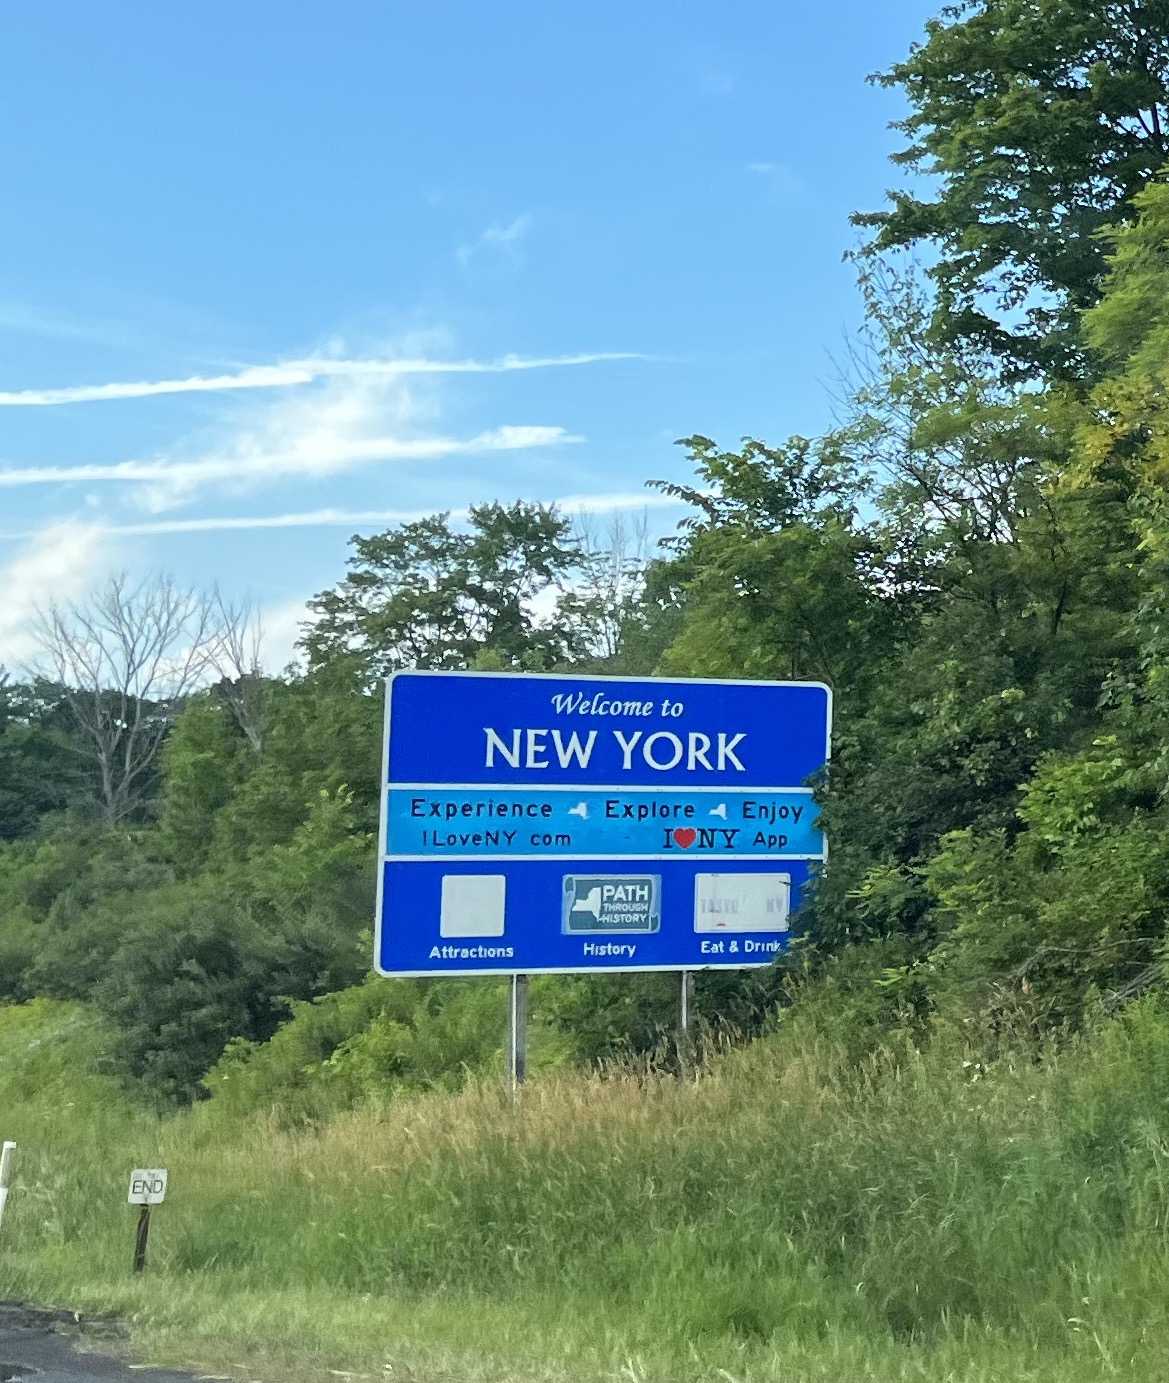
From Virginia we had a decision to make – Would we go through Washington or add on 1 hour and go around and through Maryland instead? Well, the highway on the 4th of July weekend made the decision for us as we saw 5 accidents on a small stretch of I-95 and decided that was enough of that. From Maryland, we went to Pennsylvania, and from Pennsylvania to New York.
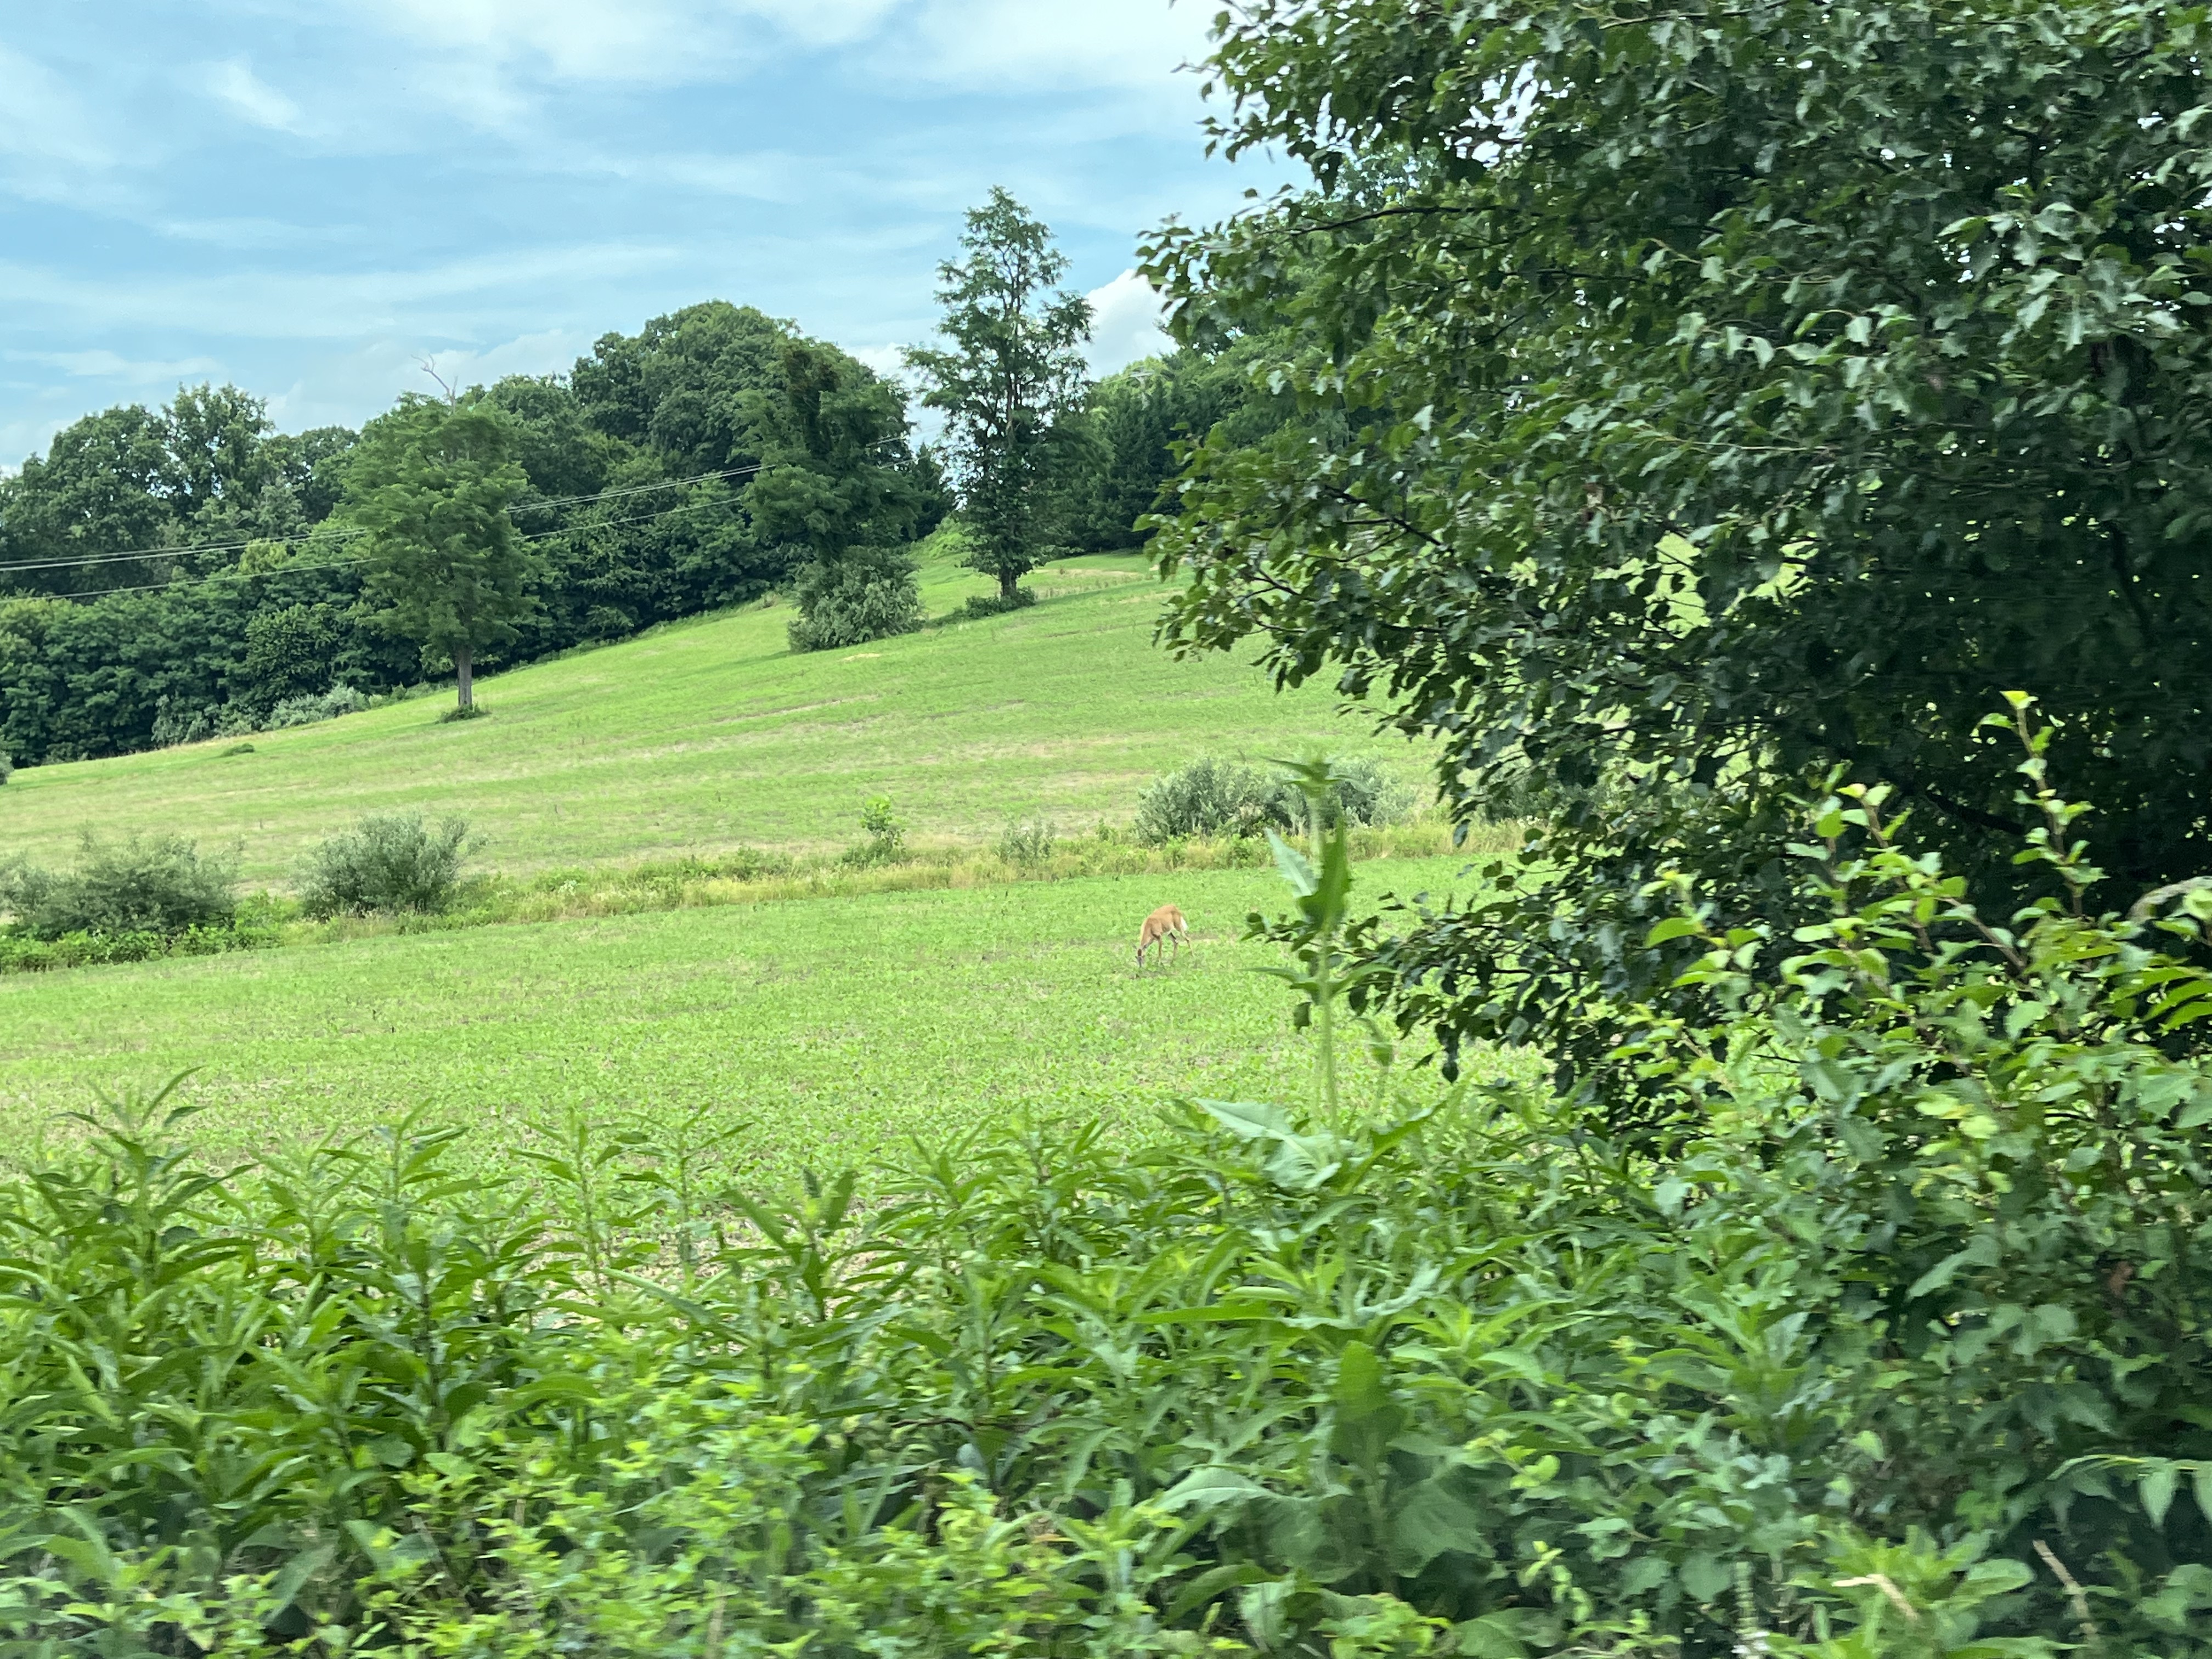
I wasn’t prepared for upstate NY and PA to be so beautiful. We saw deer, beautiful bridges, and trees on our quest for NY Pizza for dinner. We stopped at 3 separate places (don’t go to Binghamton) looking for food, getting hangrier with each passing moment, before calling ahead to a place in the middle of nowhere LaFayette, NY, called A Taste of Heaven. The owner was super nice and hilariously had a Tim Horton’s apron on as he made our pizza.
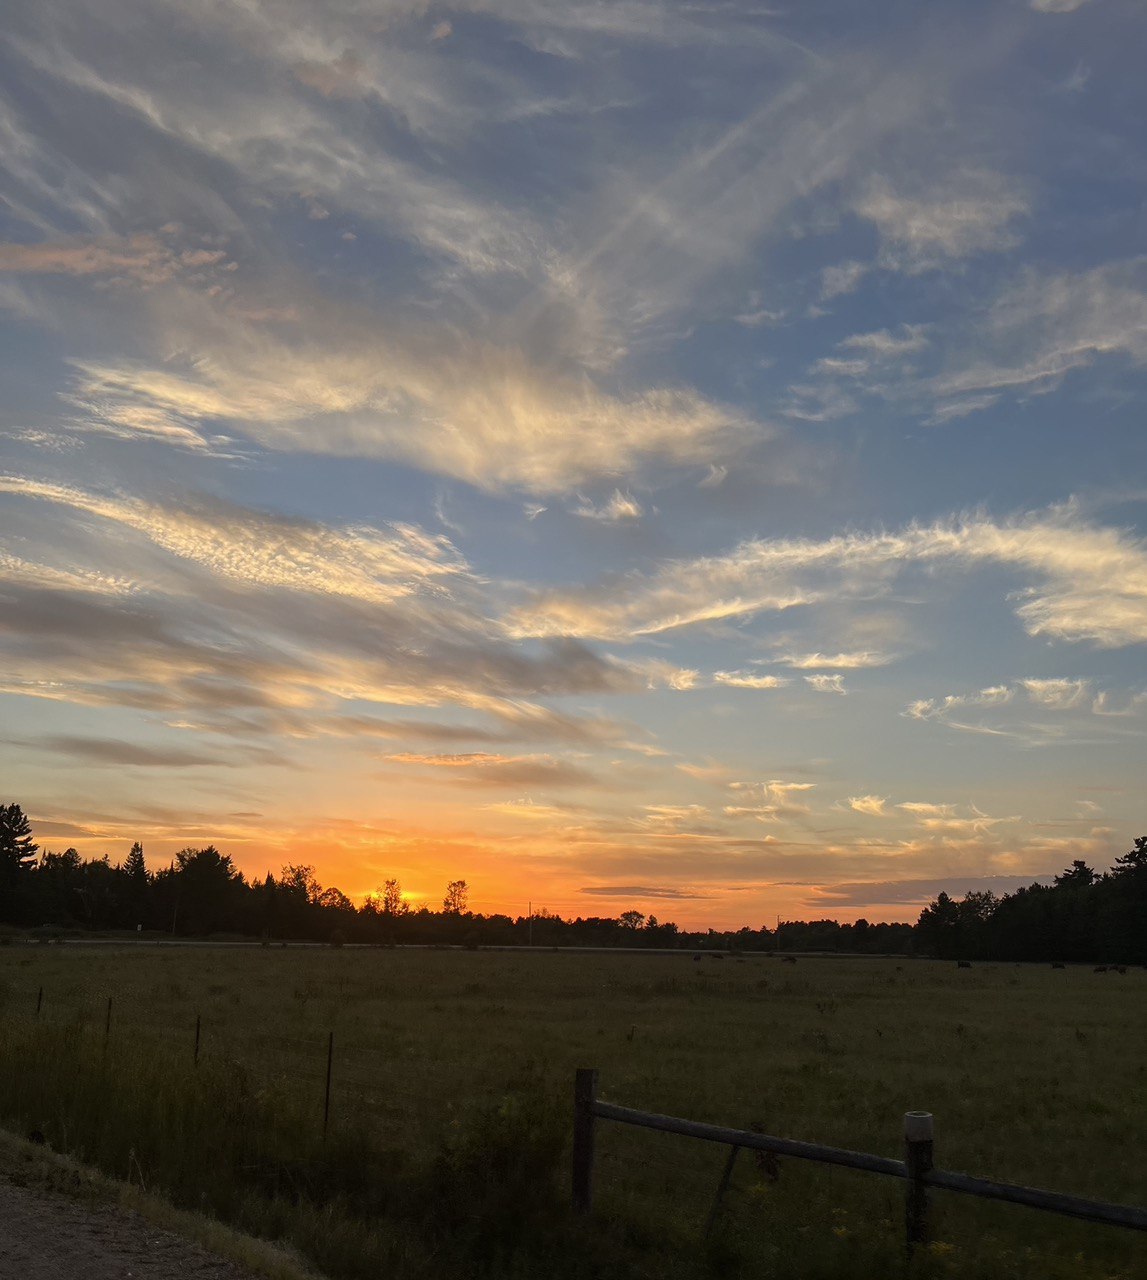
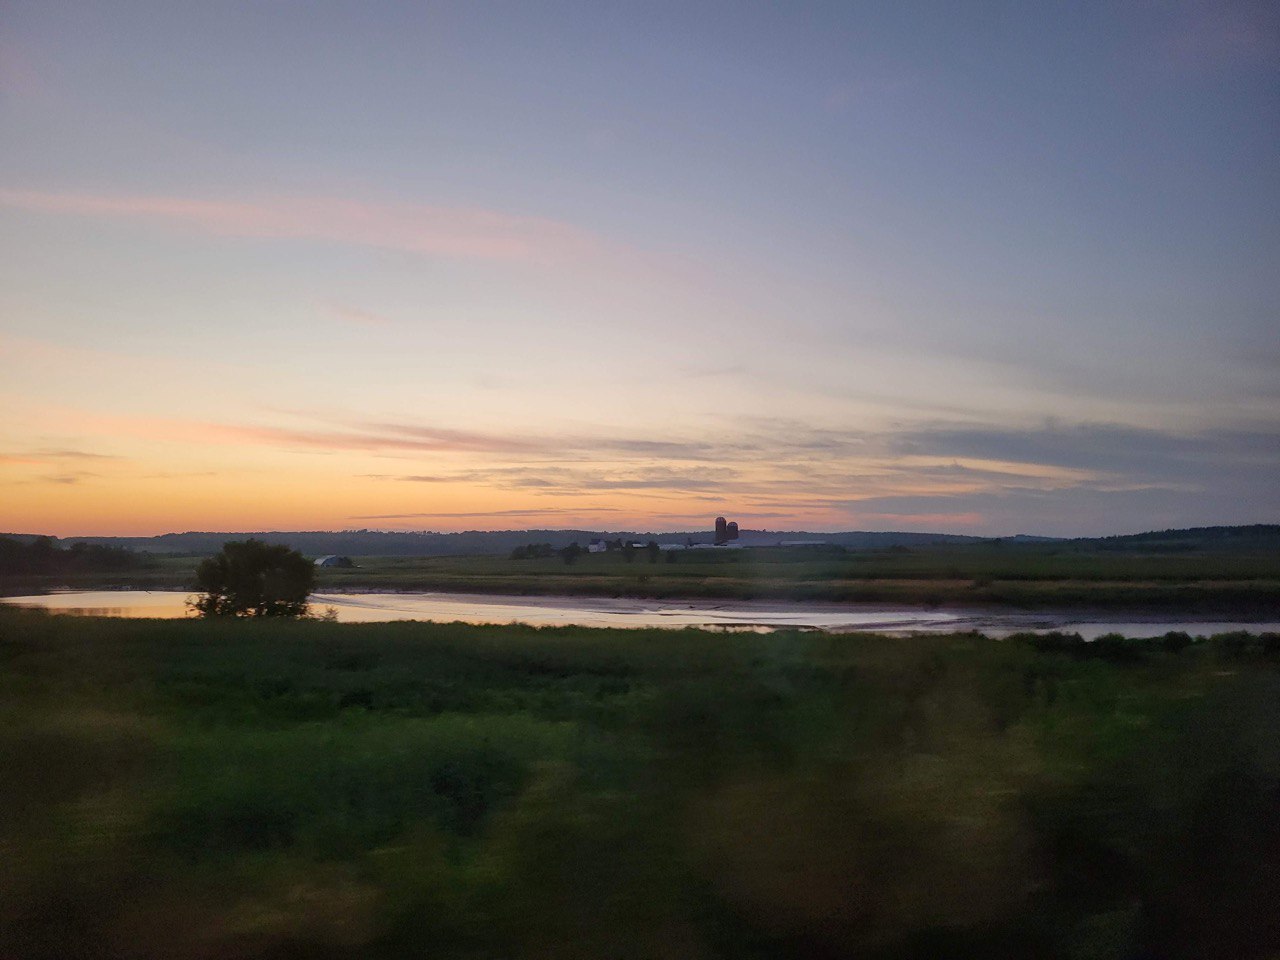
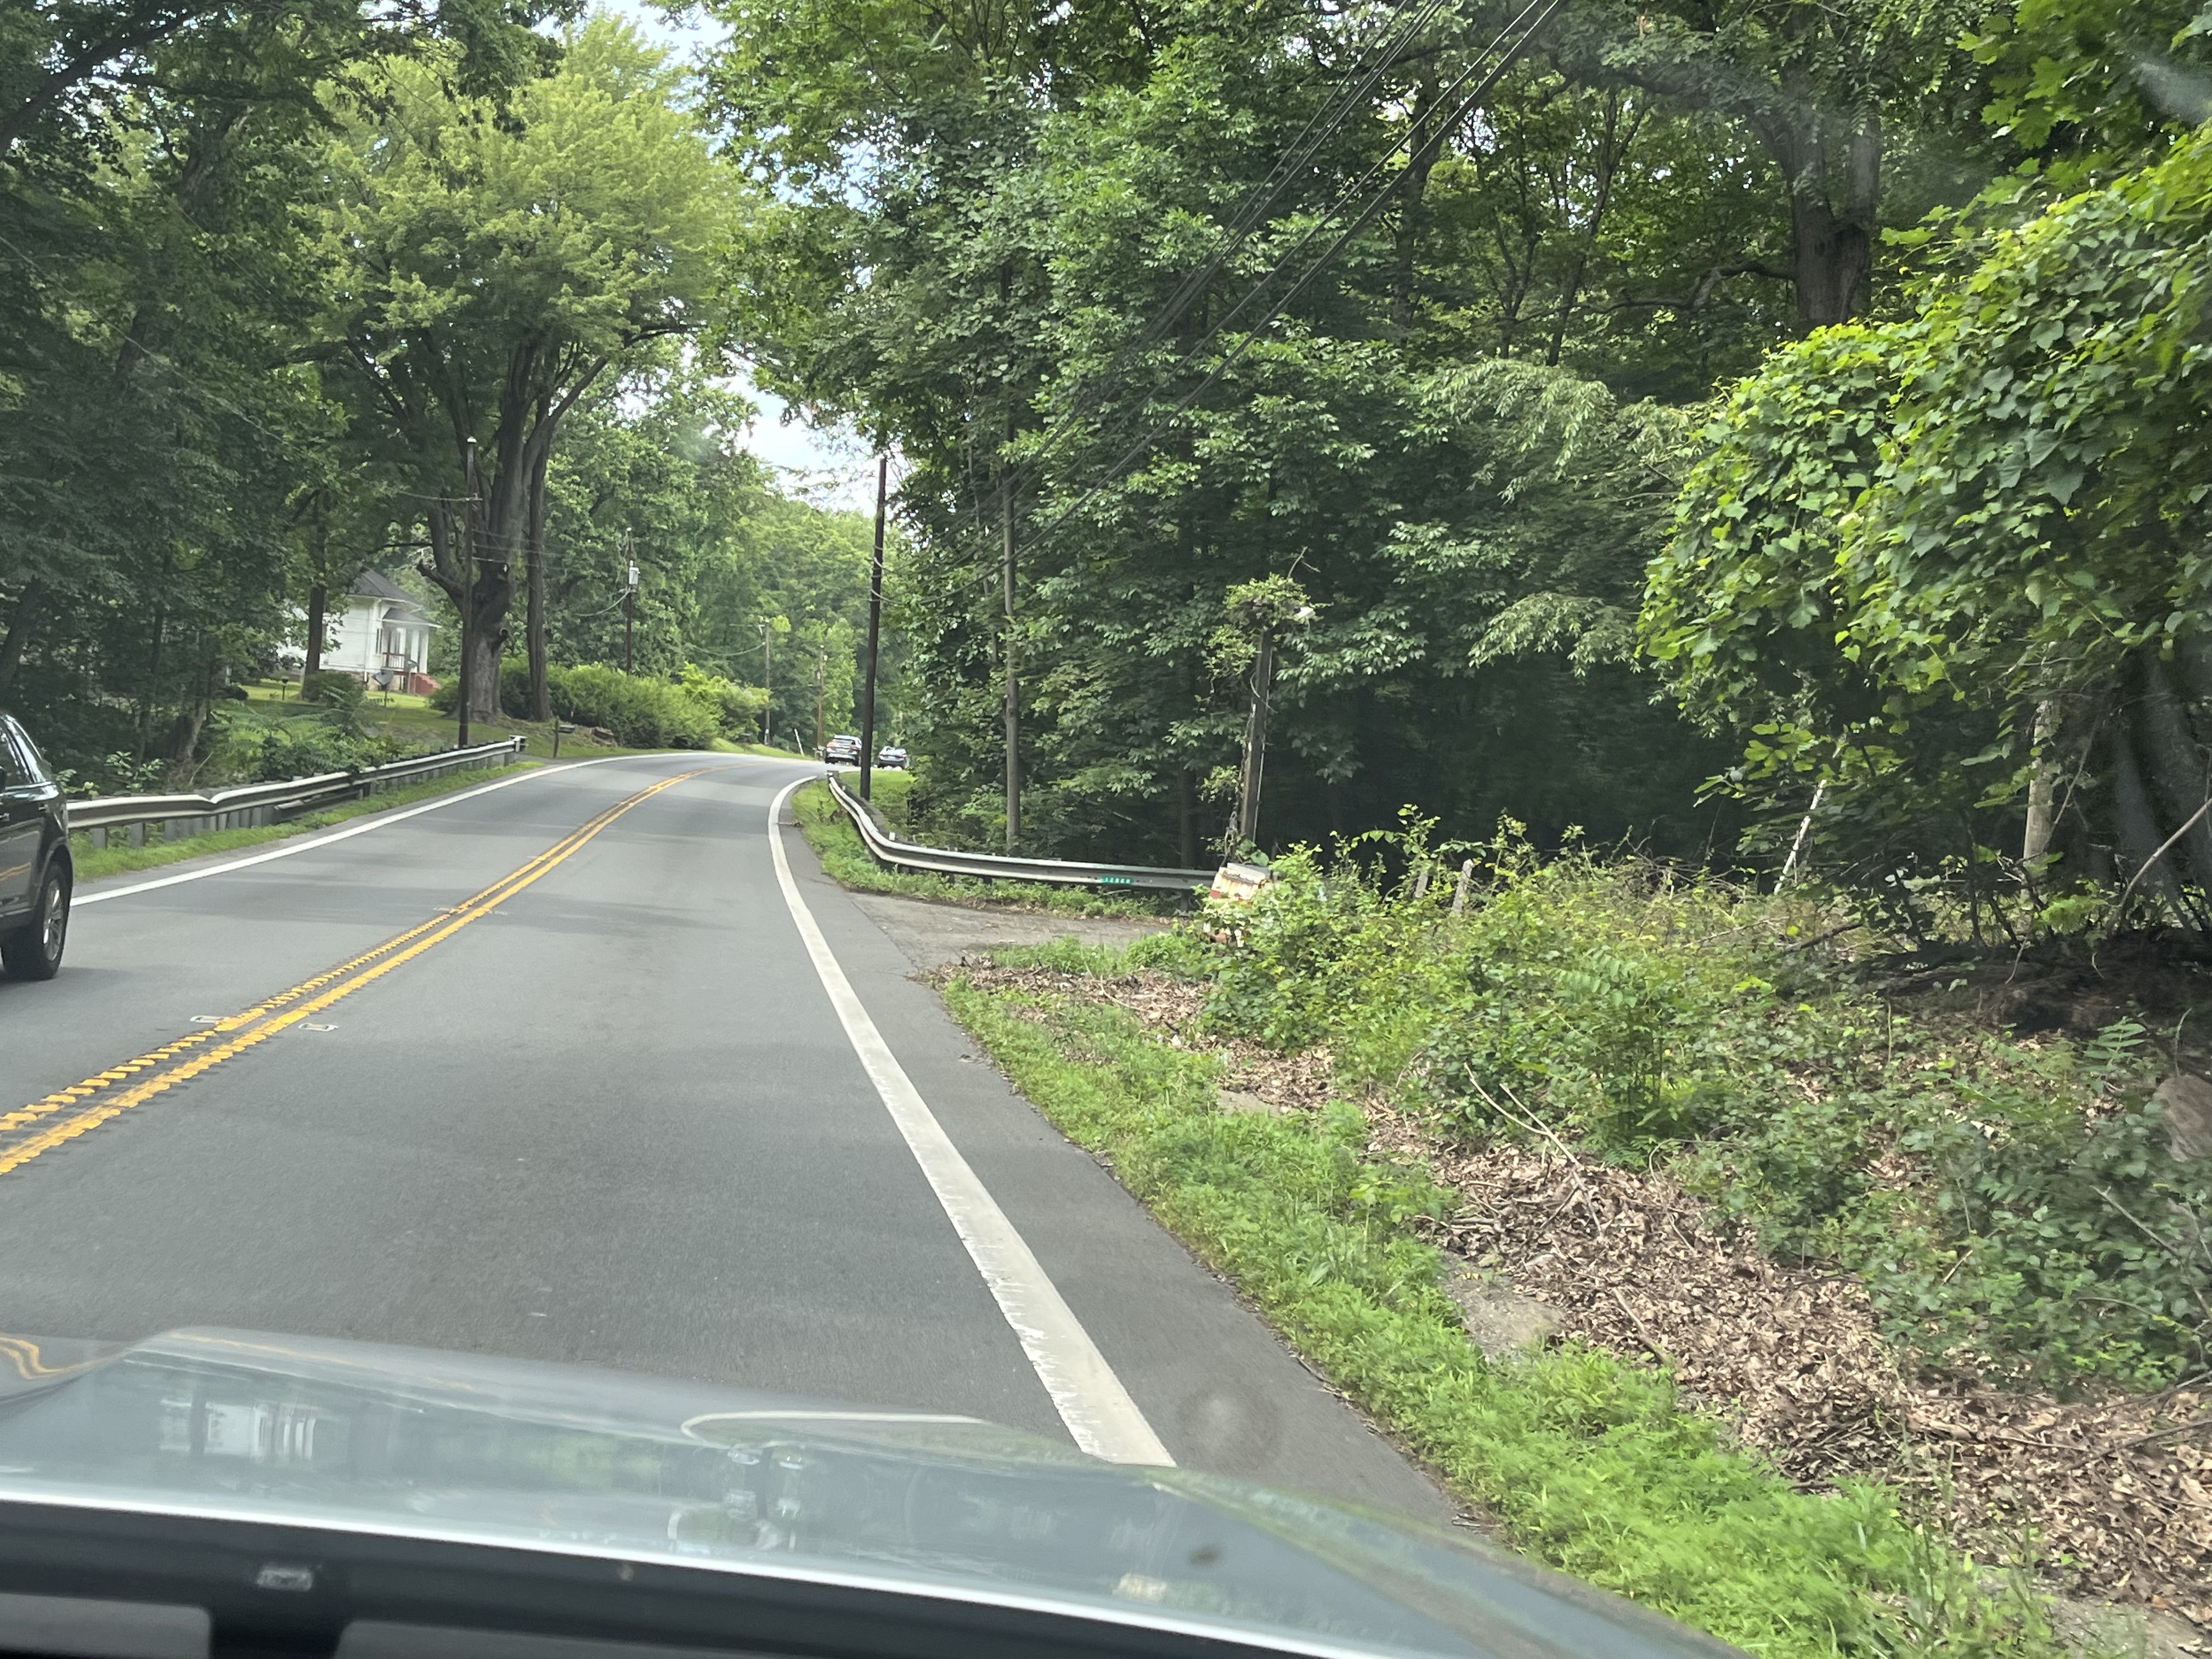
The sun started cresting as we were traveling through the Appalachians on our way to the Canadian border and we stopped, in the middle of the road (don’t do that, be safe kids!) to capture this breathtaking view.
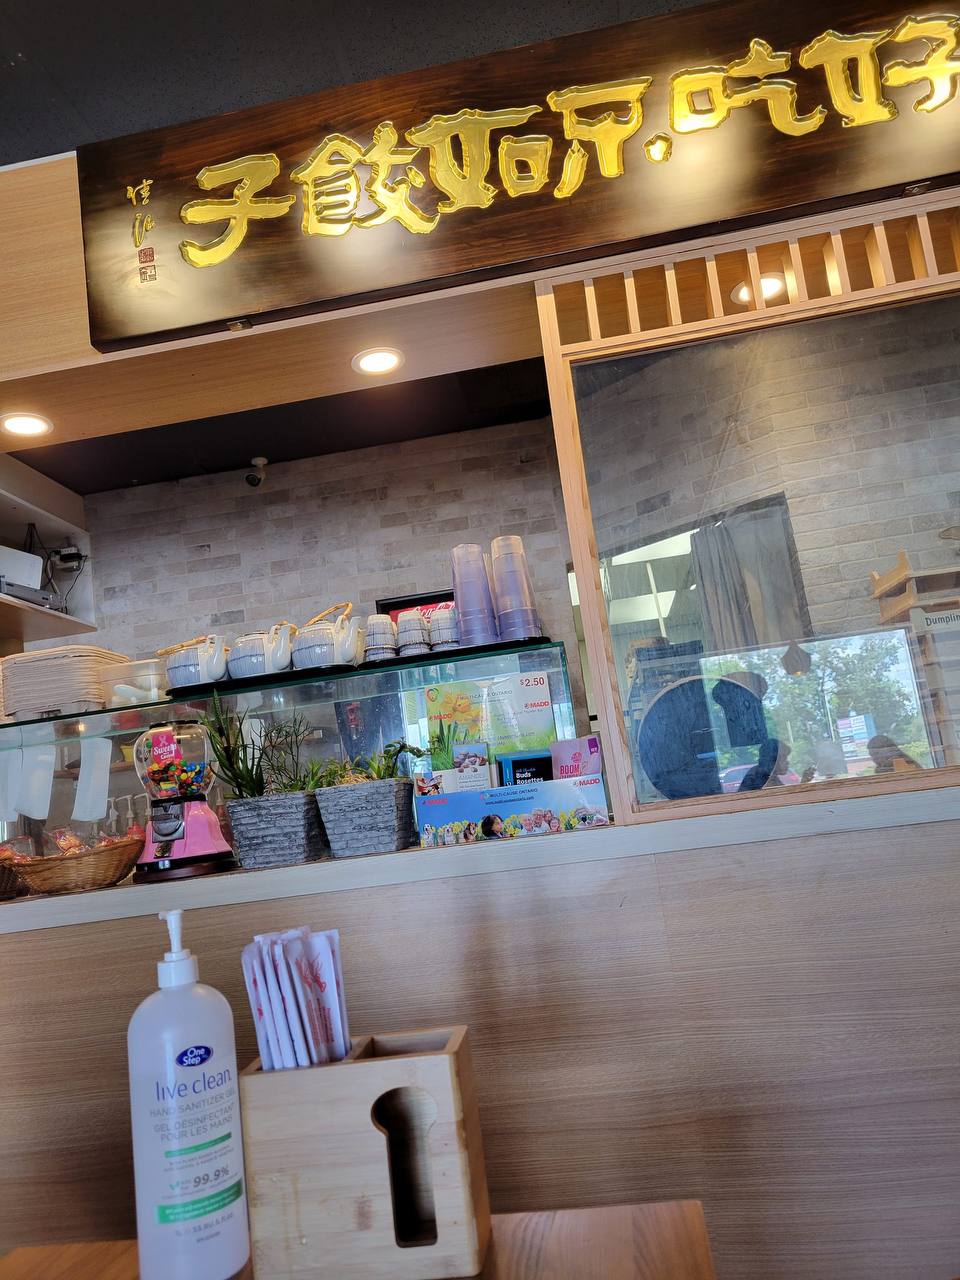
As the sun finished setting, we were off again and hit the Canadian border at 10PM. Just a few questions at border control, no trouble at all, and we were back home! We arrived at Ottawa at midnight. We slept and finished off our trip with a stop at Dumpling? Dumpling! in Nepean before heading back to Pembroke.
All in all, while emotionally and physically taxing, it ended up being an amazing trip together to spend our 10 year Anniversary. ALSO, HAPPY BIRTHDAY SYLAS since the day of this posting is officially your 33rd. Can’t wait for so many more together!
We’ll be back with you in two weeks and hope you enjoyed this little look into our life.